We’d like to remind Forumites to please avoid political debate on the Forum.
This is to keep it a safe and useful space for MoneySaving discussions. Threads that are – or become – political in nature may be removed in line with the Forum’s rules. Thank you for your understanding.
📨 Have you signed up to the Forum's new Email Digest yet? Get a selection of trending threads sent straight to your inbox daily, weekly or monthly!
Framing in/around IKEA PAX wardrobe
Comments
-
Will the PAX have doors, or be open?
0 -
Open, so hopefully that complicates things less. Still need to buy UV film for the windows to help protect the clothes but that’s a whole other task!Bendy_House said:Will the PAX have doors, or be open?Painting progress, considering hauling the first wardrobe up and attempting to prise off the last skirting board the builder forgot to remove. Also still need to figure out how to cut part of the skirting board off on the window edge for this plasterboard to go in flush.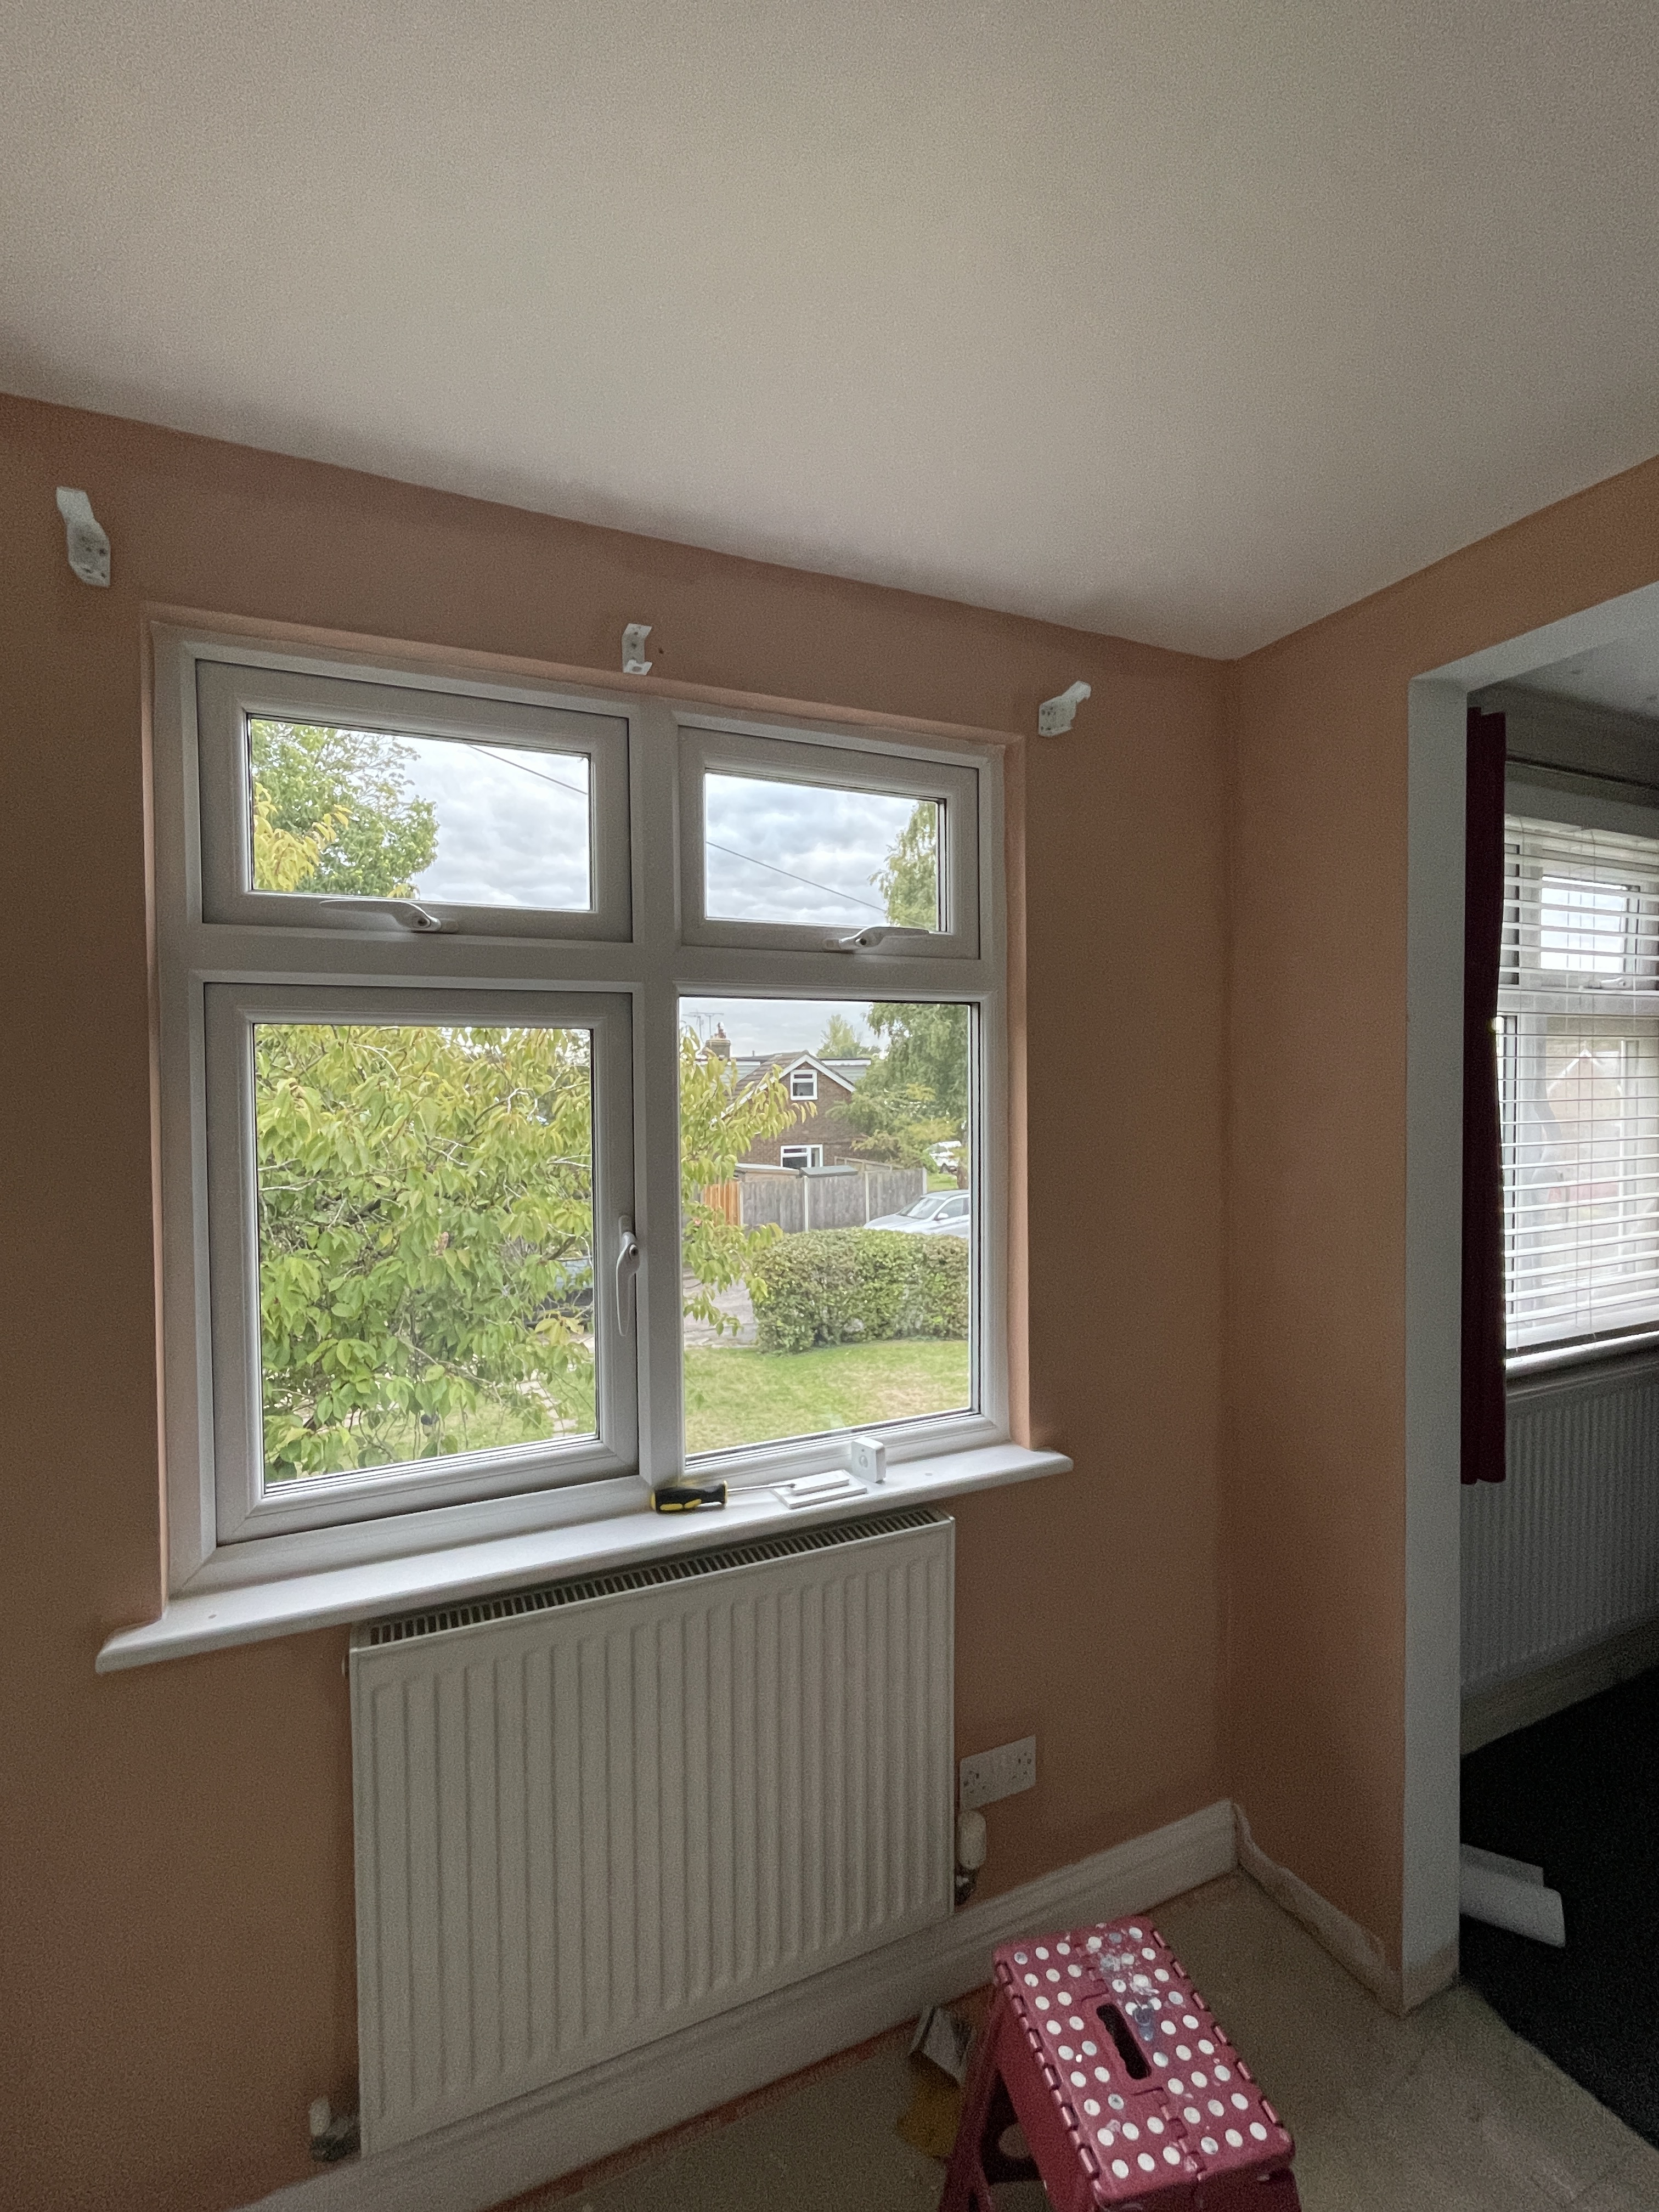 0
0 -
Where's the PAX going in relation to that photo?Purely a personal choice, but especially if going 'open', I think having the new side/top infills flush with the cabinet fronts, and then Ogee archi around it will give it a proper bespoke look. (Yay! You have Ogee skirting!) You then continue the skirting up to this archi, just like it does around a normal door.Cutting skirting in situ can be awkward if you don't have the right tool - eg a 'multitool'. Folk on here swear by them, but I've yet to use one myself. Screwfix - Titan - make one for just £40, for example.Doing it manually, if the material is MDF, then it's probably a bit easier. If you mark the cut line accurately, and then score it repeatedly with a craft - Stanley - knife without cutting yourself, you can then tackle the 'waste' side of this line using a chisel. Flat side against the cut line, and then chisel out Vs behind it to allow the chisel to cut in further. It'll take a while, but will work.I've even hammered - gently - a Stanley knife down such a board, cutting'slicing in only a few mm at a time. Crude, but it worked!0
-
It's going where I'm stood, on the other corner! Here's a better picture, though taken a bit fisheye, it's actually a square 2m x 2xm room. There will be a 100cm PAX in the corner against the far wall, then a corner extension piece out to the left. Then another 75cm carcass, all of those are 58cm deep. Then there will be another 75cm carcass but this time 35cm deep on the righthand side on the far wall, in order to get it to sit behind the window.Bendy_House said:Where's the PAX going in relation to that photo?Purely a personal choice, but especially if going 'open', I think having the new side/top infills flush with the cabinet fronts, and then Ogee archi around it will give it a proper bespoke look. (Yay! You have Ogee skirting!) You then continue the skirting up to this archi, just like it does around a normal door.Cutting skirting in situ can be awkward if you don't have the right tool - eg a 'multitool'. Folk on here swear by them, but I've yet to use one myself. Screwfix - Titan - make one for just £40, for example.Doing it manually, if the material is MDF, then it's probably a bit easier. If you mark the cut line accurately, and then score it repeatedly with a craft - Stanley - knife without cutting yourself, you can then tackle the 'waste' side of this line using a chisel. Flat side against the cut line, and then chisel out Vs behind it to allow the chisel to cut in further. It'll take a while, but will work.I've even hammered - gently - a Stanley knife down such a board, cutting'slicing in only a few mm at a time. Crude, but it worked!
The framing-in as previously said will be a 12cm/15cm (due to the corner extension piece the L shape is not perfectly symmetrical each side but 3cm wider on one) on each side wall, and then framing on top.
So I just ripped out my first piece of skirting, another DIY lesson taught! Stanley knife and the pry bar I bought did the trick. Now seriously considering redoing the skirting for the whole room (this dressing room and bedroom) as due to the wall work done to achieve this dressing area, half the room's skirting is pulled up and our last attempt at purchasing a matching board proved fruitless. It'd certainly make the room like nicer but it's such a funky room all round with so many corners (dormer loft conversion with chimney breast, one wall at three different depths. Even some diagonal wall) that it is a bit concerning the idea of doing it myself. But it does mean I can just rip out that righthand board under the window and don't need to worry about any multitool or similar. My builder already included adding the skirting back to the affected walls (one side of the room) but would likely quote more to do the whole room, but it would look good with fresh skirts.
Definitely rethinking my decisions now. One "built-in" look I'd seen was to stick a spacer noggin in-between the carcasses and then putting stripwood over the carcass meeting points to make it look all flush. But then I realised in my design there would only be one opportunity to do that, because where the other carcasses meet there is a depth difference (58 vs 35) so thought it'd look a bit silly to only trim out that one spot.
1 -
OK, went ahead and made some drawings.
Here is the basic wardrobe setup, based on IKEA (not completely accurate)
If I were to do the "full" trim-out, then that would involve making the plasterboard sit flush with the cabinet fronts, screwing the cabinets together (which I'd want to do anyway) and covering the gaps with 36mm stripwood. I would also need to cut out a long piece of MDF to attach to the edge of one carcass to account for the shallow cupboard. 18mm so easy to get hold of (not so easy to cut for me though, but could maybe get it cut to size in store). I would then want to do the same stripwood trim all around the tops and outside edges to make it consistent. And then finish by covering over the plinths too - need to check what the depth is to see if I can buy wood in that 6mm stripwood thickness but to the right size. Though that would be easy to trim down at least.
I made a full drawing of it and the end result is really lovely but it's a lot of work.
I think the 35cm shallow cupboard is what adds so much work as obviously if they were equal it'd be one stretch of plasterboard and supporting timber, but in my case it's 3 pieces to make the corner
Quite a lot of timber to glue up on the ceiling and get straight:
1 -
Why the reduced depth wardrobe? Window?Everything that is supposed to be in heaven is already here on earth.
0 -
Yup. It actually would've just fit a 58cm if we'd cut out the windowsill and got rid of the blind (which we like), but ultimately just went for the 35cm depths. Wardrobes are already purchased and here so that's the design! Lots of drawers for OH's jumpers so it's still good use of the space.Doozergirl said:Why the reduced depth wardrobe? Window?
I just prepared my cutting lists and looked at what I'll need. Looks like I'll have to get deliveries from both Wickes and B&Q as neither have a complete set of what I want that would also fit in my car. But total materials minus glue and paint is around £120 which isn't too bad at all and would really make the room look great.1 -
How useful will the 35cm deep units be? An alternative approach - as would be undertaken by 'proper' DIYers - would be to start with a 58cm deep unit, but to cut the sides down (at the back) to whatever depth you can get away with as regards that window.If it's as close to fitting as you say, could you trim the 58 down to, say, 50? If so, a lot more useful space.Yes, that would still require a staggered panel at the top, so perhaps Doozer's earlier suggestion of using MDF might prove worthwhile? You could do this with 9mm MDF (tho' 12mm would probably be easier overall). Easy to cut using a fine-toothed hand saw - a skill that all budding DIYers need to get under their belt - and joined with glue and a small timber fillet (15mmx15mm) as a corner support. Once set, you can plane/sand the overlap until it's perfectly acceptable.0
-
Oops - units already purchased...It all looks fine. Come back as required - and to give us updates


0 -
Yup already done! I've filled them with useful drawers so they'll be perfect for smaller items, with a pull-out face-on hanger system which is just right for OH's work shirts. So it'll get use!
Just picked up the timber from B&Q. Think I will finish my painting (got a few bits that need taping and tidying) and then have a go at building the first 100cm unit for the corner.
Trim and plasterboard arriving on Monday from Wickes (2.4m so can't get it in the car!) plus more MDF in 18mm to act as the end panel. Did get some 6mm MDF though that needs to be ripped for the base plinth covers. But that is a way off yet!
Also found some little plastic-capped male/female joining bolts to put through the carcasses to secure them. Nice that they are in white so should blend in. I am considering filling the additional adjustable holes on the inside once the shelves are in place to make it look even more bespoke.
Also found a great cutting list tool online so hopefully won't have loads of excess timber.1


Confirm your email address to Create Threads and Reply

Categories
- All Categories
- 355.1K Banking & Borrowing
- 254.6K Reduce Debt & Boost Income
- 455.8K Spending & Discounts
- 247.9K Work, Benefits & Business
- 604.9K Mortgages, Homes & Bills
- 178.8K Life & Family
- 262.6K Travel & Transport
- 1.5M Hobbies & Leisure
- 16.1K Discuss & Feedback
- 37.7K Read-Only Boards