We’d like to remind Forumites to please avoid political debate on the Forum.
This is to keep it a safe and useful space for MoneySaving discussions. Threads that are – or become – political in nature may be removed in line with the Forum’s rules. Thank you for your understanding.
📨 Have you signed up to the Forum's new Email Digest yet? Get a selection of trending threads sent straight to your inbox daily, weekly or monthly!
Plastering question (External corners)
Comments
-
Im pretty confident with trowel, I have external "twitcher" but think they are a load of pants.
I was thinking of skimming the side wall first (without bead) then tidy up the edge once it had dried with sand paper. Then skimming the other side (underside) of wall0 -
Im pretty confident with trowel, I have external "twitcher" but think they are a load of pants.
Kind of agree really, like I say, very rarely gets used, however they do work but the same with all plasterers trowels they neeed to be worked in (you can't just get a new trowel of the shelf and get a great finish - even the so called "broken in trowels" by Marshalltown)
My internal twitcher gets lots of use, means I can put a ceiling and two walls on at the same time.
I'm struggling to picture your wall, can you put a level against it and take a pic and upload? I might be able to advise from this
Regards
P0 -
Cant get pic at moment im afraid. Basically its a dormer window that comes into a room with a pitched wall (slanting up to ceiling) The bit im plastering is a box section that has been put round a wooden joist that is supporting the doormer window box. hence why it comes int the room at a 45 degree angle from window box to ceiling.
Any help?0 -
What i'm struggling with is the wall being that far out that you can't get a 3mm bead on it? these beads don't have to fit flush all the way up, you can pull it out a bit where it won't sit. failing this, you could always try a stop bead? Put the stop bead on the external angle that is the flattest.Cant get pic at moment im afraid. Basically its a dormer window that comes into a room with a pitched wall (slanting up to ceiling) The bit im plastering is a box section that has been put round a wooden joist that is supporting the doormer window box. hence why it comes int the room at a 45 degree angle from window box to ceiling.
Any help?
The stop bead below is normally used exactly for that STOP so you don't have to do the other wall if not needed. however if you pull this stop bead over the edge by 3mm, you have an edge to work upto.
Hope this all makes sence and helps
P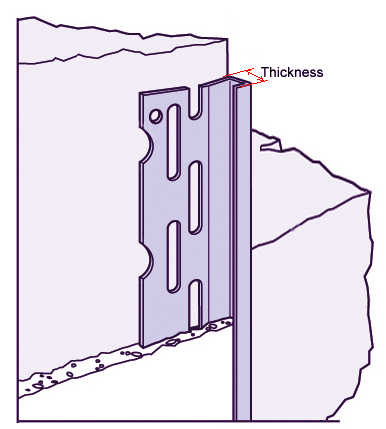 0
0 -
Ive just popped over to the house in my lunch break to tryed the plaster trick to stick it and problem is the walls arn't straight so the angle bead doesnt sit flush enough.
Now im a perfectionist and know if i leave the bead on slight proud in areas its going to show once i skim.
Any tips for skimming without using a bead?
What finish are you trying to get - do you want the walls flat with the edges straight, or are you trying to follow the curves of the existing wall?0 -
Im probably being to critical, like i said I am a perfectionist. The trouble is the wall edge has a low point in the middle so when the bead goes on it bounces in the middle if pushed on. Dont want to skim it then have something pushed up against it once its all skimmed for it to then to crack all the plaster.
Image from google as example, left hand edge.
 0
0 -
Im probably being to critical, like i said I am a perfectionist. The trouble is the wall edge has a low point in the middle so when the bead goes on it bounces in the middle if pushed on. Dont want to skim it then have something pushed up against it once its all skimmed for it to then to crack all the plaster
AHHHHH, the pennies dropped!!!!! Get a small bag of Thistle Bonding coat and bond the "hollow" in the wall, then bead up after its dried.0 -
What finish are you trying to get - do you want the walls flat with the edges straight, or are you trying to follow the curves of the existing wall?
The curve is very slight so as long as the walls are smooth i think it will ok, just think it will look worse with a bead that cant be secured properly0 -
whoever original plastered it hasnt used angle bead and had got a good finish, apart from the slight curve! It is a 200 year old cottage so i just call the curve character.0
-
Plasterer will no doubt correct me if I am wrong, as he is a professional and I am an amateur, but from my experience;
If the hollow is large, then make good with bonding. When I was doing this I got my wife to hold a board up against the adjacent wall and plastered up to this.
If the hollow is not large, then make sure that you put some top coat plaster in the hollow to stick the beading down. This will make sure the beading is properly supported there while you adjust to to square and vertical.
When everything is finished, the plaster works its way into and around the beading, and once it goes hard it locks the beading into place so it can't bounce.
You will eb surprised how well the paster sticks the beading into place. It really is rock solid.0

This discussion has been closed.
Confirm your email address to Create Threads and Reply

Categories
- All Categories
- 355.2K Banking & Borrowing
- 254.7K Reduce Debt & Boost Income
- 455.8K Spending & Discounts
- 247.9K Work, Benefits & Business
- 605K Mortgages, Homes & Bills
- 178.8K Life & Family
- 262.8K Travel & Transport
- 1.5M Hobbies & Leisure
- 16.1K Discuss & Feedback
- 37.7K Read-Only Boards