We’d like to remind Forumites to please avoid political debate on the Forum.
This is to keep it a safe and useful space for MoneySaving discussions. Threads that are – or become – political in nature may be removed in line with the Forum’s rules. Thank you for your understanding.
The MSE Forum Team would like to wish you all a Merry Christmas. However, we know this time of year can be difficult for some. If you're struggling during the festive period, here's a list of organisations that might be able to help
📨 Have you signed up to the Forum's new Email Digest yet? Get a selection of trending threads sent straight to your inbox daily, weekly or monthly!
Has MSE helped you to save or reclaim money this year? Share your 2025 MoneySaving success stories!
Help me repair this ceiling crack
Cheerio90
Posts: 10 Forumite


Hello,
Living in a Victorian semi.
Living in a Victorian semi.
A few months back I noticed this crack in the coving, it’s slowly spread into a hairline crack on the ceiling.
I’d love to DIY the repair but I’m a total beginner…
is it doable myself? And if so please tell me what to buy and the correct technique please!
Thanks


is it doable myself? And if so please tell me what to buy and the correct technique please!
Thanks


0
Comments
-
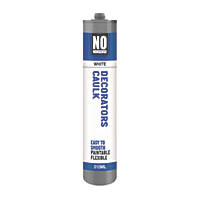
IMO, the simplest way is to clean the crack with a paintbrush wetted with diluted PVA, then fill it with either decorator's caulk or something like 'anty crack' sealant. Both have some elasticity, but shrink when setting, so you'll have to repeat it twice or three times.Also, they are difficult to sand, so do your best to get a neat finish when filling.If the gap keeps growing this will last longer than with usual filler, but not forever.
0 -
That looks like old plaster.Be careful that the plaster hasn't blown and it's getting ready to fall. 😬 There looks like more than one crack and that the ceiling isn't all that level any more.Everything that is supposed to be in heaven is already here on earth.
1 -
Hello,
Thanks for both replies probably not looking at a forever fix but just something that looks cosmetically better for a while.
Doozergirl, you could be right, old plaster as in original? We do have some Lath and Plaster walls still left around the house. Does this make a difference to the repair job?
Ceiling doesn’t look great in that area, a leak from the bay window roof was ignored by the previous owner, we have since had the bay roof completely stripped back and replaced only last year and there’s been no more drips since. I did wonder if this crack was the result of the area ‘drying out’.
Again, appreciate any advice anyone can give me. The house is lovely but not without it’s to-do list !Thanks0 -
You need to gently dig the length of the crack out in a small v shape using a sharp implement, then fill and sand. Simply filling it will result in the crack reappearing.
Plenty of vids on youtube
0 -
Also use a fine filler, and some fine sand paper slightly wet to sand down and smooth out. Toolstation sell both (using Topcashback of course). I drilled through my ceiling once (from the top downwards) but sorted it using this method. Apart from slight difference in paint (when light shines on it) its impossible to even notice.
But first of all check why has it cracked? has someone been in the loft walking on the beams?0 -
Thanks for the tips!This is my lounge ceiling so above is a bedroom. The crack starts right where the two bits of coving join at a corner so my predictions were either some slight movement, an old repair that had past its sell by date or the plaster drying out due to the historic leak/ damp bay roof which is now repaired.Thanks again!0
-
You may well find the laths swelled when they got wet causing some of the nibs to break off. Quite possible some of the nails have rusted away too. Short term fix would indeed be decorators caulk (don't bother trying to fill with sand). Longer term, I'd see if it is possible to find some matching coving (there are companies that specialise in period reproductions), and replace the ceiling with plasterboard - It will be a very messy job taking down lath & plaster, but it will give you opportunity to repair any hidden damage as well as improving the insulation.You can get sandable lime putty based fillers, but I don't think the extra expense is warranted in your case.Any language construct that forces such insanity in this case should be abandoned without regrets. –
Erik Aronesty, 2014
Treasure the moments that you have. Savour them for as long as you can for they will never come back again.0 -
If you tape the joints, its best to use a joint filler.0
-
Cheerio90 said:This is my lounge ceiling so above is a bedroom. The crack starts right where the two bits of coving join at a corner so my predictions were either some slight movement, an old repair that had past its sell by date or the plaster drying out due to the historic leak/ damp bay roof which is now repaired.Any cracking near the corners of a bay window should lead to some checks that the bay is not moving vertically or horizontally relative the to main structure. No need to panic, but keep an eye on the bay both internally and externally to see if there are any signs of movement.When the bay roof was replaced did they happen to mention whether or not you have a bressumer beam?0
-
I second the above post. Though it may not look as tidy it will do as I can see the crack moving a bitgrumbler said:IMO, the simplest way is to clean the crack with a paintbrush wetted with diluted PVA, then fill it with either decorator's caulk or something like 'anty crack' sealant. Both have some elasticity, but shrink when setting, so you'll have to repeat it twice or three times.Also, they are difficult to sand, so do your best to get a neat finish when filling.If the gap keeps growing this will last longer than with usual filler, but not forever.
The ceiling is certainly lath and plaster or whatever its called and personally, I would not try to make the crack bigger to fill as suggested by one poster here
Not sure if you are to paint but as you know it won't match unless the whole thing is done.
You will get a good finish on the corner cracks with the above - buy the best of the above as some take a lot longer to dry ready to paint and the more expensive ones dry more quickly.0
Confirm your email address to Create Threads and Reply

Categories
- All Categories
- 352.9K Banking & Borrowing
- 253.9K Reduce Debt & Boost Income
- 454.7K Spending & Discounts
- 246K Work, Benefits & Business
- 602.1K Mortgages, Homes & Bills
- 177.8K Life & Family
- 259.9K Travel & Transport
- 1.5M Hobbies & Leisure
- 16K Discuss & Feedback
- 37.7K Read-Only Boards


