We’d like to remind Forumites to please avoid political debate on the Forum.
This is to keep it a safe and useful space for MoneySaving discussions. Threads that are – or become – political in nature may be removed in line with the Forum’s rules. Thank you for your understanding.
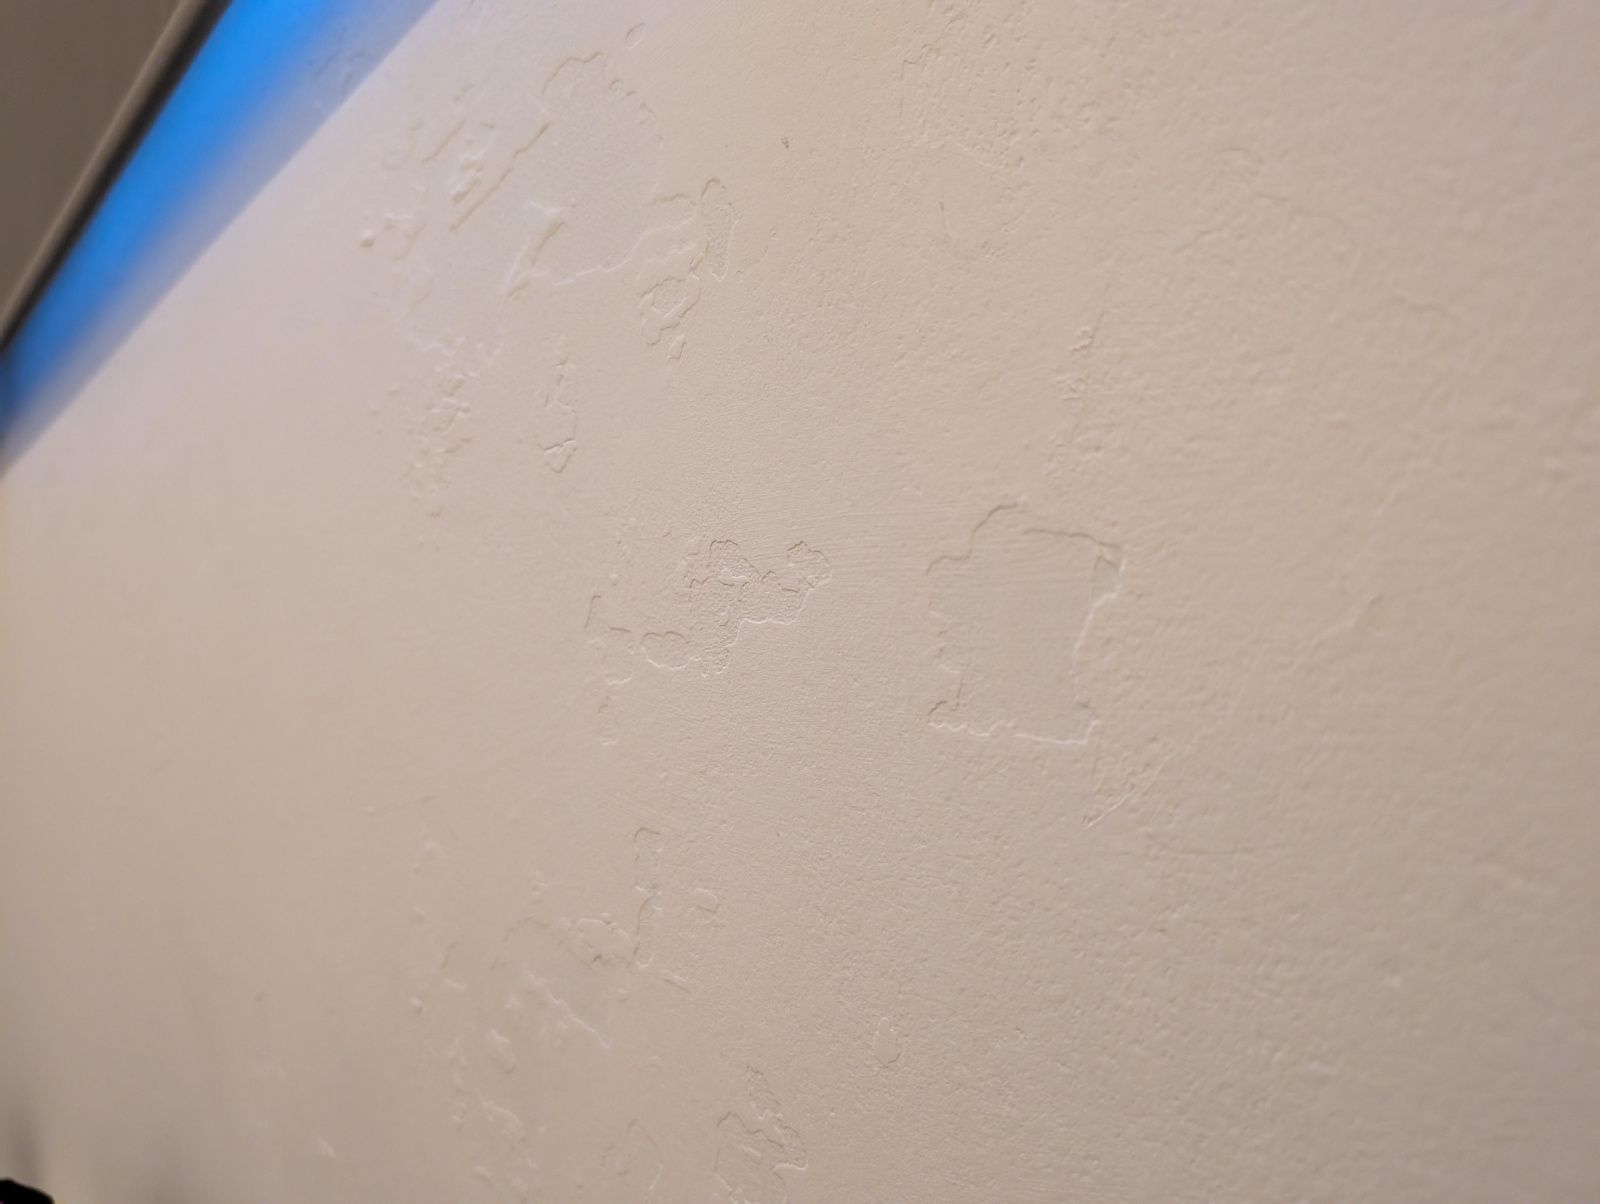
What are these patches on my wall?


Only wall in the flat that has it, it's a bedroom wall which is the exterior wall. I'm hoping it's just previous owners crappy diy left overs. I'm thinking to just use polyfiller and smooth it out.
The walls are not plaster, they're plasterboard.
Comments
-
Agreed, looks like poor/lazy decoration
0 -
It could be that the previous occupants had stuck posters onto the wall. Removing the posters has also taken some of the thin plaster skim off with it.
1 -
Only wall in the flat that has it, it's a bedroom wall which is the exterior wall. I'm hoping it's just previous owners crappy diy left overs. I'm thinking to just use polyfiller and smooth it out.
The walls are not plaster, they're plasterboard.
It is probably applying a second coat of paint (with a roller) before the first coat has dried properly. The roller pulls patches of partly-dried paint away from the wall - causing the craters - and then deposits them elsewhere - causing the mounds.
If a wall is plastered then not using a mist coat can lead to the same effect even if the first coat is left to dry properly. It is the lack of adhesion between the paint film and substrate (the wall) which causes this to happen.
Rubbing down the high spots and using a fine surface filler in the holes should do the trick - but there is a risk of further patches of paint detatching when painting over. If they do then use a wet sponge to clean the lumpy paint off the wall before it dries, and clean (wash) the roller before continuing.
Edit: another cause, not so common these days, is if someone has put emulsion paint over distemper without using a stabilising solution first. The damp from subsequent coats of emulsion can cause the first layer of emulsion to debond from the distemper.
3 -
It definitely looks like the first coat not adhering to the wall properly. Chances are it’s because there wasn’t a mist coat used over the fresh plaster. I agree with the above apart from the distemper, which would be very unusual over plasterboard as it’s normally only found in older properties over plaster.
Try filling the low spots with a fine surface filler like Toupret or Easifill then sanding down. Seal with a coat of Peelstop before painting with emulsion.
Edit: I removed the reference to Gardz. Peelstop would be a better solution than Gardz in this situation.
0 -
I agree with the above apart from the distemper, which would be very unusual over plasterboard as it’s normally only found in older properties over plaster.
Yes, I wasn't suggesting the OP had distemper, only that emulsion paint on top of distemper can produce the same kind of result.
It is unusual to find distemper applied direct to plasterboard, but in the 1960's and early 70's skimmed plasterboard ceilings were often finished with distemper.
1 -
I have exactly this in certain places on all my walls. (Both outside walls and inner plasterboard walls.)
I moved into my place 24 years ago. (1980 property.) The elderly lady, who had lived in it for 20 years before me, had thick old-fashioned shiny embossed wallpaper on all the walls.
When I moved in, I did not want wallpaper, so my Decorator stripped off all the wallpaper and painted the walls with matt paint. It had been a difficult job for him to remove all the old wallpaper.
I have always lived with these patches and don't really notice it with the furniture in and the Barley White walls.
(It was also such a big improvement anyway, compared to how it was, as she was also a heavy smoker!)
I suspect the only way to have dealt with it properly, would have been to completely replaster the walls.
0 -
That sounds about right. The embossed paper was often used to cover flaws in the plaster or previous paint layers.
0 -
Polyfilla is the biggest brand but it has been overtaken by better products over the years. It’s not the easiest to sand and has a tendency to flash through the paint. Easifill or Toupret fine surface are easier and don’t flash.
3 -
I didn't even know polyfiller was a brand, I thought it was the name of the product. I'll get something suitable from my local screwfix.
0 -
'Polyfilla' is like yer 'Hoover'. But I'd go with btw's recommendations, since the quality of filler makes a world of difference to the success of the job.
We don't know the cause, but chances are the existing paint is not well attached.
I'd start with a large sanding pad on a pole, and, say, 120 or 180 grit paper. Gentle pressure, and go over the walls to remove all the high spots and lumps, and leave the overall surface 'keyed'.
Wipe down thoroughly with a damp cloth, and apply the filler using a wide-bladed filling knife, wider that the recesses you are filling - that guides the 'fill'. Allow to fully set, and give these areas another light sanding with 180. Check the result. You should not be able to feel the filled parts, or their edges.
Wipe again, and paint using a roller. Do not overload the roller, and try and get it applied and rolled out evenly as gently and quickly as possible - don't go back over still-wet previously applied paint.
Good luck.
2


Confirm your email address to Create Threads and Reply

Categories
- All Categories
- 354.6K Banking & Borrowing
- 254.5K Reduce Debt & Boost Income
- 455.5K Spending & Discounts
- 247.5K Work, Benefits & Business
- 604.4K Mortgages, Homes & Bills
- 178.6K Life & Family
- 262K Travel & Transport
- 1.5M Hobbies & Leisure
- 16.1K Discuss & Feedback
- 37.7K Read-Only Boards