We’d like to remind Forumites to please avoid political debate on the Forum.
This is to keep it a safe and useful space for MoneySaving discussions. Threads that are – or become – political in nature may be removed in line with the Forum’s rules. Thank you for your understanding.
Wood Burner Query, Please Help. (Auckland model?)


Look suggests this is Auckland model? Any experts please help. Thanks!


Comments
-
Some photos of one currently for sale -> https://www.ebay.co.uk/itm/395627241814It does appear that you are missing the firebricks. These can be easily obtained from any number of sources (including ebay). Or you might try a local HETAS installer (or shop) - I'd only bother cutting the back firebrick if you used the rear flue connection.A grate is only needed if you are burning smokeless coal. For just wood, build up a bed of ash up to the top of the bars, and scoop out any excess once it has cooled down. Put any hot ash is a steel bucket and take it outside to cool down. It is not unheard of for hot ash to emit carbon monoxide (that is CO, not CO2), so don't keep the ash bucket indoors.Also found this for you -> https://www.knight-stoves.co.uk/wp-content/uploads/2016/06/Aukland.pdfOh, and do make sure you have a working CO alarm that is less than 5-7 years old.
Any language construct that forces such insanity in this case should be abandoned without regrets. –
Erik Aronesty, 2014
Treasure the moments that you have. Savour them for as long as you can for they will never come back again.3 -
There SHOULD be a grill in there, but if you are only going to burn wood then you don't actually need one, they are only to make cleaning out easier. So If you can't get one don't worry0
-
Can't quite make out from that last pic, but it does appear to have a top 'baffle' plate in place?
When you look upwards, SS, can you see the flue exit hole, or is there a full-width plate under it acting as a ceiling?1 -
Yes I think. Struggling to put this back nowThisIsWeird said:Can't quite make out from that last pic, but it does appear to have a top 'baffle' plate in place?
When you look upwards, SS, can you see the flue exit hole, or is there a full-width plate under it acting as a ceiling?")
 1
1 -
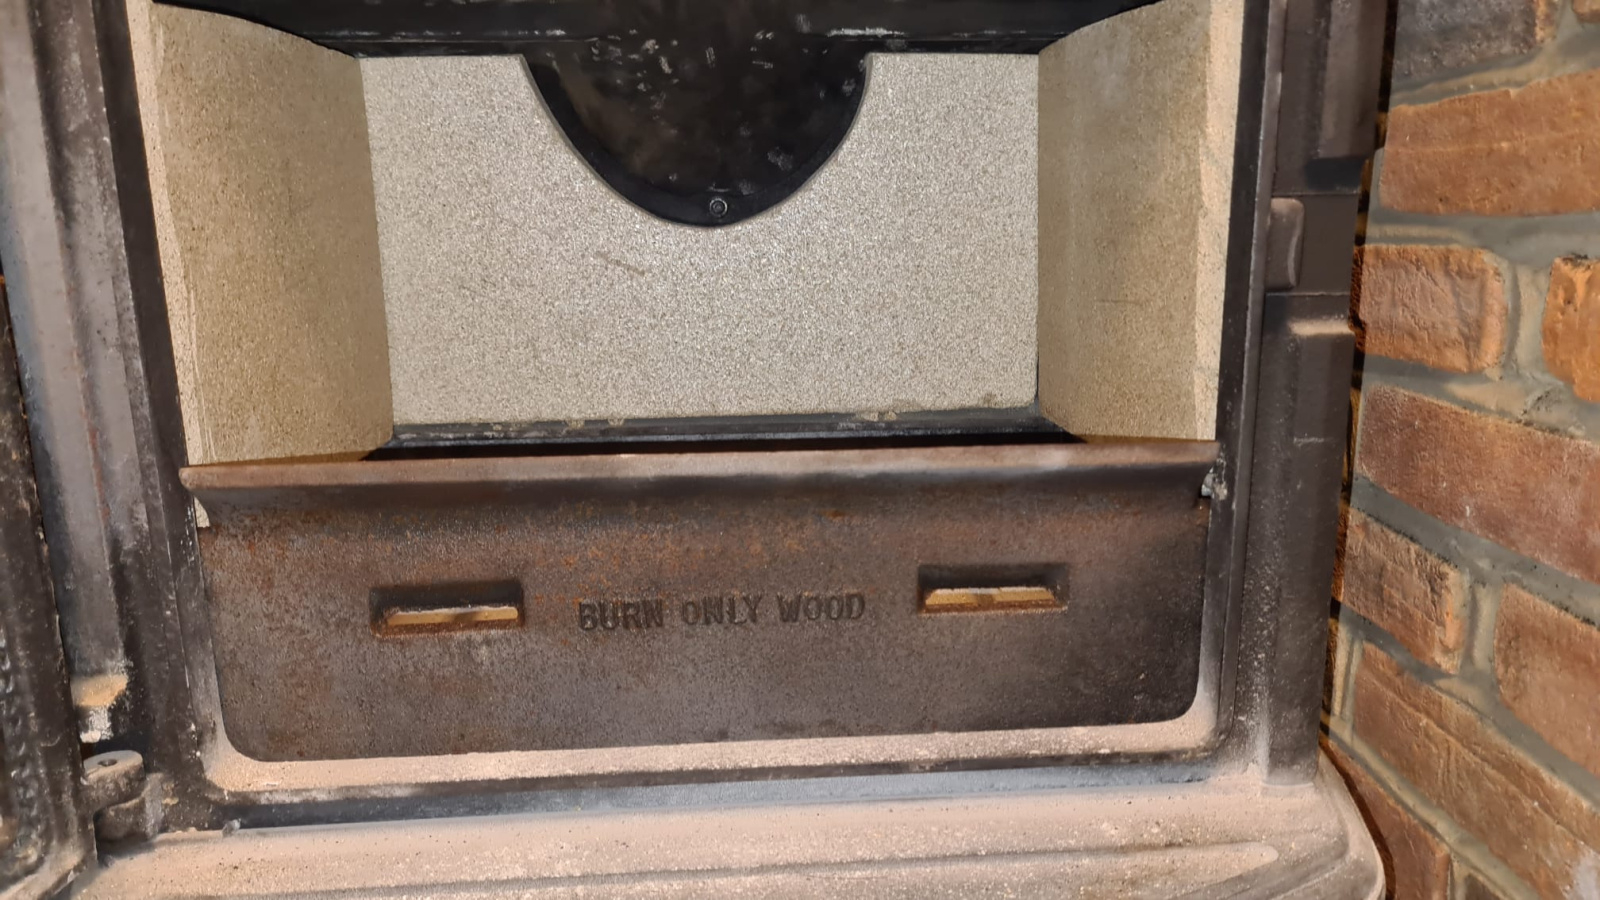
Thanks for this. I have seen online its easy to get shaped bricks...still missing that metal plate written "burn only wood". probably there only to stop ash falling outside..? ThanksFreeBear said:Some photos of one currently for sale -> https://www.ebay.co.uk/itm/395627241814It does appear that you are missing the firebricks. These can be easily obtained from any number of sources (including ebay). Or you might try a local HETAS installer (or shop) - I'd only bother cutting the back firebrick if you used the rear flue connection.A grate is only needed if you are burning smokeless coal. For just wood, build up a bed of ash up to the top of the bars, and scoop out any excess once it has cooled down. Put any hot ash is a steel bucket and take it outside to cool down. It is not unheard of for hot ash to emit carbon monoxide (that is CO, not CO2), so don't keep the ash bucket indoors.Also found this for you -> https://www.knight-stoves.co.uk/wp-content/uploads/2016/06/Aukland.pdfOh, and do make sure you have a working CO alarm that is less than 5-7 years old.
0 -
If I could place something like this inside that should do the job right..?
https://www.ebay.co.uk/itm/125648623610
OR
https://www.ebay.co.uk/itm/362722144670
OR
https://www.ebay.co.uk/itm/386211374633
last two without tray but still functional I think..?? These could separate ash and make easy to clean up if I can fit one of these inside..? Thanks
0 -
Ha-ha, yes the baffle can be baffling. Try lifting the front edge and guiding it right up as far as possible into the top front corner above the open door, and then lift the rear to the correct position, and then let it go back towards the back of the stove.
As folks have said, you don't need a grate for logs, as it gets its burning air from above. But, I'd still like to have one, just in case the stove floor becomes too hot. Unless that's the design - it doesn't use a grate?
Read how to use such stoves before use - you should burn it 'hot', and use only the top air supply once it's under way - a good clean burn.0 -
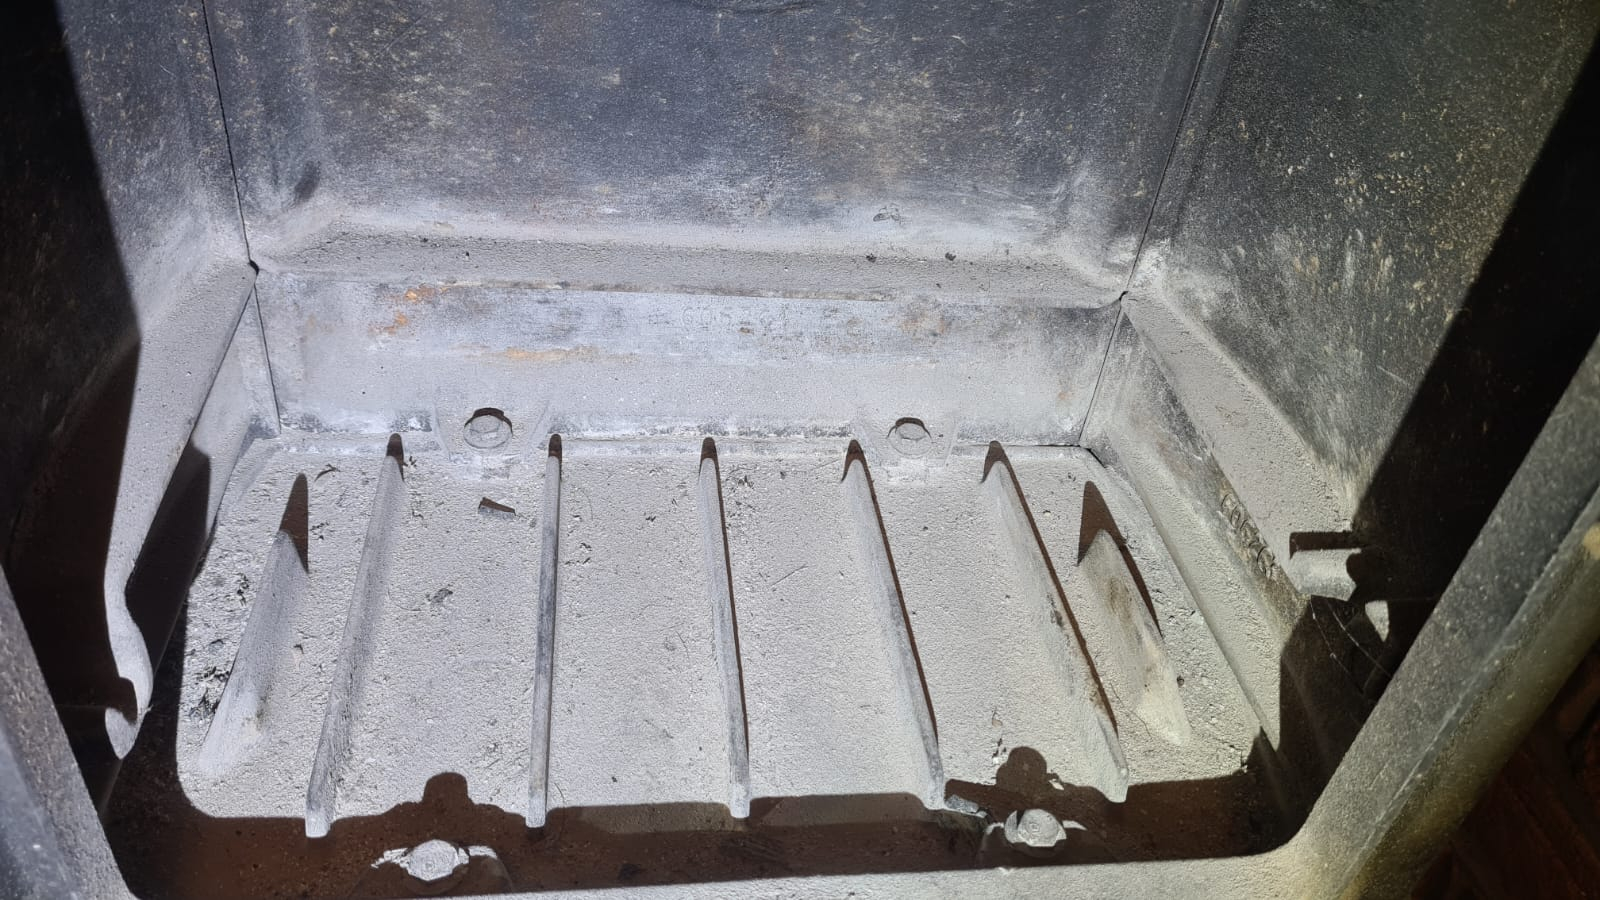
Interesting - if you read FreeBear's instructions link.Seems as tho' no grate is required for burning wood, but you should cover these bottom ridges with sand.That front 'burn only wood' is almost certainly as you suggest - effectively to keep the ash and logs from spilling out. However, I suspect it'll also have a bearing on how it burns, as it'll direct most of the air coming through the two round front vents up and over that missing plate, and on to the top of the wood - although there are seemingly two slots in that plate too.The instructions tell you how to fit the baffle plate.And please read the burn instructions too, and even read some more online. In essence, you get a good draught to get the fire up and roaring as quickly as possible; the stove will start to heat up and 'draw' properly, and then the front two inlets are closed, and you only use the top 'secondary burn' vent to control the fire. Only the starting-up flames 'roar'. You'll soon get to know the burning flame types - 'lazy' flames, deep red/orange glows, and stuff. Lovely...When you look at your chimney pot, there will be some grey smoke as the fire starts up, but that should all-but-disappear once the fire is burning properly, with practically nothing visible.
0 -
I bought two Vermiculite boards from eBay for £68 and successfully cut them to the correct shape using an angle grinder and a jigsaw. Despite a few mistakes, I managed to fit them perfectly into the slots, and they locked into place securely. While cleaning the wood burner in the living room after finishing the first one, I made an unexpected discovery—the log retainer plate from the first burner had somehow ended up in the other one under the ash!
Overall, I’m really pleased with the outcome. I believe I did a better job than the Auckland Burner eBay listing photo that Freebear shared. I wanted to share my experience with everyone here because, without the support and advice from this community, I wouldn’t have had the confidence to tackle this DIY project. Well done to everyone involved—great results all around! See the attached photos.

 2
2 -
Very nice, SS!Read FreeBear's instruction link carefully - see what it says about the bed of sand, for example. What's in the bottom in the photo?1


Confirm your email address to Create Threads and Reply

Categories
- All Categories
- 354K Banking & Borrowing
- 254.3K Reduce Debt & Boost Income
- 455.2K Spending & Discounts
- 247K Work, Benefits & Business
- 603.6K Mortgages, Homes & Bills
- 178.3K Life & Family
- 261.1K Travel & Transport
- 1.5M Hobbies & Leisure
- 16.1K Discuss & Feedback
- 37.7K Read-Only Boards