We’d like to remind Forumites to please avoid political debate on the Forum.
This is to keep it a safe and useful space for MoneySaving discussions. Threads that are – or become – political in nature may be removed in line with the Forum’s rules. Thank you for your understanding.
📨 Have you signed up to the Forum's new Email Digest yet? Get a selection of trending threads sent straight to your inbox daily, weekly or monthly!
The Forum now has a brand new text editor, adding a bunch of handy features to use when creating posts. Read more in our how-to guide
Air vent not sticking on!
Comments
-
It would still need screwing and drilling like this one?ic said:This one at Screwfix has the screw holes in each corner - same manufacturer (see the images). The one you have must be designed to cover a very small hole. They do another even larger.
https://www.screwfix.com/p/map-vent-adjustable-vent-white-229mm-x-152mm/7374d
https://www.screwfix.com/p/map-vent-adjustable-vent-white-229mm-x-229mm/2057d0 -
I see.Sekekama said:
I had it done because plasterers removed the one in other room and hallway see image and my double glazed windows don't have vents. My friend raked it open but now I regret it just thought a vent would look nice one I could open and close when needed. Taking time away from paintingThisIsWeird said:Sekekama said:You push it left and right to close, I regret everything taking this off Thanks IC and Tellit - I can see now it's sliding.Sekekama, why did you change it? What purpose does it serve? Is it essential for that room - for a gas fire or wood-burning stove, for example?Whether open or closed, that grill is going to be bludy cold in winter. It has next-to-no insulation value, and will attract condensation like a condie thing.If it isn't actually needed, then this is what I'd do; you should fill the inner wall skin with insulation, to around a half-inch of the inner wall surface. Best, easiest, way to do this is to look on your Facebook Marketplace, and find someone selling/getting rid or Celotex-type rigid insulation, just an offcut is needed. Ditto a piece of plasterboard sheet - again just a tiny piece. Or, have a wander around any skip you see outside a house being worked on. I walked past a skip just yesterday eve that had whole sections of the T&G rigid insulation in it...Trim it to fit snugly in that hole, and tap it in tightly, until it the back reaches the inner face - ie does not go in to the cavity. If it ain't super-snug - if there are gaps around it - then you may need to add a bead of foam, although Polyurethane wood glue - the expanding type - will do.Then cut the p'board to also fit in there, and a wee surrounding gap is ok. Trim/chisel away the surface of the insulation block until the p'board sits in that hole, just a couple of mm or so deeper than the outer surface. Mix up some more of that filler, add a few dabs to the back of the p'board, press it into place, and force some more filler firmly around the p'board edges to seal it in place; leave to set, and the p'board should be fixed in place.Then add layers of filler over it all, using a straight edge wider than the hole to remove any too-high bits. Let it set, and add a layer more until you know you have it at least flush with the wall.Allow to dry fully.If you have a metal straight-edge - a steel rule, the back of a saw blade, anything like that - then use it to scrape away excess filler until it's essentially flat. Then 80 grit on a sanding block, followed by 120 grit, to get it all perfectly flat and blended in.Jobbie jobbed - once painted.
What age is your house? What type of floor - is it suspended floorboards? Your DG windows will still have a cracked-open lockable vent setting?
Do you have any 'condensation' issues? Droplets on your window panes in the morning, for example?
Does your home feel air-tight, or does it have a notable through-draught? Eg, can you feel a draught coming under closed doors?
If you don't need these hellish vents, then I'd get rid. You can smooth it off to match the rest of the skimmed walls. Or, if you reckon you cannot, just replace the grills after having insulated the inner wall skin as described before!
0 -
1930s house and it tends to get warm no condensation issues there's already insulation in the cavity. I have a damp issue in landing (separate issue)ThisIsWeird said:
I see.Sekekama said:
I had it done because plasterers removed the one in other room and hallway see image and my double glazed windows don't have vents. My friend raked it open but now I regret it just thought a vent would look nice one I could open and close when needed. Taking time away from paintingThisIsWeird said:Sekekama said:You push it left and right to close, I regret everything taking this offThanks IC and Tellit - I can see now it's sliding.Sekekama, why did you change it? What purpose does it serve? Is it essential for that room - for a gas fire or wood-burning stove, for example?Whether open or closed, that grill is going to be bludy cold in winter. It has next-to-no insulation value, and will attract condensation like a condie thing.If it isn't actually needed, then this is what I'd do; you should fill the inner wall skin with insulation, to around a half-inch of the inner wall surface. Best, easiest, way to do this is to look on your Facebook Marketplace, and find someone selling/getting rid or Celotex-type rigid insulation, just an offcut is needed. Ditto a piece of plasterboard sheet - again just a tiny piece. Or, have a wander around any skip you see outside a house being worked on. I walked past a skip just yesterday eve that had whole sections of the T&G rigid insulation in it...Trim it to fit snugly in that hole, and tap it in tightly, until it the back reaches the inner face - ie does not go in to the cavity. If it ain't super-snug - if there are gaps around it - then you may need to add a bead of foam, although Polyurethane wood glue - the expanding type - will do.Then cut the p'board to also fit in there, and a wee surrounding gap is ok. Trim/chisel away the surface of the insulation block until the p'board sits in that hole, just a couple of mm or so deeper than the outer surface. Mix up some more of that filler, add a few dabs to the back of the p'board, press it into place, and force some more filler firmly around the p'board edges to seal it in place; leave to set, and the p'board should be fixed in place.Then add layers of filler over it all, using a straight edge wider than the hole to remove any too-high bits. Let it set, and add a layer more until you know you have it at least flush with the wall.Allow to dry fully.If you have a metal straight-edge - a steel rule, the back of a saw blade, anything like that - then use it to scrape away excess filler until it's essentially flat. Then 80 grit on a sanding block, followed by 120 grit, to get it all perfectly flat and blended in.Jobbie jobbed - once painted.
What age is your house? What type of floor - is it suspended floorboards? Your DG windows will still have a cracked-open lockable vent setting?
Do you have any 'condensation' issues? Droplets on your window panes in the morning, for example?
Does your home feel air-tight, or does it have a notable through-draught? Eg, can you feel a draught coming under closed doors?
If you don't need these hellish vents, then I'd get rid. You can smooth it off to match the rest of the skimmed walls. Or, if you reckon you cannot, just replace the grills after having insulated the inner wall skin as described before!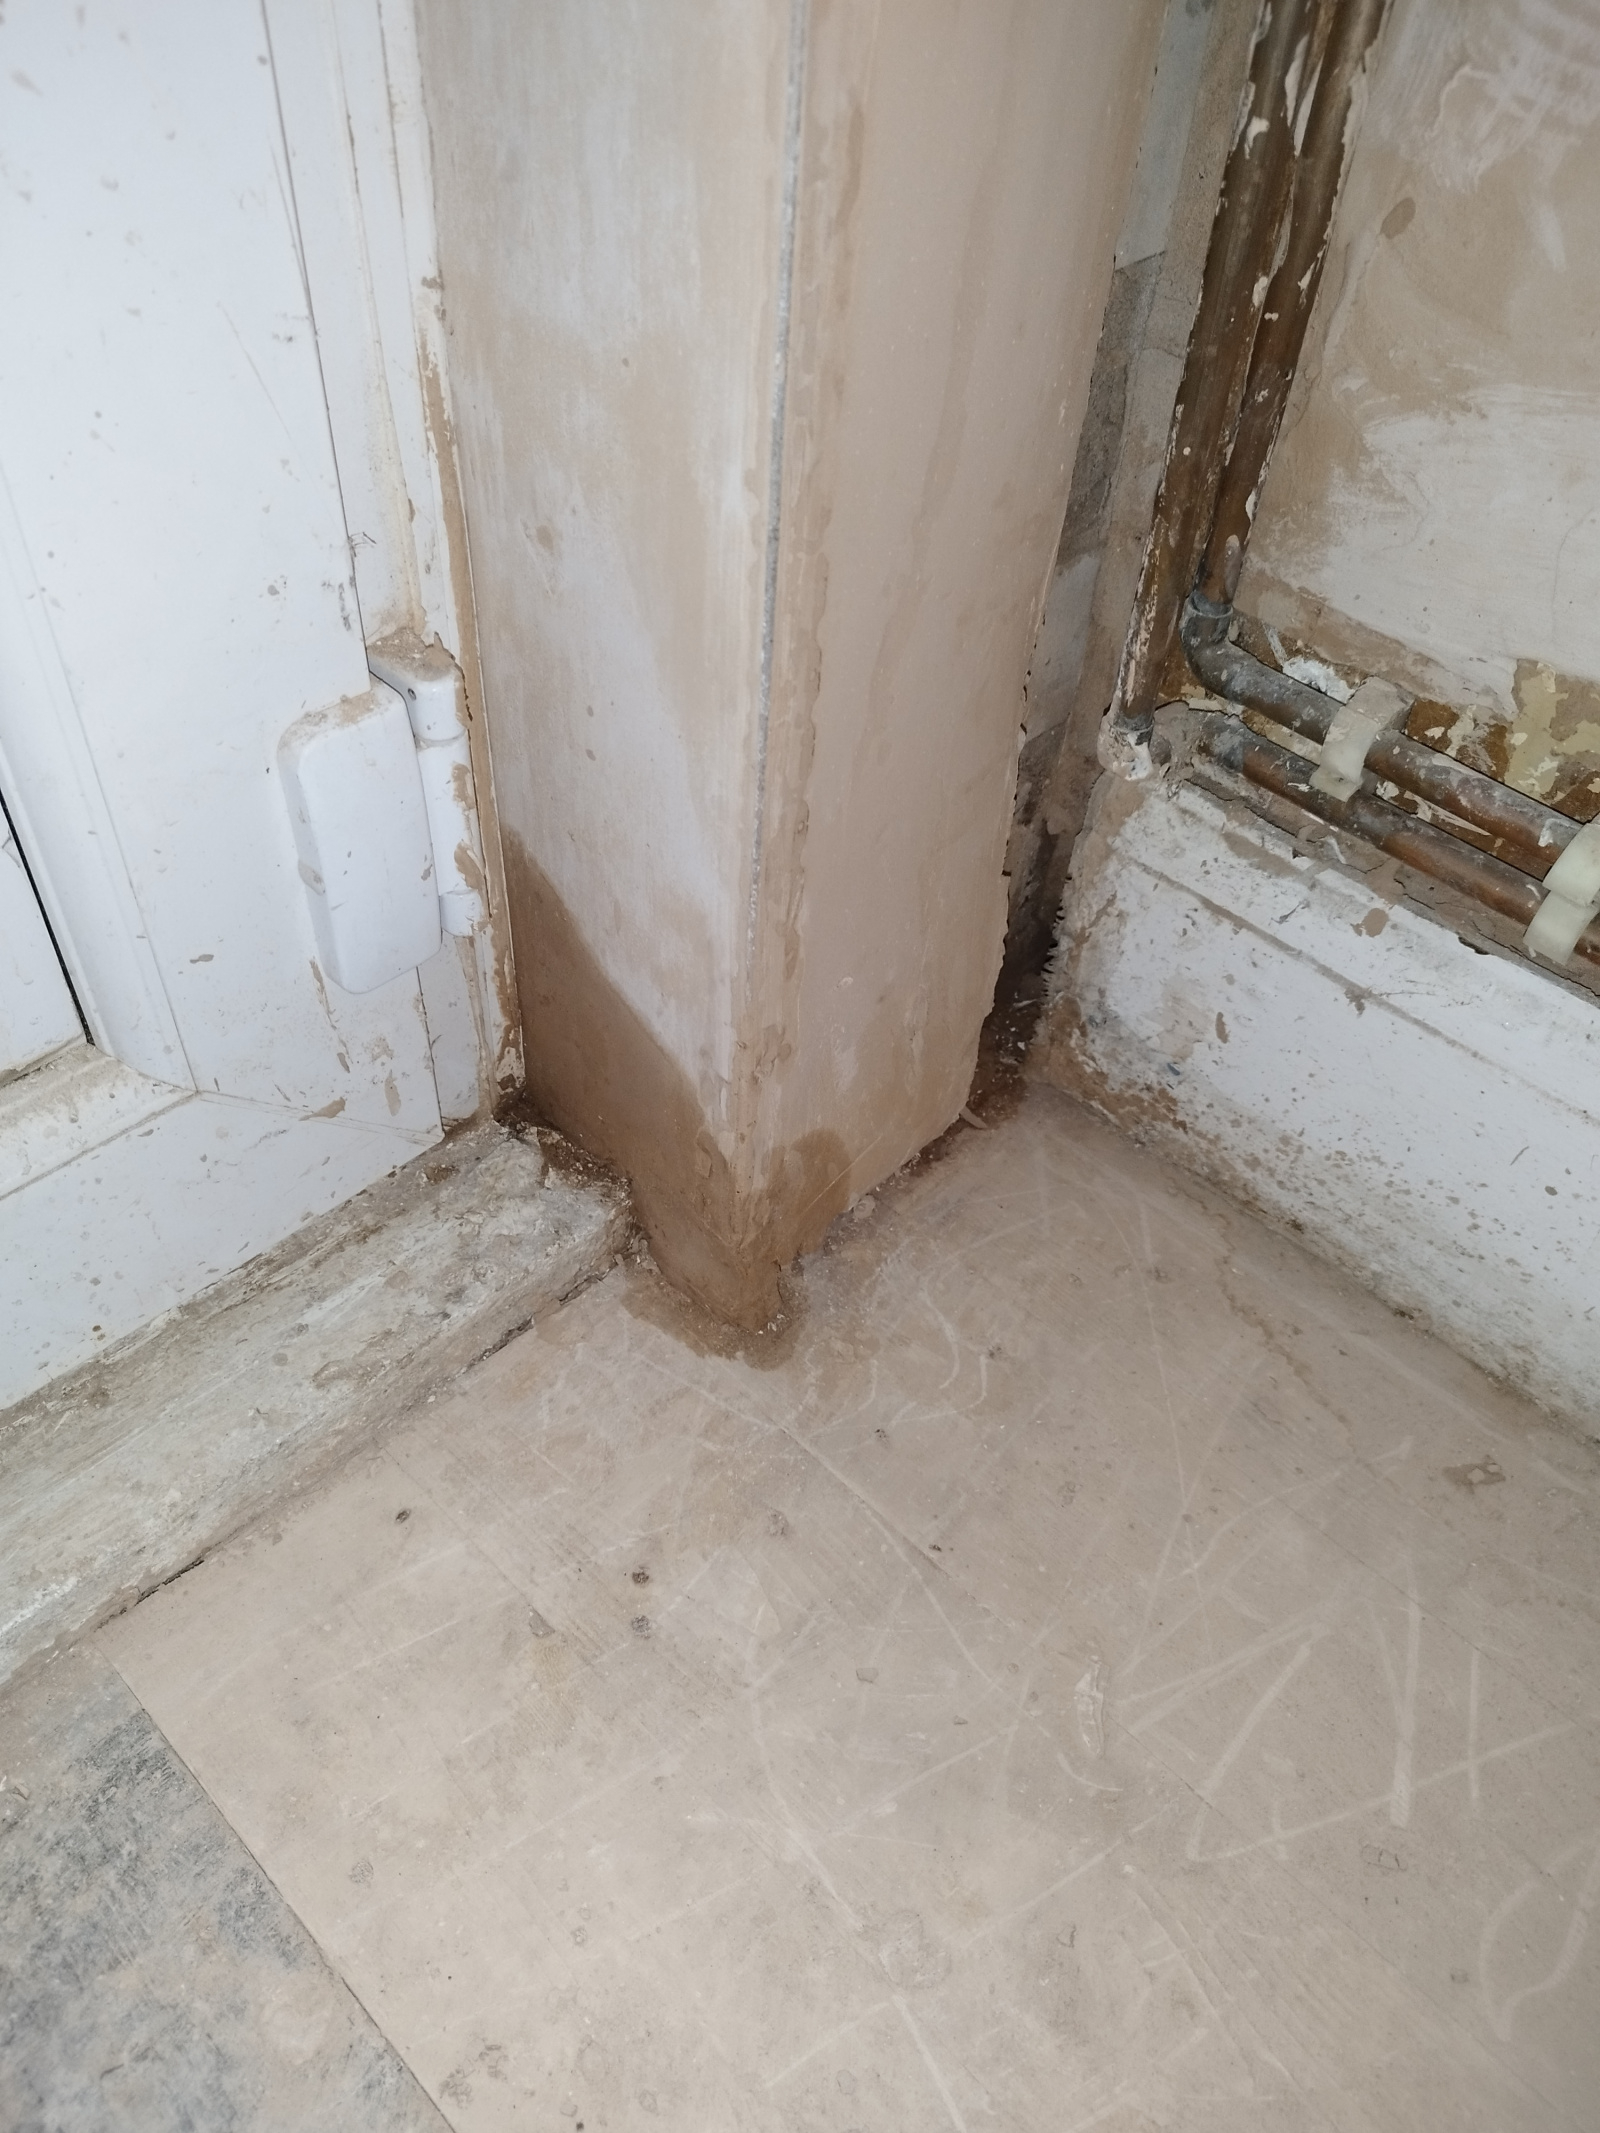 1
1 -
Sekekama said:1930s house and it tends to get warm no condensation issues there's already insulation in the cavity. I have a damp issue in landing (separate issue)Cool - no cond issues. 1930's house - same as me, so they tend to be naturally draughty enough via their floorboards to not have cond
 In your case, I would 100% fill that inner wall skin with high-quality insulation, a piece of p'board glued/filled in, and skim over it. It'll take a bit of work to finish it perfectly flat and blend in with the surrounding wall, but it's 100% DIY-doable.You do not need that vent, and it's a bludy eyesore :-)If you have any other vents in rooms yet to be skimmed, then do them first, so they'll be skimmed over in one go.Before you fill that inner skin, if you have any cavity-wall insulation spare, and I suspect a handful of loft insulation will do (but hopefully others will advise), then I'd fill that cavity void first too. But it needs to be a material that's waterproof, and won't act as a damp bridge. Once you seal the inner skin, that outer vent will be pointless too, as all it'll do is vent the cavity, and reduce its thermal effectiveness. You can either leave it, or seal it - block the holes with mastic.Once you fill the actual cavity with CWI or similar, (tho' that is largely optional - the insulation you add to the inner skin will beat the lack of CWI behind it!), then fill the inner skin as I explained before.Jobbie jobbed.Yes, the other damp issue is completely different - that's 'penetrating', getting past the door frame somehow.
0 -
Any ideas what could be causing my damp near doorway (I had floorboards lifted in past and subfloor below air brick cleared).ThisIsWeird said:Sekekama said:1930s house and it tends to get warm no condensation issues there's already insulation in the cavity. I have a damp issue in landing (separate issue)Cool - no cond issues. 1930's house - same as me, so they tend to be naturally draughty enough via their floorboards to not have condIn your case, I would 100% fill that inner wall skin with high-quality insulation, a piece of p'board glued/filled in, and skim over it. It'll take a bit of work to finish it perfectly flat and blend in with the surrounding wall, but it's 100% DIY-doable.You do not need that vent, and it's a bludy eyesore :-)If you have any other vents in rooms yet to be skimmed, then do them first, so they'll be skimmed over in one go.Before you fill that inner skin, if you have any cavity-wall insulation spare, and I suspect a handful of loft insulation will do (but hopefully others will advise), then I'd fill that cavity void first too. But it needs to be a material that's waterproof, and won't act as a damp bridge. Once you seal the inner skin, that outer vent will be pointless too, as all it'll do is vent the cavity, and reduce its thermal effectiveness. You can either leave it, or seal it - block the holes with mastic.Once you fill the actual cavity with CWI or similar, (tho' that is largely optional - the insulation you add to the inner skin will beat the lack of CWI behind it!), then fill the inner skin as I explained before.Jobbie jobbed.Yes, the other damp issue is completely different - that's 'penetrating', getting past the door frame somehow.
I'm thinking whether to try a masonry waterproofing cream on the bricks that get wet to see if that helps.
I've posted in the past:
https://forums.moneysavingexpert.com/discussion/6547583/how-to-tackle-this/p1
https://forums.moneysavingexpert.com/discussion/comment/81025027#Comment_810250270 -
Sekekama said:Any ideas what could be causing my damp near doorway (I had floorboards lifted in past and subfloor below air brick cleared).
I'm thinking whether to try a masonry waterproofing cream on the bricks that get wet to see if that helps.
I've posted in the past:
https://forums.moneysavingexpert.com/discussion/6547583/how-to-tackle-this/p1
https://forums.moneysavingexpert.com/discussion/comment/81025027#Comment_81025027No idea - but I'll check these threads again.Most likely as suggested by others; a simple gap or crack in the seal between the door frame and the brickwork. Water is cunning - it can get in anywhere, and then travel to a point where it comes through. So, it could be coming in along the top of the frame, and tricking down inside until it reaches near the bottom. Or, if the bottom threshold has drain holes, are they blocked?I'd examine the whole outside frame-to-wall contact very closely, and redo any dodgy bits. Look for any cracks in the outside render.Will you be continuing that skirting board around the damp bit until it meets the door frame? If so, I'd remove the plaster right against the frame, to have a look there. Dry it with a hair-dryer, and then watch the next time it rains - or spray water using a hose.0 -
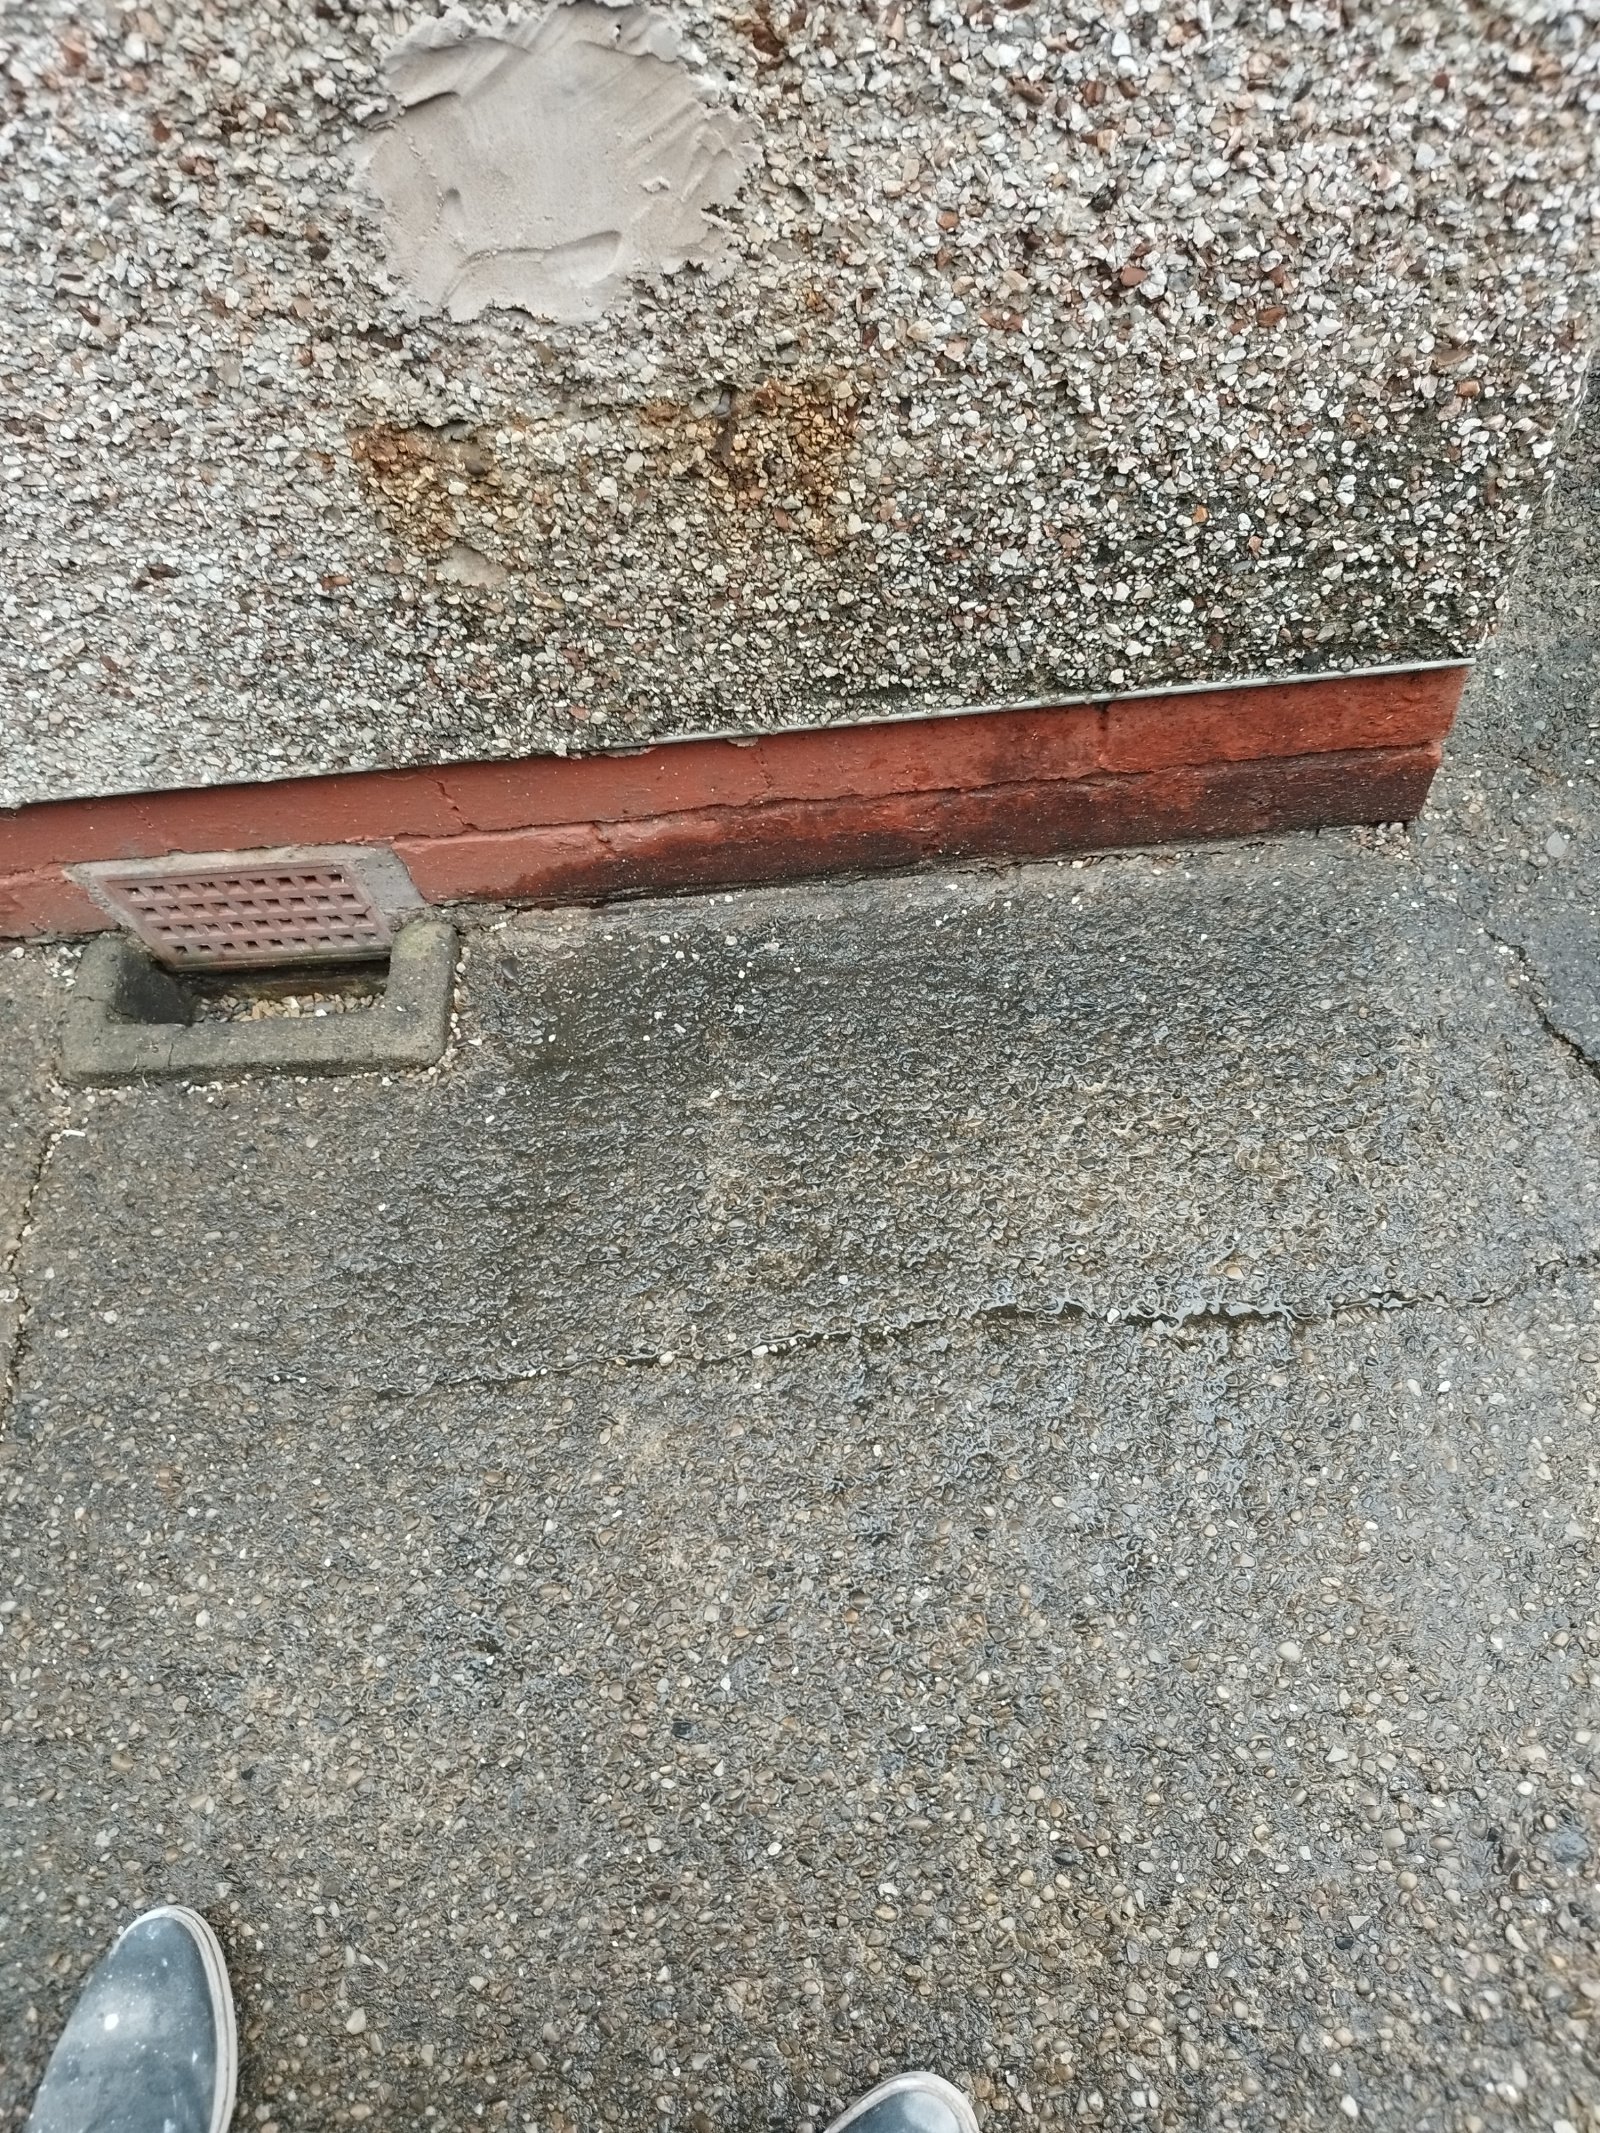
What about the wet bricks at bottom I was thinking of applying stormdry masonry creat which waterproofs it but still leaves it breathable. How would I fill any gaps in the frame? Mortar or sealant?ThisIsWeird said:Sekekama said:Any ideas what could be causing my damp near doorway (I had floorboards lifted in past and subfloor below air brick cleared).
I'm thinking whether to try a masonry waterproofing cream on the bricks that get wet to see if that helps.
I've posted in the past:
https://forums.moneysavingexpert.com/discussion/6547583/how-to-tackle-this/p1
https://forums.moneysavingexpert.com/discussion/comment/81025027#Comment_81025027No idea - but I'll check these threads again.Most likely as suggested by others; a simple gap or crack in the seal between the door frame and the brickwork. Water is cunning - it can get in anywhere, and then travel to a point where it comes through. So, it could be coming in along the top of the frame, and tricking down inside until it reaches near the bottom. Or, if the bottom threshold has drain holes, are they blocked?I'd examine the whole outside frame-to-wall contact very closely, and redo any dodgy bits. Look for any cracks in the outside render.Will you be continuing that skirting board around the damp bit until it meets the door frame? If so, I'd remove the plaster right against the frame, to have a look there. Dry it with a hair-dryer, and then watch the next time it rains - or spray water using a hose.

 0
0 -
Is the frame sealant between the frame and the wall ok?As for these cracks in the 'dash, I've no idea what's best, or if it's responsible.0
-
It looks fine from what I've seen. Honestly thinking for now to buy stormdry waterproofing £35 for the bricks and maybe fill these pebbledashThisIsWeird said:Is the frame sealant between the frame and the wall ok?As for these cracks in the 'dash, I've no idea what's best, or if it's responsible.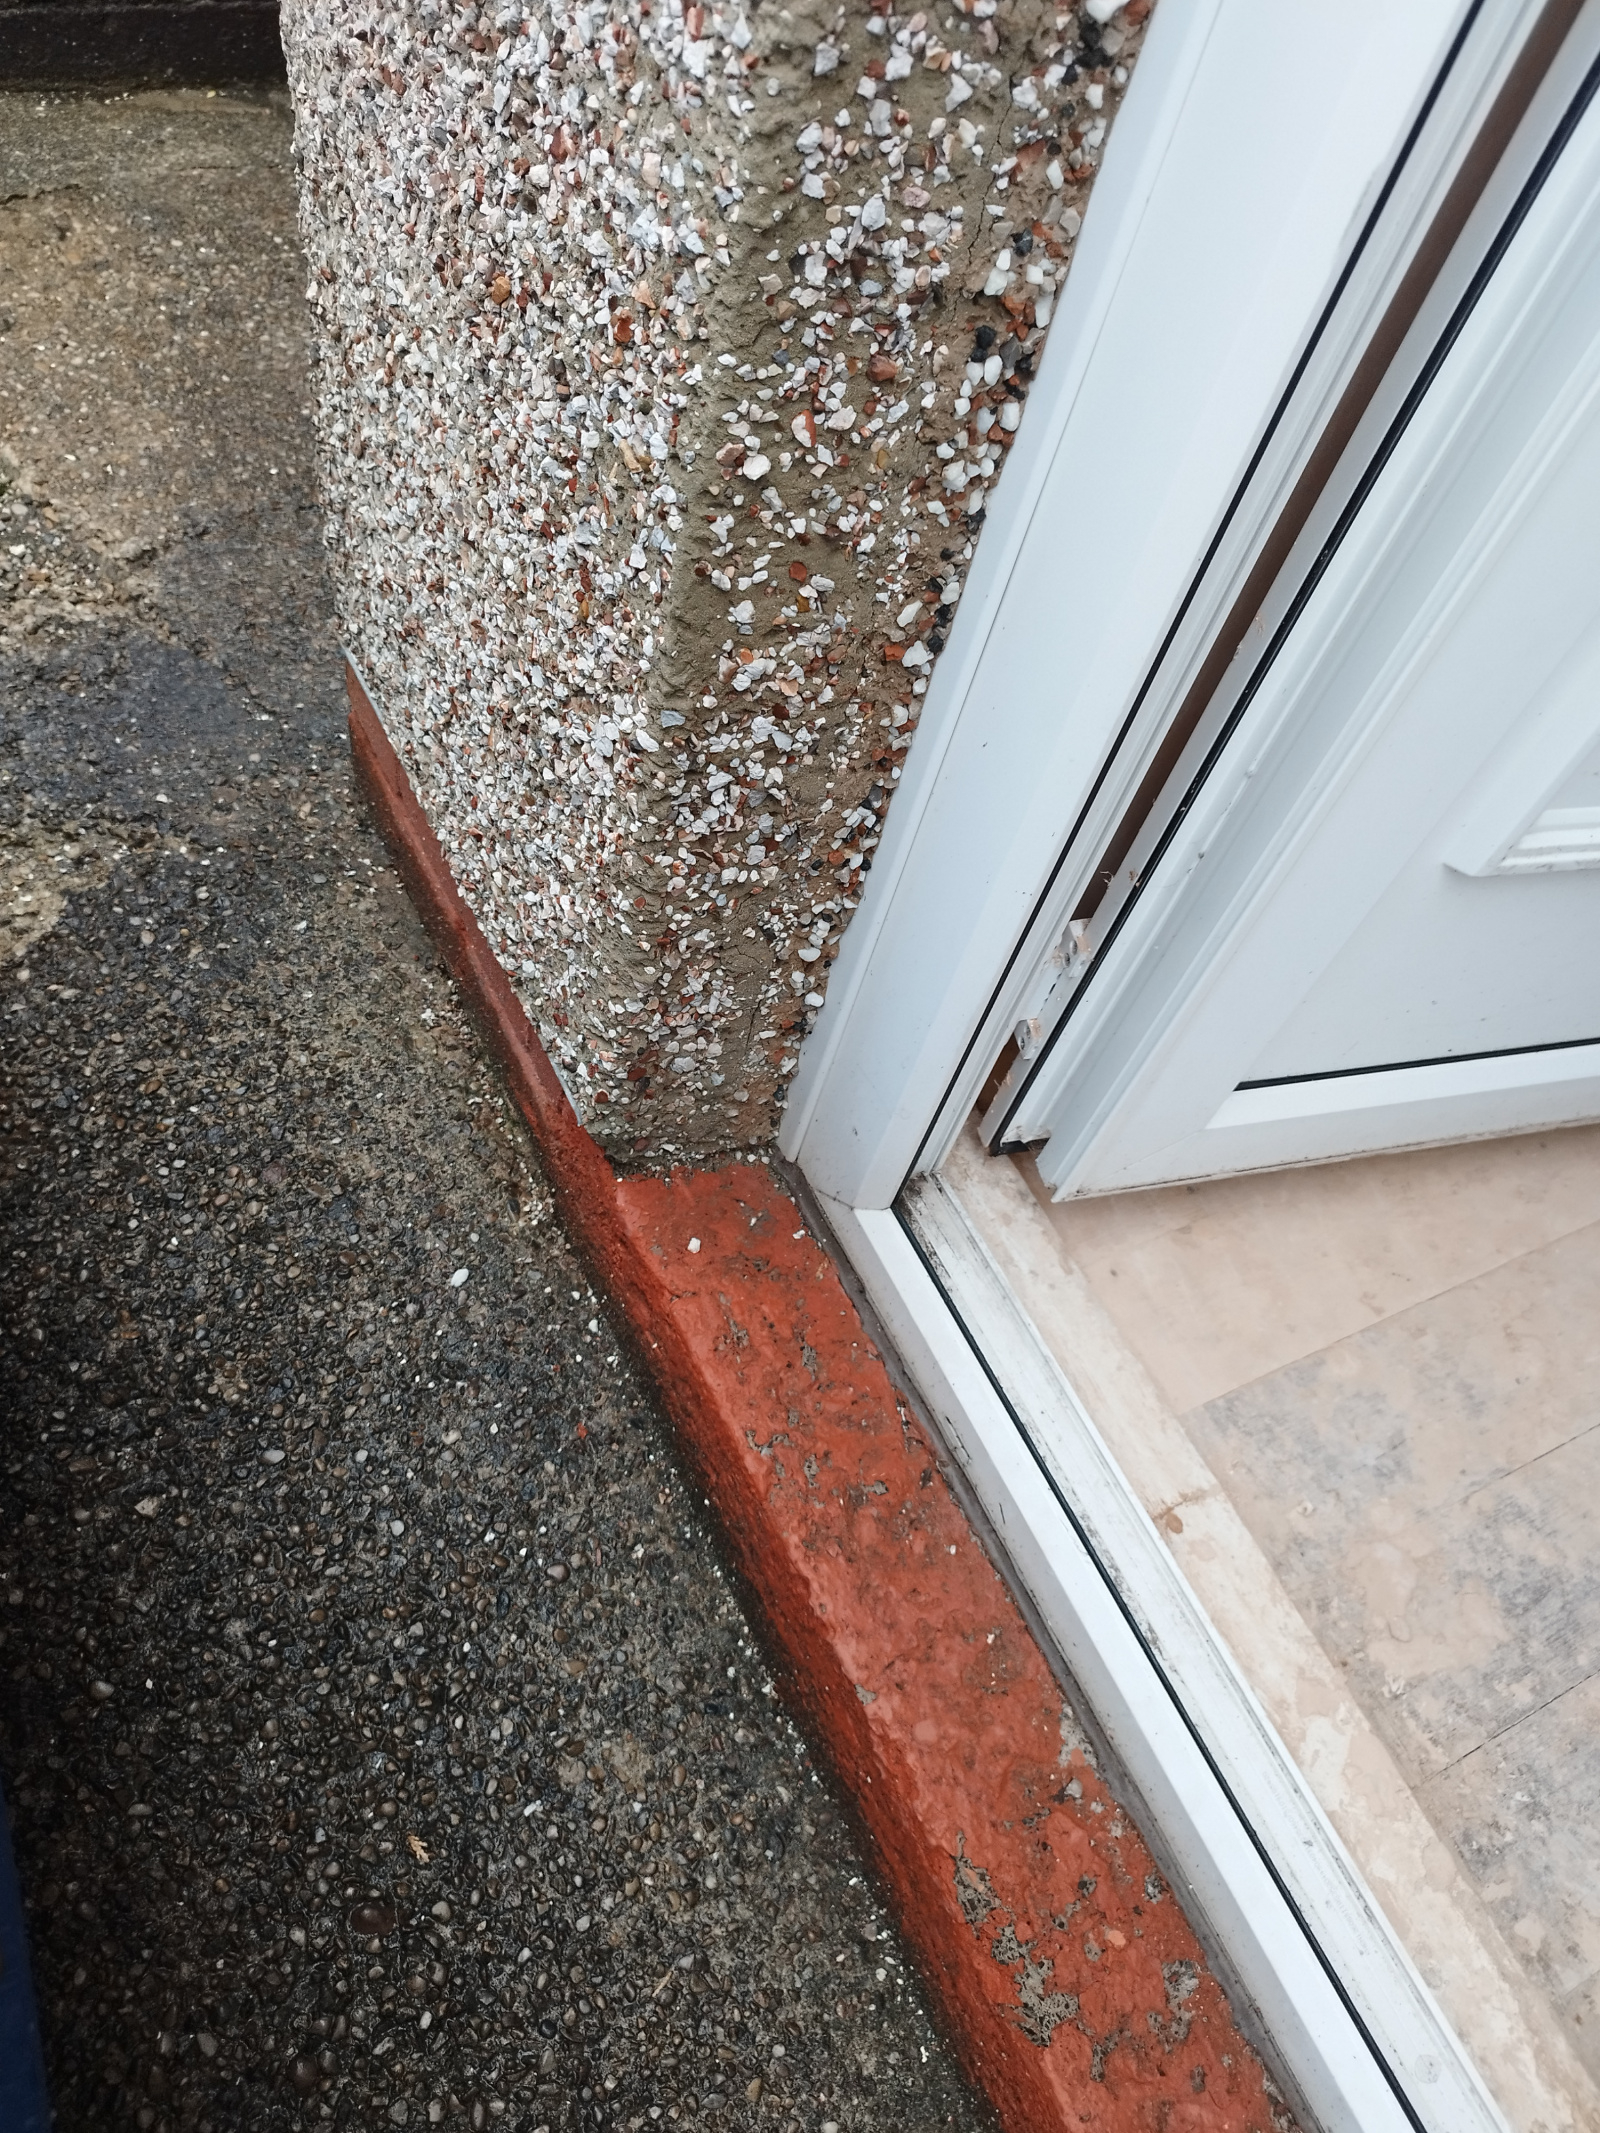
 cracks on the side of door with a grey filler 0


Confirm your email address to Create Threads and Reply

Categories
- All Categories
- 353.8K Banking & Borrowing
- 254.3K Reduce Debt & Boost Income
- 455.2K Spending & Discounts
- 246.9K Work, Benefits & Business
- 603.4K Mortgages, Homes & Bills
- 178.2K Life & Family
- 261K Travel & Transport
- 1.5M Hobbies & Leisure
- 16K Discuss & Feedback
- 37.7K Read-Only Boards