We’d like to remind Forumites to please avoid political debate on the Forum.
This is to keep it a safe and useful space for MoneySaving discussions. Threads that are – or become – political in nature may be removed in line with the Forum’s rules. Thank you for your understanding.
📨 Have you signed up to the Forum's new Email Digest yet? Get a selection of trending threads sent straight to your inbox daily, weekly or monthly!
The Forum now has a brand new text editor, adding a bunch of handy features to use when creating posts. Read more in our how-to guide
Is this dry

Sekekama
Posts: 93 Forumite


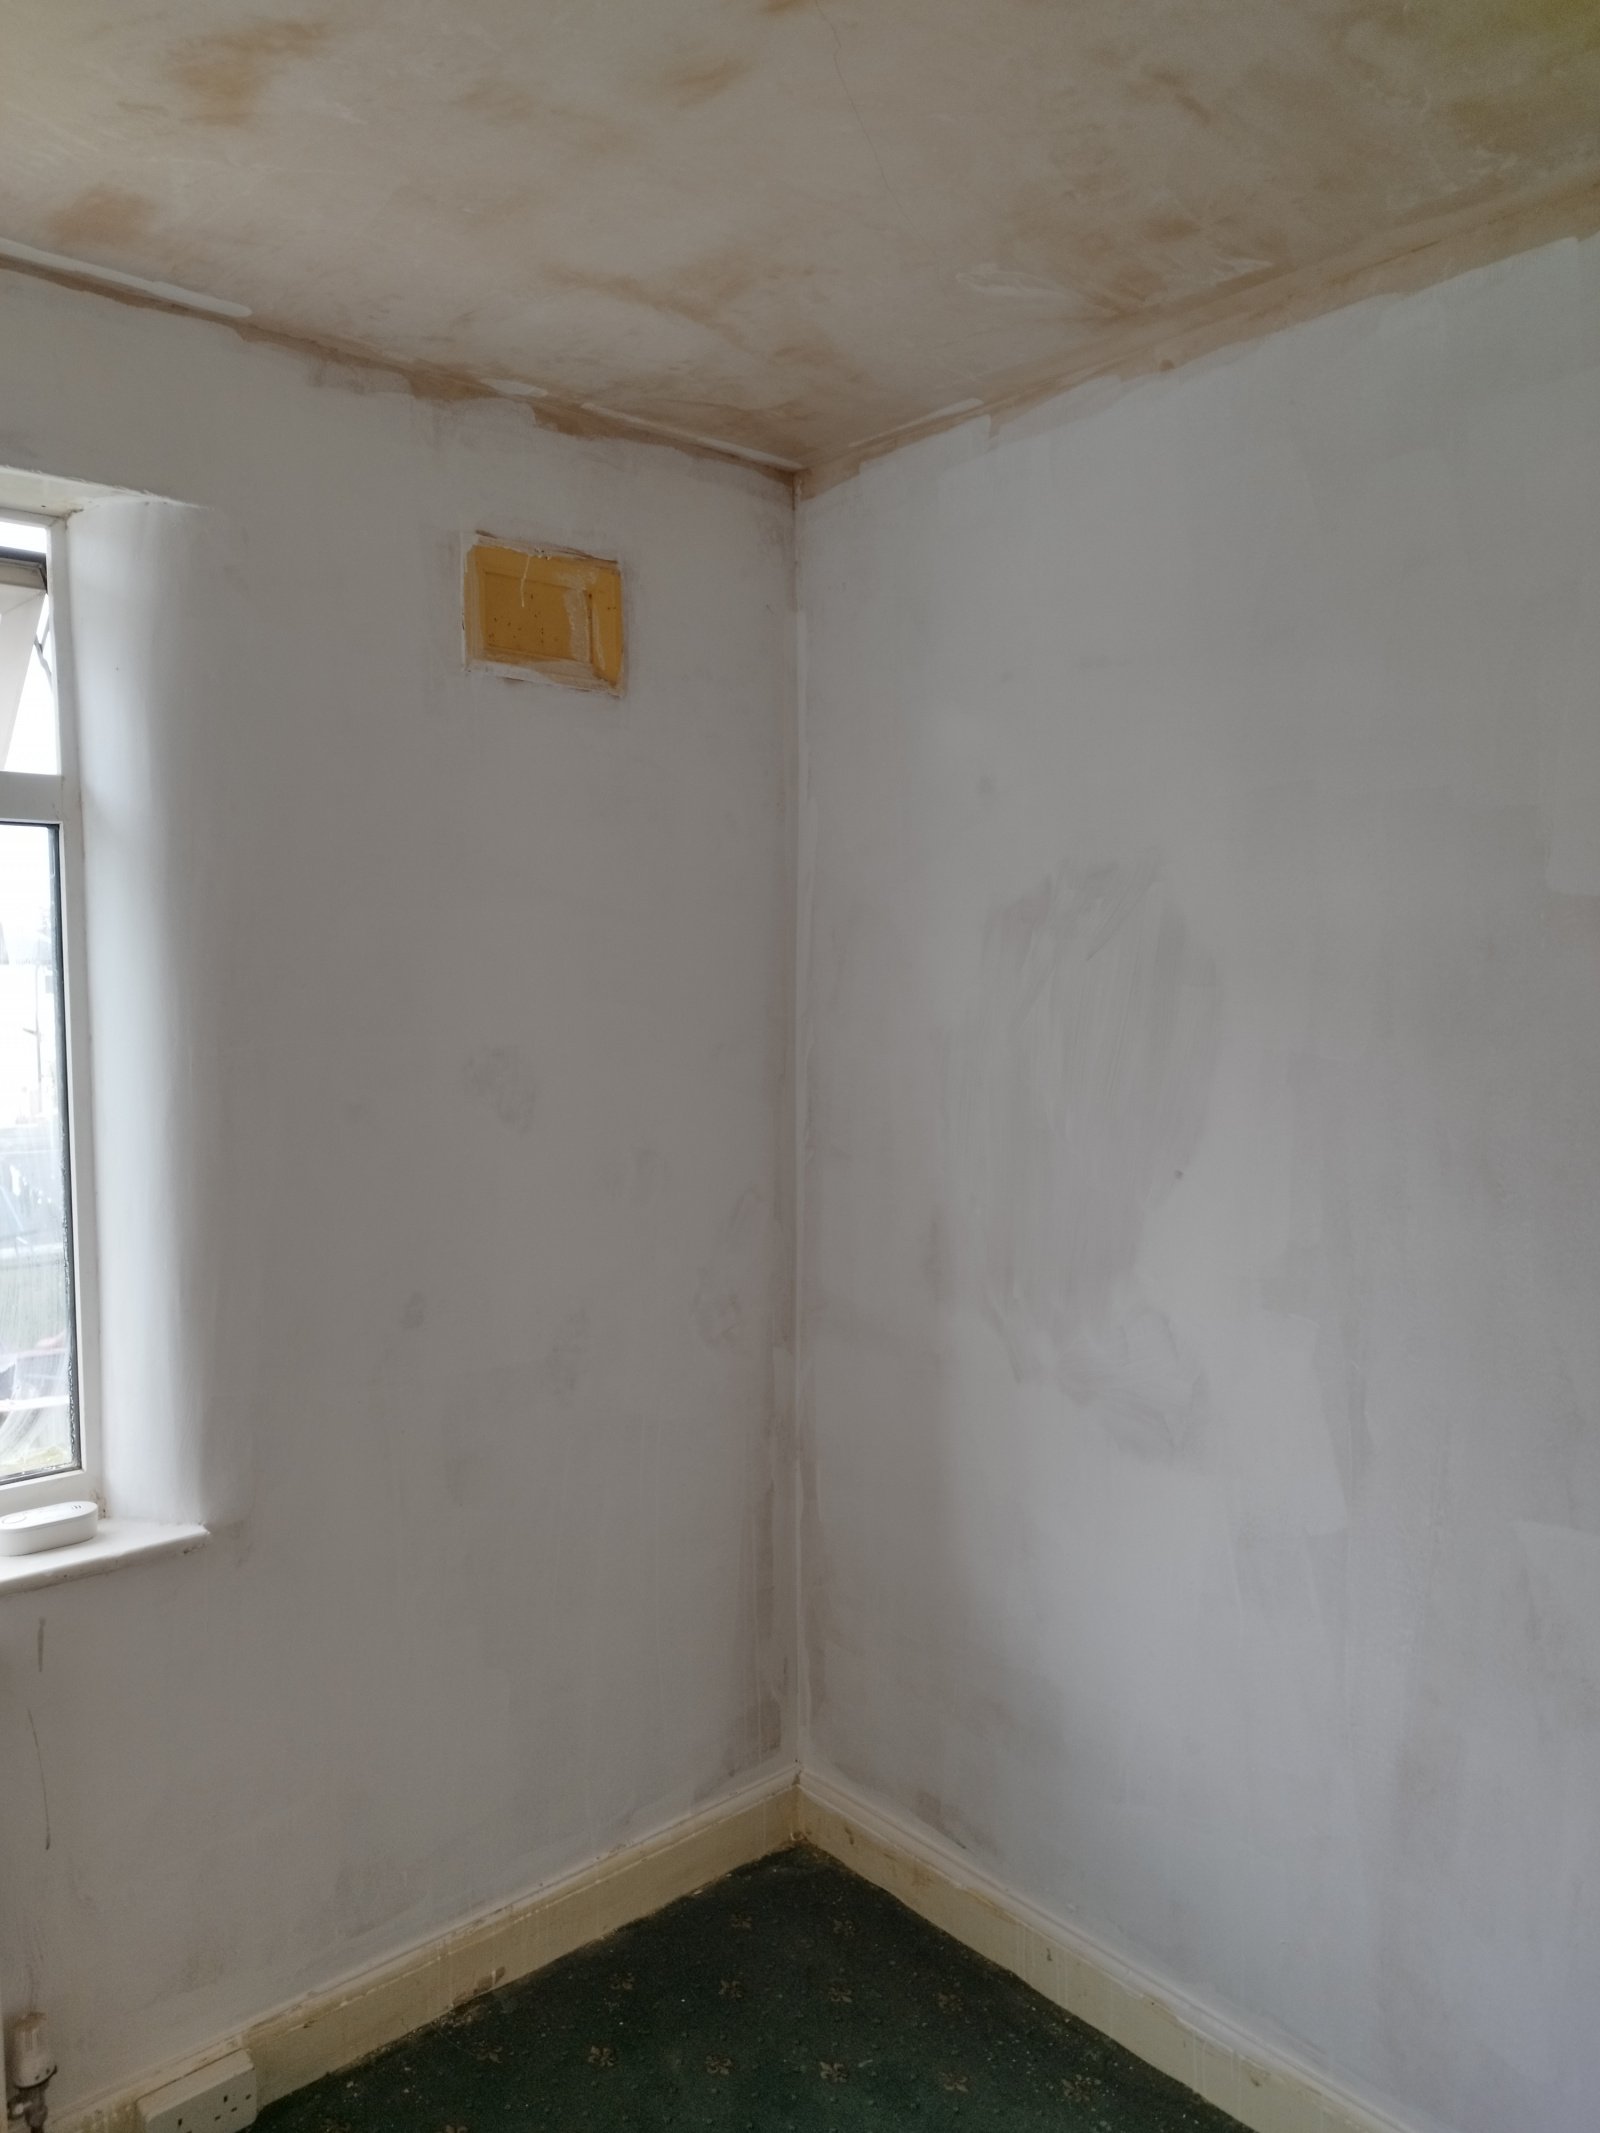
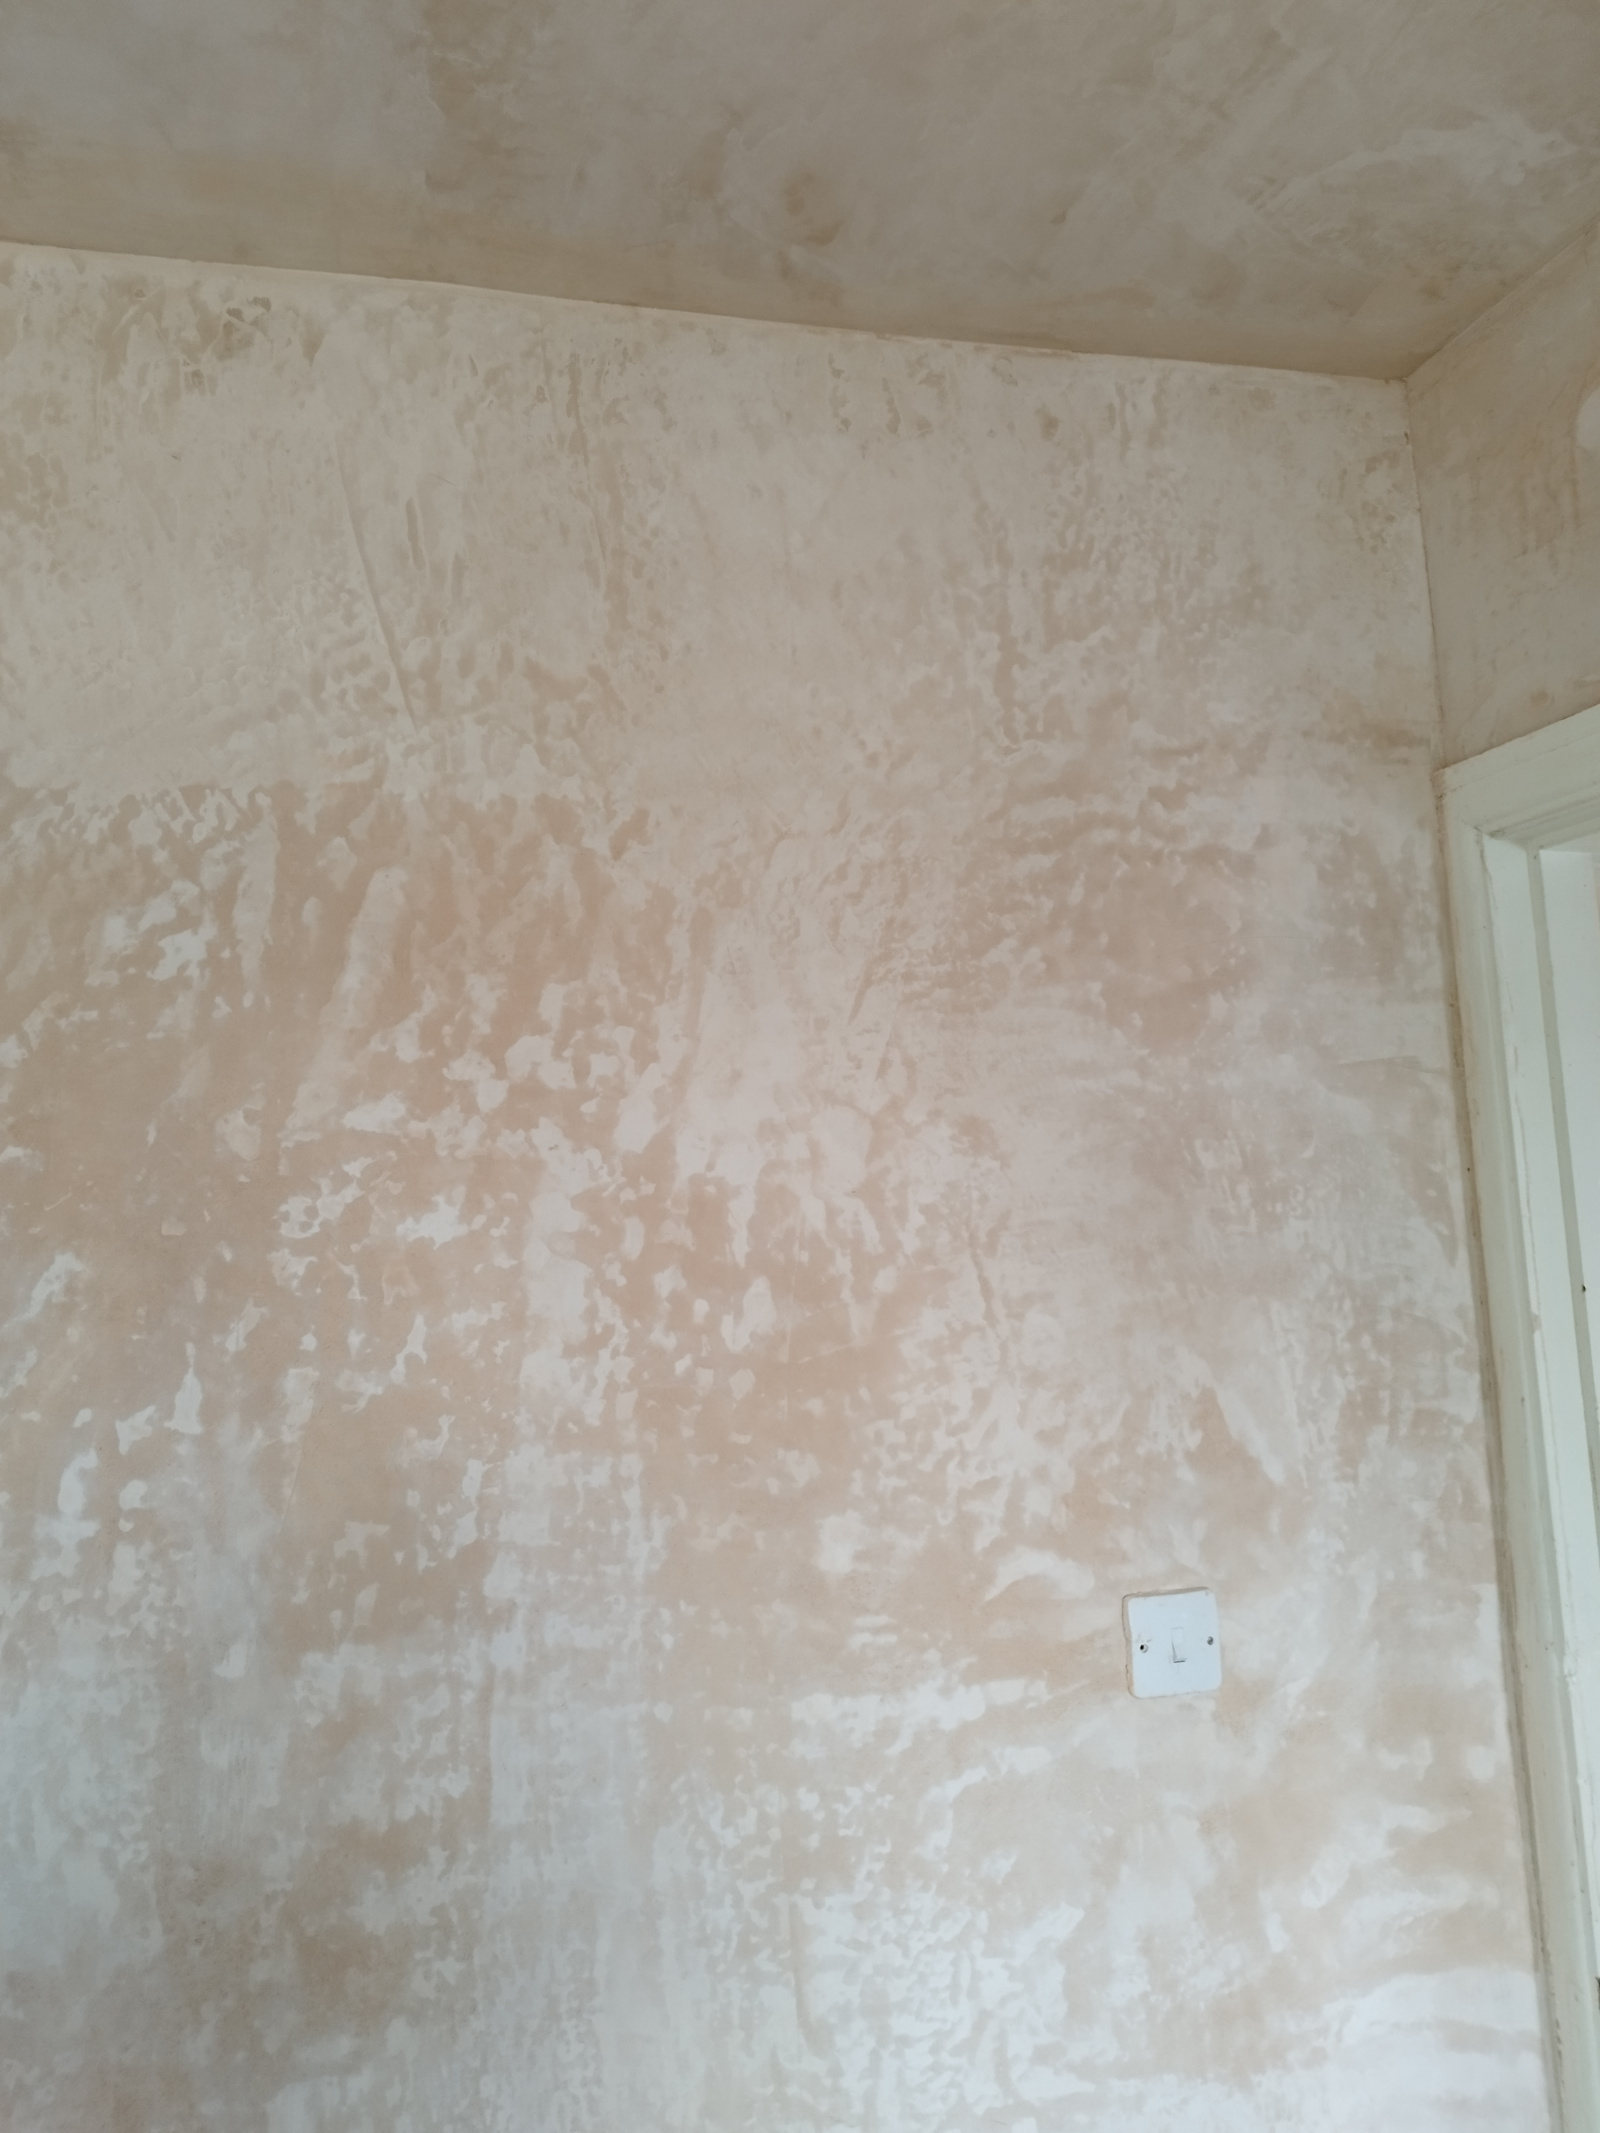
A month ago had old plaster bonded/skimmed over. Now this is the result there's some darker patches which feel dry to the touch. I've mist coated two walls and where the patches are it doesn't adhere that well. There's also a crack across the ceiling which the plasterer goes it's because an old house (1935) and old plasterboard beneath. 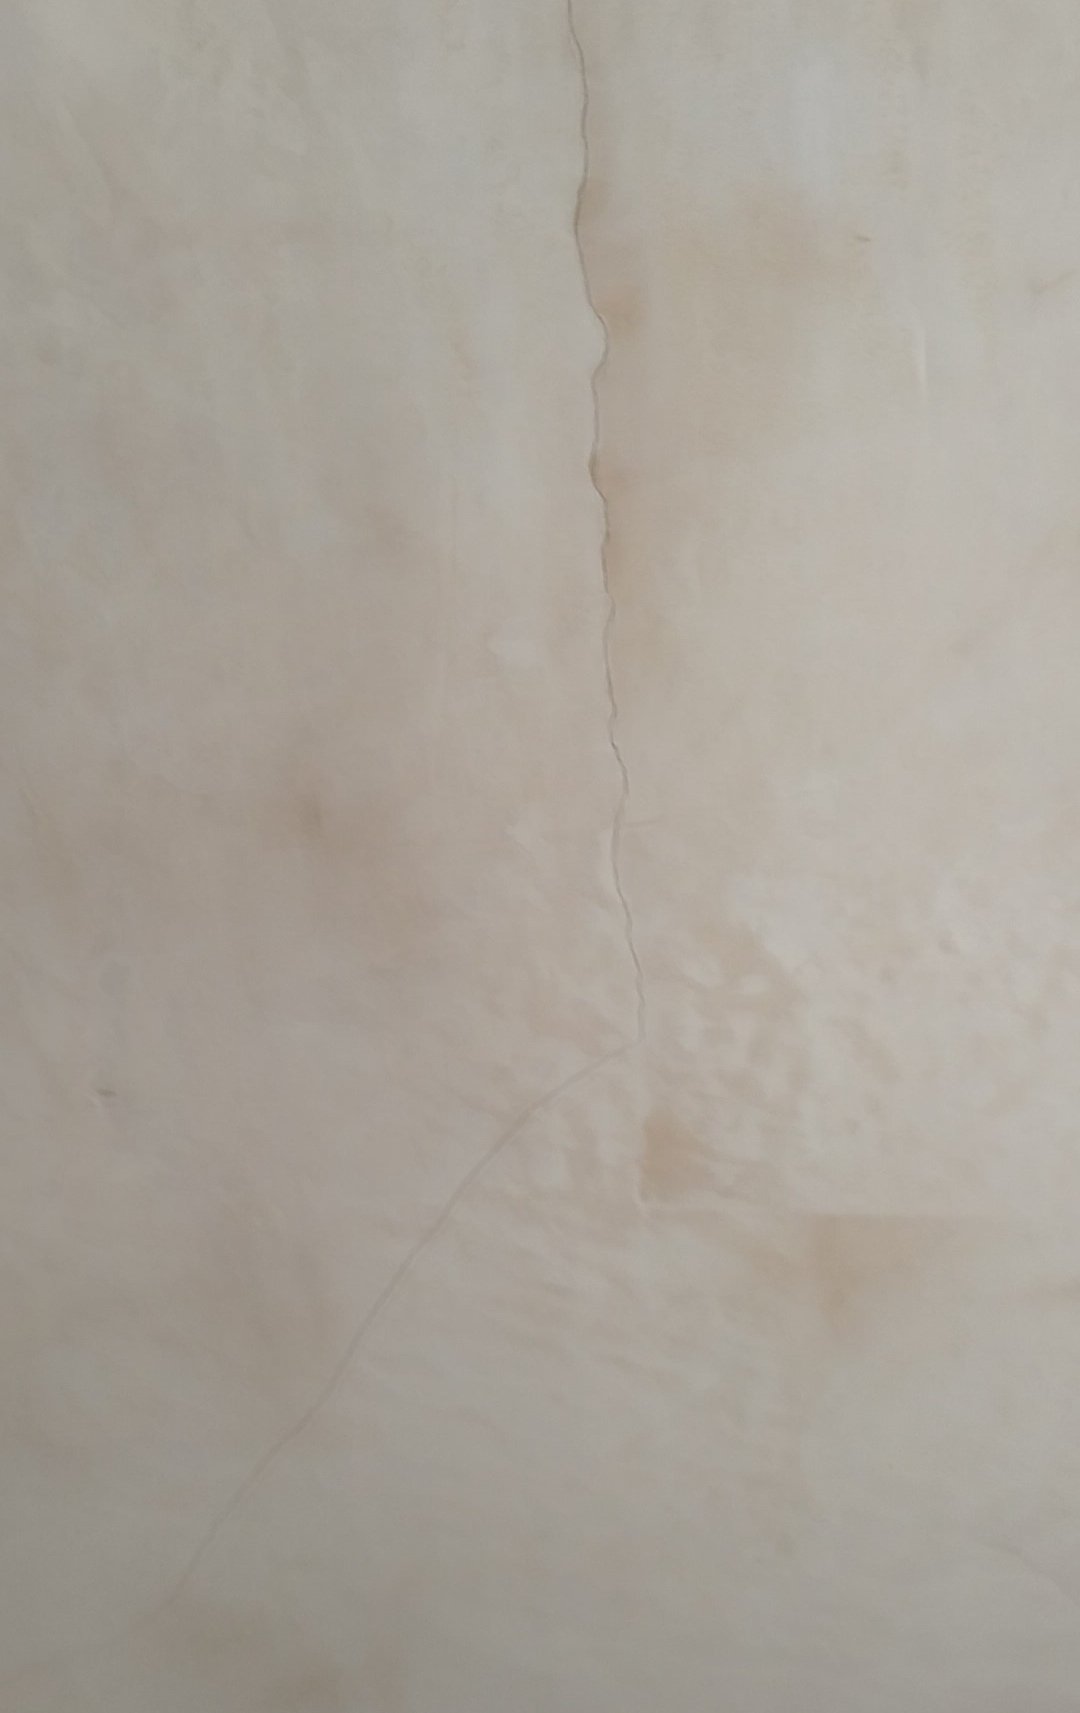
0
Comments
-
The patches might be down to the plaster being polished during the last few finishing passes - Do they look shiny ?A light sanding with 60 or 80 grit sandpaper would take the shine off. Do it by hand rather than with power tools.A 1935 house is more likely to have a lath & plaster ceiling originally. Plasterboard only really took off in the 1950s despite being invented around 1917. Skimming a lath & plaster ceiling is always going to be problematic, especially if the old ceiling has cracks in it. Scrim tape helps to hide cracks, but they will often reappear (the same applies to cracked lime plaster on walls). Not much you can do about it beyond filling the cracks and painting over - The other alternative is to take the whole ceiling down (a dirty, messy job) and fixing new plasterboard up. Some say you can just overboard with 9.5mm plasterboard, but is is a crap shoot getting screws in to the joists. Taking the old ceiling down gives you opportunity to add insulation and getting it right up to the walls. Still a very dirty and messy job.Any language construct that forces such insanity in this case should be abandoned without regrets. –
Erik Aronesty, 2014
Treasure the moments that you have. Savour them for as long as you can for they will never come back again.1 -
They are not shiny tbh ceiling cracks is hairline so can be filled with polyfilla more worried about patches especially if they show after normal coat of paint atm only mist coatedFreeBear said:The patches might be down to the plaster being polished during the last few finishing passes - Do they look shiny ?A light sanding with 60 or 80 grit sandpaper would take the shine off. Do it by hand rather than with power tools.A 1935 house is more likely to have a lath & plaster ceiling originally. Plasterboard only really took off in the 1950s despite being invented around 1917. Skimming a lath & plaster ceiling is always going to be problematic, especially if the old ceiling has cracks in it. Scrim tape helps to hide cracks, but they will often reappear (the same applies to cracked lime plaster on walls). Not much you can do about it beyond filling the cracks and painting over - The other alternative is to take the whole ceiling down (a dirty, messy job) and fixing new plasterboard up. Some say you can just overboard with 9.5mm plasterboard, but is is a crap shoot getting screws in to the joists. Taking the old ceiling down gives you opportunity to add insulation and getting it right up to the walls. Still a very dirty and messy job.0 -
Unless you intend to keep it I would lose the carpet and underlay from the room, that will improve ventilation and speed up drying out.Play with the expectation of winning not the fear of failure. S.Clarke0
-
Almost certainly it's either that they haven't fully dried out, or have been polished as FreeBear said. Over-polishing will make these patches hard, smooth, and difficult for the paint to adhere.Flat sanding block with, say, 120 grit paper, done lightly. You should soon see what the issue is when you do this; if the sanded plaster floats off as a fine powder, then chances are it's dry. And the finish revealed underneath should be an even colour, whether it was previously dark or light.Since you've gone to the expense of having it skimmed, then I think it would be worth a light going-over in any case, to get the best possible even finish.Dust mask, goggles, hairnet :-)
 0
0 -
I probably should have sanded the wall before mist coat? I've got this https://www.wickes.co.uk/Wickes-Flexible-Sanding-Sponge---Medium-Coarse/p/154894ThisIsWeird said:Almost certainly it's either that they haven't fully dried out, or have been polished as FreeBear said. Over-polishing will make these patches hard, smooth, and difficult for the paint to adhere.Flat sanding block with, say, 120 grit paper, done lightly. You should soon see what the issue is when you do this; if the sanded plaster floats off as a fine powder, then chances are it's dry. And the finish revealed underneath should be an even colour, whether it was previously dark or light.Since you've gone to the expense of having it skimmed, then I think it would be worth a light going-over in any case, to get the best possible even finish.Dust mask, goggles, hairnet :-)0 -
Sorry for confusion, was going by thread title.Play with the expectation of winning not the fear of failure. S.Clarke0
-
Sekekama said:
I probably should have sanded the wall before mist coat? I've got this https://www.wickes.co.uk/Wickes-Flexible-Sanding-Sponge---Medium-Coarse/p/154894ThisIsWeird said:Almost certainly it's either that they haven't fully dried out, or have been polished as FreeBear said. Over-polishing will make these patches hard, smooth, and difficult for the paint to adhere.Flat sanding block with, say, 120 grit paper, done lightly. You should soon see what the issue is when you do this; if the sanded plaster floats off as a fine powder, then chances are it's dry. And the finish revealed underneath should be an even colour, whether it was previously dark or light.Since you've gone to the expense of having it skimmed, then I think it would be worth a light going-over in any case, to get the best possible even finish.Dust mask, goggles, hairnet :-)All skimmed surfaces need some prep before painting. Sometimes a wipe with a damp cloth is all that's needed, but really a light-going-over with a sanding block will usually pay dividends. For this, I'd suggest the completely flat type I linked to - it'll remove all the wee high-points.Foam-types can follow existing contours, rather than help level them out, but I'm sure it did its 'cleaning' job fine. If the mist coat looks well adhered on the areas you've done, you should be ok.
0 -
Touch is a terrible way to tell is something is dry or not, human skin doesn't have any hydro receptors so we have no inert way of telling if something is wet or not and instead imply its wet based on a combination of temperature, visual cues etc, its why sometimes its really hard to tell if something is damp or cold.1 -
Any other sanding option a little block takes a long timeThisIsWeird said:Sekekama said:
I probably should have sanded the wall before mist coat? I've got this https://www.wickes.co.uk/Wickes-Flexible-Sanding-Sponge---Medium-Coarse/p/154894ThisIsWeird said:Almost certainly it's either that they haven't fully dried out, or have been polished as FreeBear said. Over-polishing will make these patches hard, smooth, and difficult for the paint to adhere.Flat sanding block with, say, 120 grit paper, done lightly. You should soon see what the issue is when you do this; if the sanded plaster floats off as a fine powder, then chances are it's dry. And the finish revealed underneath should be an even colour, whether it was previously dark or light.Since you've gone to the expense of having it skimmed, then I think it would be worth a light going-over in any case, to get the best possible even finish.Dust mask, goggles, hairnet :-)All skimmed surfaces need some prep before painting. Sometimes a wipe with a damp cloth is all that's needed, but really a light-going-over with a sanding block will usually pay dividends. For this, I'd suggest the completely flat type I linked to - it'll remove all the wee high-points.Foam-types can follow existing contours, rather than help level them out, but I'm sure it did its 'cleaning' job fine. If the mist coat looks well adhered on the areas you've done, you should be ok.0


Confirm your email address to Create Threads and Reply

Categories
- All Categories
- 353.5K Banking & Borrowing
- 254.1K Reduce Debt & Boost Income
- 455K Spending & Discounts
- 246.6K Work, Benefits & Business
- 602.9K Mortgages, Homes & Bills
- 178.1K Life & Family
- 260.6K Travel & Transport
- 1.5M Hobbies & Leisure
- 16K Discuss & Feedback
- 37.7K Read-Only Boards