We’d like to remind Forumites to please avoid political debate on the Forum.
This is to keep it a safe and useful space for MoneySaving discussions. Threads that are – or become – political in nature may be removed in line with the Forum’s rules. Thank you for your understanding.
📨 Have you signed up to the Forum's new Email Digest yet? Get a selection of trending threads sent straight to your inbox daily, weekly or monthly!
The Forum now has a brand new text editor, adding a bunch of handy features to use when creating posts. Read more in our how-to guide
Boarding up a ceiling gap after Velux window removal advice

nero33
Posts: 265 Forumite


Hi. I've had the window removed and am about to board up the gap left with plasterboard. So I need to make a timber frame so I can screw the new plasterboard on.
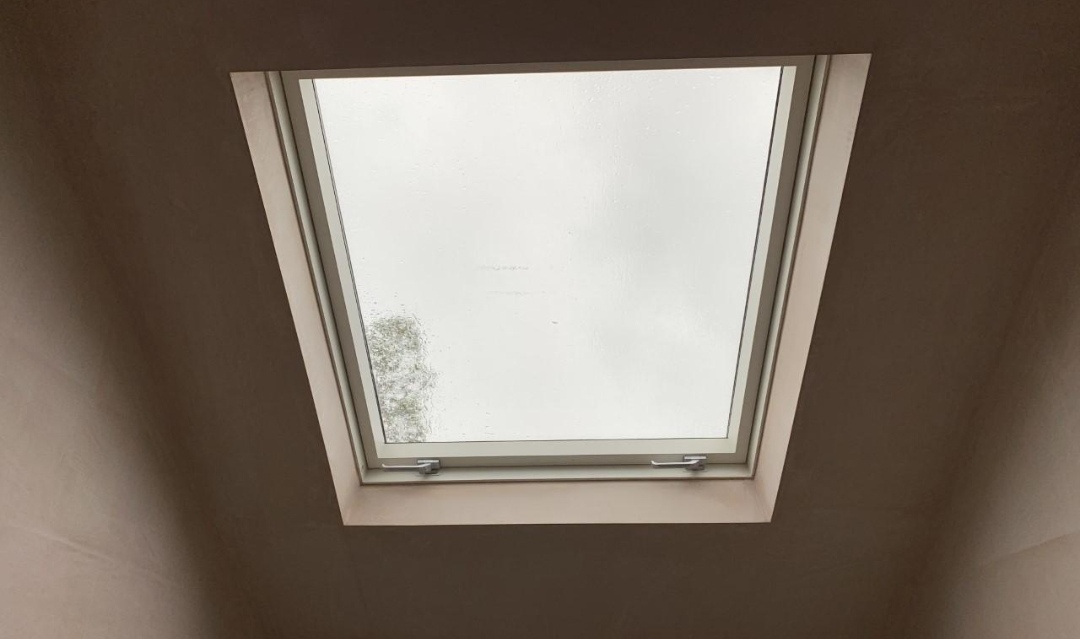
My only concern is the 3x2 timber I'm going to use to screw into the sides of the existing ceiling plaster board.
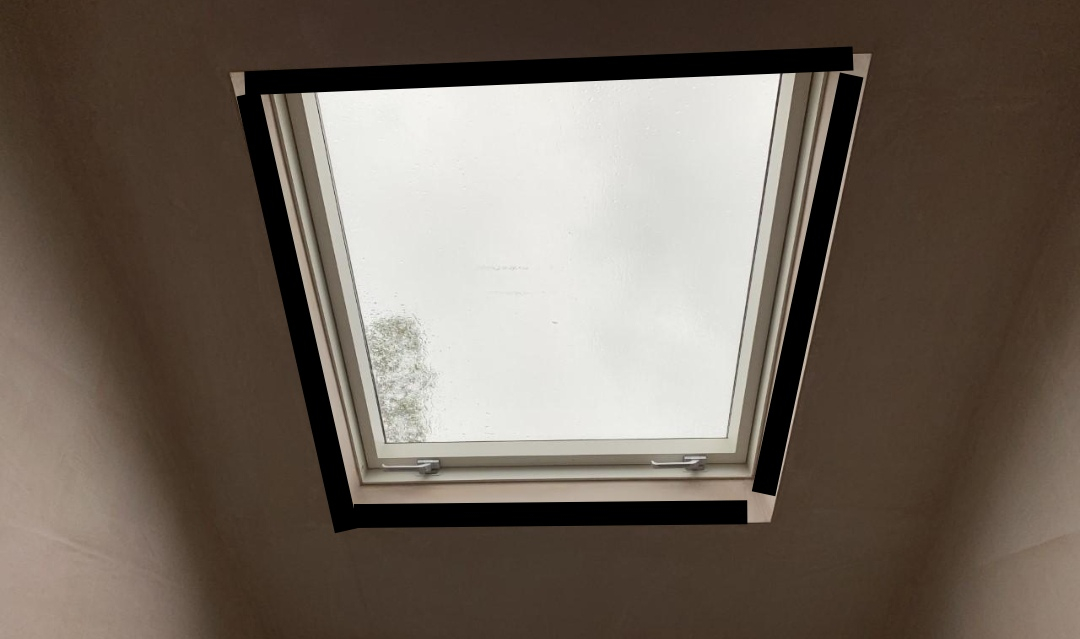
The parts/edges where I'll attach the timber (marked in black below) has the metal beading all along it and then boarded and skimmed over.
Can I screw holes into this metal beading to fit my Rawl plugs? Never attempted it before.
The timber is 45mm thickness so what would be the best size screw to use?
Many Thanks
My only concern is the 3x2 timber I'm going to use to screw into the sides of the existing ceiling plaster board.
The parts/edges where I'll attach the timber (marked in black below) has the metal beading all along it and then boarded and skimmed over.
Can I screw holes into this metal beading to fit my Rawl plugs? Never attempted it before.
The timber is 45mm thickness so what would be the best size screw to use?
Many Thanks
0
Comments
-
I would imagine that there is already a stout timber framing around the opening, so no need for Rawl plugs. I'd suggest removing the plasterboard from inside the reveal and ~12mm around the edge. Don't worry about the corner bead as it is surplus to requirements. A single 3x2 in the middle of the opening should suffice, and perhaps some short lengths of 2x1 batten around the edges. Aim for 25-30mm of engagement of the screws in the wood you are screwing in to. So for a 25mm thick bit of timber being fixed to the side, 50mm screws will do (but if you don't remove the plasterboard, 65-70mm screws).
Any language construct that forces such insanity in this case should be abandoned without regrets. –
Erik Aronesty, 2014
Treasure the moments that you have. Savour them for as long as you can for they will never come back again.1 -
As Freebear says.Assuming there's a gap between the inner wall + insulation and the outer roof for ventilation, you will want to maintain this, most likely in a vertical direction. When you remove the p'board from the reveal, you should be able to see any such gap - look to continue it from the bottom to the top.Then add insulation to your equation - you don't want a cold panel.If you run a craft knife around the perimeter of the opening, just outside where the metal corner bead sits, and just deep enough to cut into the plaster skim, you should be able to prise away the beading along with the plasterboard reveals. With that line of skim removed, it will leave a nice 'step' down of around 3mm, and you'd set your new frame so that the new plasterboard panel you fit sits flush with this lower step. That make sense?When you come to skim over the panel, you bed a mesh jointing tape in this step, and it covers the joint between the new board and the wall. Then skim over.
1 -
Velux windows are usually fully trimmed all round so no through ventilation.ThisIsWeird said:As Freebear says.Assuming there's a gap between the inner wall + insulation and the outer roof for ventilation, you will want to maintain this, most likely in a vertical direction. When you remove the p'board from the reveal, you should be able to see any such gap - look to continue it from the bottom to the top.Then add insulation to your equation - you don't want a cold panel.If you run a craft knife around the perimeter of the opening, just outside where the metal corner bead sits, and just deep enough to cut into the plaster skim, you should be able to prise away the beading along with the plasterboard reveals. With that line of skim removed, it will leave a nice 'step' down of around 3mm, and you'd set your new frame so that the new plasterboard panel you fit sits flush with this lower step. That make sense?When you come to skim over the panel, you bed a mesh jointing tape in this step, and it covers the joint between the new board and the wall. Then skim over.
The bottom and top of the window would have timber of the same depth as the rafters as this would be supporting a rafter coming up to meet the window and continuing to the ridge beyond window
1 -
You say you have had the window removed did they not do the nesssary joinery work to make good the hole which would be supporting the felt and tilesnero33 said:Hi. I've had the window removed and am about to board up the gap left with plasterboard. So I need to make a timber frame so I can screw the new plasterboard on.
My only concern is the 3x2 timber I'm going to use to screw into the sides of the existing ceiling plaster board.
The parts/edges where I'll attach the timber (marked in black below) has the metal beading all along it and then boarded and skimmed over.
Can I screw holes into this metal beading to fit my Rawl plugs? Never attempted it before.
The timber is 45mm thickness so what would be the best size screw to use?
Many Thanks0 -
35har1old said:
Velux windows are usually fully trimmed all round so no through ventilation.ThisIsWeird said:As Freebear says.Assuming there's a gap between the inner wall + insulation and the outer roof for ventilation, you will want to maintain this, most likely in a vertical direction. When you remove the p'board from the reveal, you should be able to see any such gap - look to continue it from the bottom to the top.Then add insulation to your equation - you don't want a cold panel.If you run a craft knife around the perimeter of the opening, just outside where the metal corner bead sits, and just deep enough to cut into the plaster skim, you should be able to prise away the beading along with the plasterboard reveals. With that line of skim removed, it will leave a nice 'step' down of around 3mm, and you'd set your new frame so that the new plasterboard panel you fit sits flush with this lower step. That make sense?When you come to skim over the panel, you bed a mesh jointing tape in this step, and it covers the joint between the new board and the wall. Then skim over.
The bottom and top of the window would have timber of the same depth as the rafters as this would be supporting a rafter coming up to meet the window and continuing to the ridge beyond windowThanks.Once the window is removed, tho', wouldn't a through-flow be recommended to vent the eaves to the top like the areas to the window's sides?I don't know - just assumed.0 -
Thank you everyone. Very useful advice0


Confirm your email address to Create Threads and Reply

Categories
- All Categories
- 354.1K Banking & Borrowing
- 254.3K Reduce Debt & Boost Income
- 455.3K Spending & Discounts
- 247.1K Work, Benefits & Business
- 603.7K Mortgages, Homes & Bills
- 178.3K Life & Family
- 261.2K Travel & Transport
- 1.5M Hobbies & Leisure
- 16.1K Discuss & Feedback
- 37.7K Read-Only Boards