We’d like to remind Forumites to please avoid political debate on the Forum.
This is to keep it a safe and useful space for MoneySaving discussions. Threads that are – or become – political in nature may be removed in line with the Forum’s rules. Thank you for your understanding.
📨 Have you signed up to the Forum's new Email Digest yet? Get a selection of trending threads sent straight to your inbox daily, weekly or monthly!
The Forum now has a brand new text editor, adding a bunch of handy features to use when creating posts. Read more in our how-to guide
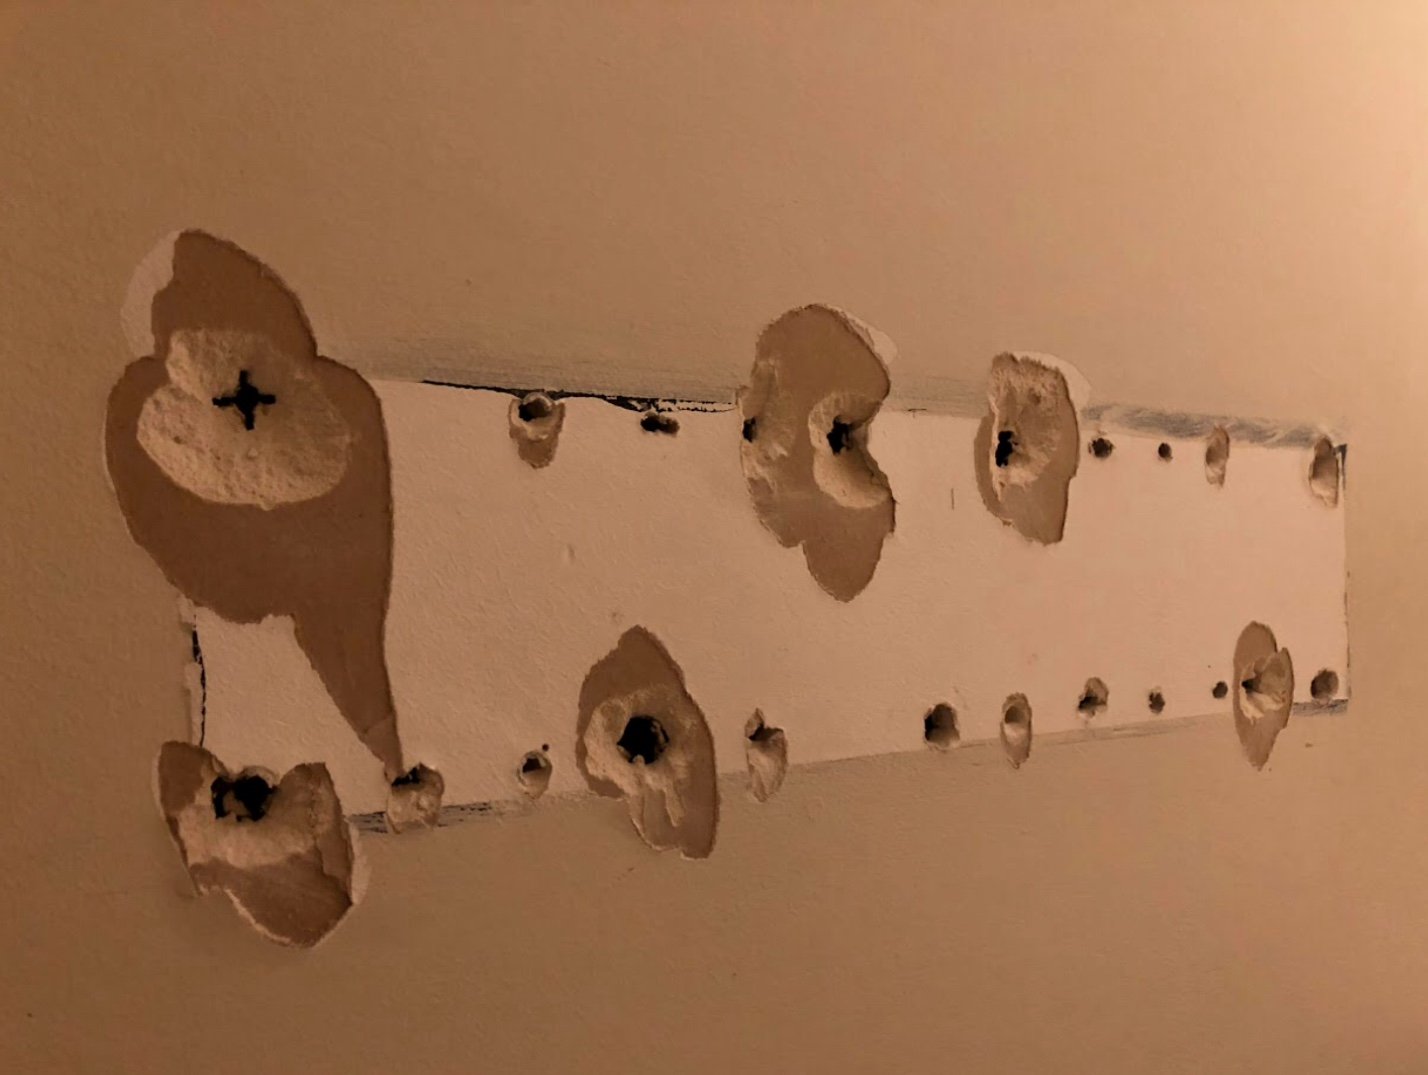
Made a mess of the wall when taking down a TV bracket, how to best repair it?
Comments
-
Lawdie, if you need to go 'incognito', then blimey.0
-
Hi,jings, maybe the whole wall has collapsed now.0
-
OP's wall.3 -
Are you sure that’s the Ops wall , and not the side of a Russian military vehicle.DanDare999 said:
OP's wall.A thankyou is payment enough .4 -
Whoops, my bad! I thought it uploaded the image here when I pasted it. Thanks for your help guys
") 0
0 -
That's an easy DIY repair job, then.First make sure that nothing is sticking up above wall surface level - no plastic wall plugs, no bits of adhesive, no loose paper edges. Then check the edges and remove any loose bits of plaster skim - I think there's a few bits there. A quick wipe-over using 180 grit sandpaper on a flat block will ensure it's all below 'wall' surface level.Then it's a tub of filler - something like this will do: https://www.screwfix.com/p/no-nonsense-interior-ready-mixed-filler-white-off-white-1kg/555gtExpect to have to fill the deeper holes in a couple of stages at least. Ie, fill the screw holes until up to the bottom of the 'crater' level, and allow to dry. Then apply to fill the craters and the missing plaster skim - use a wide-blade filling knife, finishing off at a low angle.Allow to dry fully. Give it a sand using ~180 grit, wipe clean, and almost certainly it'll need a further light skim to fill the holidays.Sometimes applying a thin layer over ready-dry filler/plaster will suck the moisture out of it and make it crumbly, so be prepared to lightly dampen the receiving layer first if needed.First coat of emulsion paint should be slightly thinned - 10-ish % with water. Allow to dry fully before applying subsequent coats.It's a 'small' job, but can take a while - most of it waiting!
0 -
Yes because it's the link to the image which most of us seem to not have permissions to view...DanDare999 said:
Your link just says bad request.greensalad said:
They have used Google Photos to share the image but your browser has permissions where others do not. Presumably the permissions have changed since you saw the image, and you may even continue to see the image while it is cached for you.DanDare999 said:
There's a clear picture of the wall and has been since the post went up. Maybe there's a problem your end.Le_Kirk said:Your photo of a No Entry sign does not really tell us much about the problem! Looks like there is a problem with the link to the site you used to host it.
Try opening this URL on an incognito browser window and you will see the issue: https://lh3.googleusercontent.com/C4CSe_pEd6KNVCdX96jnDQ9nOWDLB6X6MWgpwURB49O9PR5g1eE5hmikj-ADVuA2L6t8ZUmFv-Eeuzy7zu4fDoPMayCITXErpWPaVL6BknNUjpEz3fzRr6d-gsMOzM8QlSxFCwhlhOHeB2GFXUwaqQmHKAZsa2Y9PmTcO0ARCyIkennn78NoTxzHJLpf4I70bucnfRQKTrE7Ok-l34zEB9m8CG46io660jfirCcTDrGf0pXS_xgB56CXL_2n_tXwB1y_W_jmouJ1_UhmG-VTX-qfGxP6lcdasfBBM721bA38t_P-fhU3kVttjMjwLc5ce22omIE1EdG8otZo2NPkNdMa346ydIHN-Z_SUT73Sjhd5nXCS-0SJ9nLsSG8oErsIQOKaSiaqsxcRg_2aAWTZhXBQT4DsRfzu-VJtRq25ouJ2_G5PirpNwzbHHlNvdfT2U-2p_qzi7D6257ZmkZ63zGgsBUNnreaMDUaMgdtO_ENfMLBTGqIrO76nItsy1AT0vZIpcdB0Iq2OtLb2_miMsrfzMCDrIucMhXfF1squ0QhmUpfi3piWzbZkzaYCPwRAfzSAaULYwrAkv8z9_PzOgX_Wb9-aAirM825cqR_jePHYqd_nBx6RVO84bX2FsD01LTb5hghmcrFgYLPkBtsTuoc7jOmEnqqqvvfIRwx1OnzlJc3acefKysRFI6lRkQP3UYGzJWdEMWWBdcvO4Wj8f_arfzYDo4uCOq7dGpgwf8r-_hIFTCPUBeCcTmVHbkdlPow4V8j_KvJLj9ilF1PgAi_Jd3GEaFv_eYVwHO6IfurUGpQoUzz4tm-7YwLbM9Mkpnm3YnyVz5HKNgjDJyxqj66Y_ZYzvKrb6but2-1RlmPTlb4Dm4SaX2EKZRsv8Nq4n9emRk20-QMYWPJfyE1vpxJHokMNpG62piVSaLQ_CdD-5dBAw=w1227-h920-no?authuser=00 -
Hi,worked for me, when it was sorted.
0 -
Can see your new image. I've filled worse!
I personally highly recommend "Make Good Jointing and Filling Compound". Having bought a house this year I'm no stranger to every type of Polyfill available, and it's been the best. It's very thin, which makes it perfect for covering large surface areas like you have here.
Get yourself a tub of it (I got mine from Screwfix), and a flexible plastic filling knife. Pick off every loose bit of wall you can, give the area a gentle sand then slap on the filler with the flexible knife. You might do it twice but I haven't had to. Sand it all off with a nice fine grit paper. Should be good enough to paint!1


Confirm your email address to Create Threads and Reply

Categories
- All Categories
- 354.6K Banking & Borrowing
- 254.5K Reduce Debt & Boost Income
- 455.5K Spending & Discounts
- 247.5K Work, Benefits & Business
- 604.4K Mortgages, Homes & Bills
- 178.6K Life & Family
- 261.9K Travel & Transport
- 1.5M Hobbies & Leisure
- 16.1K Discuss & Feedback
- 37.7K Read-Only Boards