We’d like to remind Forumites to please avoid political debate on the Forum.
This is to keep it a safe and useful space for MoneySaving discussions. Threads that are – or become – political in nature may be removed in line with the Forum’s rules. Thank you for your understanding.
📨 Have you signed up to the Forum's new Email Digest yet? Get a selection of trending threads sent straight to your inbox daily, weekly or monthly!
Lining Garage for Soundproofing on a Budget
Comments
-
Ideally you should isolate the inner walls from the outer else the sound will be conducted. Think of a box within a box, that's how recording studios construct sound proof rooms. Google some how to videos on studios. Although two layers of sound board (dense plasterboard, it's blue) will be better than one, leaving an airgap between them will be much better but the key will be isolating your timber frame from the existing building so that the sound waves hitting your new walls isn't immediately transmitted to the outside fabric. Or buy some really expensive headphones, they will be cheaper.
Signature on holiday for two weeks1 -
Those are good points, thanks! I did put a bead of silicone along the bottom of the door after drilling through and screwing it to the floor. Hopefully that and the brush strip on the sides and top should keep most water out.Apodemus said:Perhaps too late to suggest this, but have you sealed the bottom edge of the door? Wind-blown rain can get under a garage door, and while this can normally just dry out in the garage, the bottom edge of your framing might get wet.
Indeed the framing may well be exposed to condensation from the concrete slab and it is quite possible that the slab will become damp under the floor covering, so it might be prudent to put a strip of damp course material under the timber framing.
I also used the flooring and some epdm sheet offcuts as a DPC under the frame so the wood is a few mm off the concrete.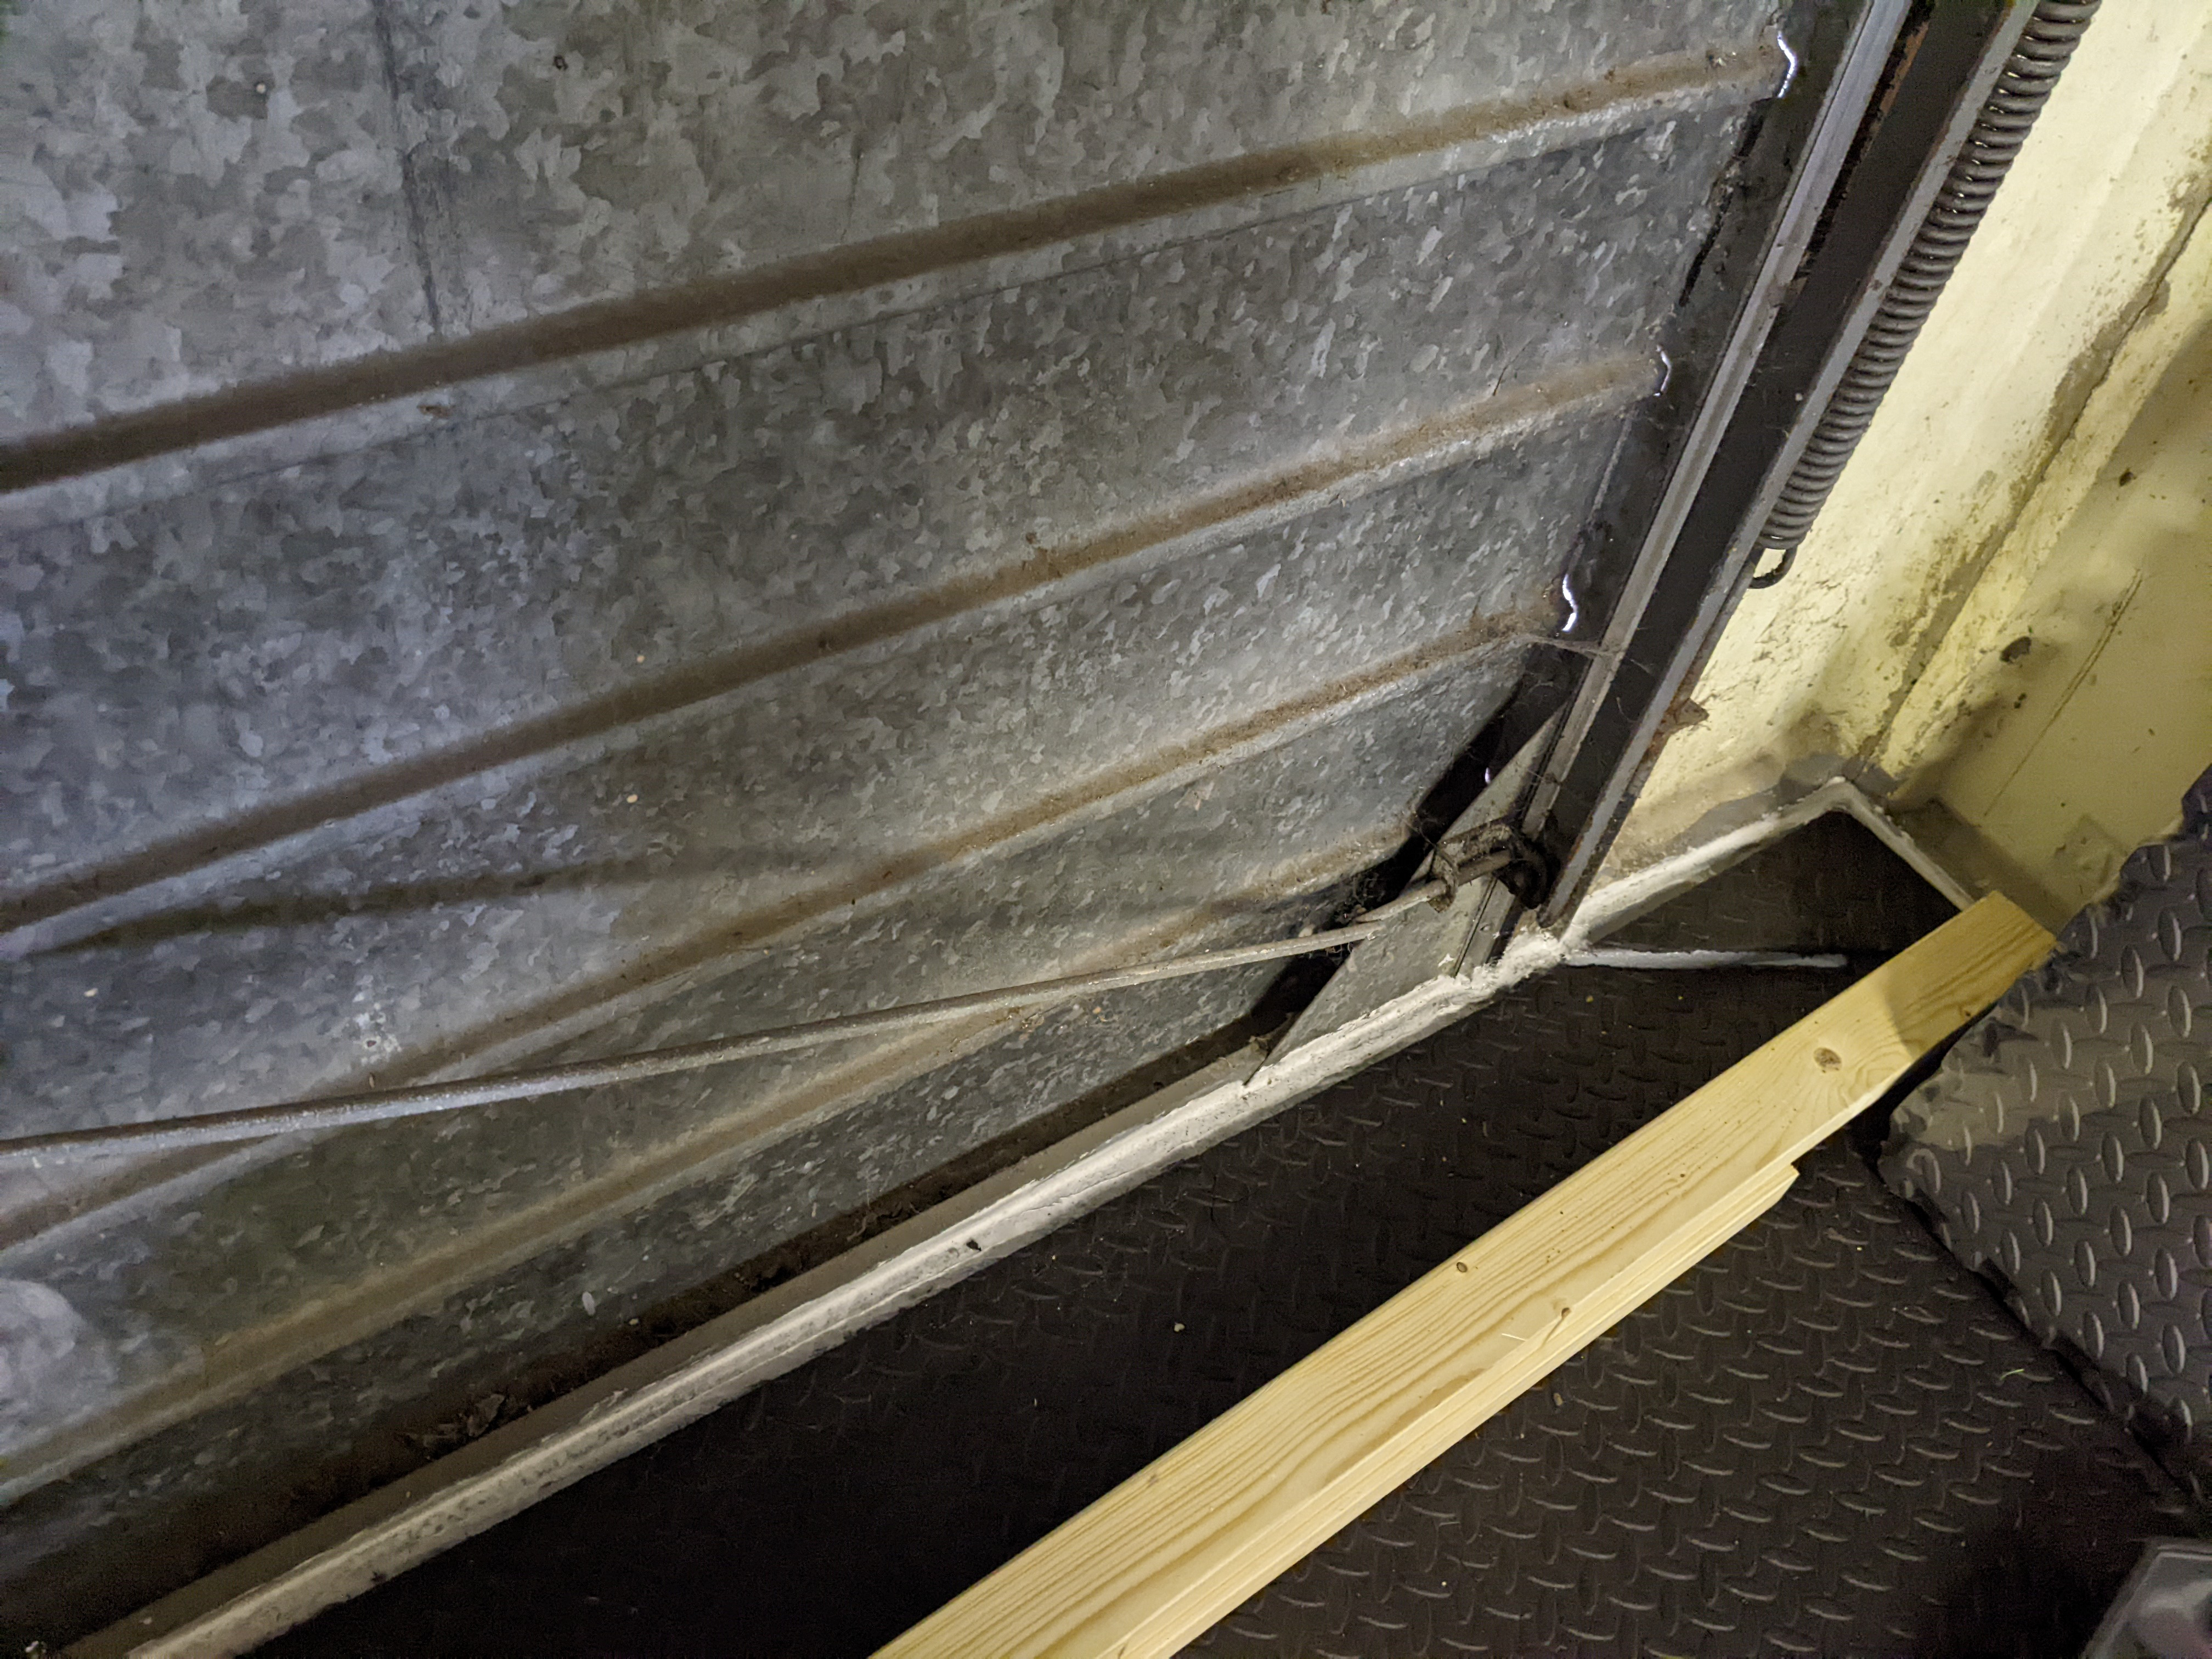
1 -
So a fibreglass tape instead of paper? On the wickes site it suggested a paper based tape. I don't know why you would want one over the other but fibreglass tape does seem like it would be more durable.FreeBear said:Maxson said: Are these the right things for filling in the tapered edge joints?Leave a gap between each board as you fix it up, typically 3-5mm. Or you can apply a bit of the jointing compound to the edge of the board already fixed up before sliding the next one in to place (gets the jointing compound right in to the gap). Before the compound has dried, run a length of mesh tape along the join, A thin smear of jointing compound over the top applied with a wide spatula or jointing knife will then fill the tapered edge.If you want a real smooth finish, have a look at wet sponge sanding - Basically, take a damp sponge float, and rub it over the dried compound to smooth it out. No dust compared to dry sanding.
I'll have a look at wet sponge sanding.
Thanks for the tips!0 -
I'm trying to minimise the contact between the framing and the existing structure but I do have to attach it to the roof timbers in places at least for now to stop it falling down. I intend to use silicone between layers as a cheaper alternative to that green glue. Anything rubbery will absorb energy.Mutton_Geoff said:Ideally you should isolate the inner walls from the outer else the sound will be conducted. Think of a box within a box, that's how recording studios construct sound proof rooms. Google some how to videos on studios. Although two layers of sound board (dense plasterboard, it's blue) will be better than one, leaving an airgap between them will be much better but the key will be isolating your timber frame from the existing building so that the sound waves hitting your new walls isn't immediately transmitted to the outside fabric. Or buy some really expensive headphones, they will be cheaper.0 -
A bit late to this but I have to say that I'm amazed at the quality of knowledge and advice on this thread - usually this forum is full of dodgy advice when it comes to soundproofing but the advice here is pretty much spot on. I've built recording studios and made all the mistakes going to start with, although the latest one has excellent soundproofing thanks to all the lessons learned.
The only thing that I would add is that it would help to have some kind of flexible layer where your studs meet the floor. I used carpet underlay made from rubber crumbs. And resist the temptation to attach anything to the outer structure of the garage. This will destroy all your hard work and drastically reduce the soundproofing properties.
If you go to the effort of using a double layer of plasterboard then it is better to use different thicknesses for each layer. I ended up using a layer of 19mm plasterboard plank, then Green Glue and then a layer of 12mm acoustic plasterboard. If I needed better performance I could then have added a layer of 15mm acoustic plasterboard as well but I found it wasn't needed.
One other thing to think about is ventilation. A soundproof room must have no gaps in the inner layer so you'll need some way to get the air in and out. Normally you would use two baffle boxes to give you a sound attenuating inlet and outlet with a fan in the outlet to move the air through.1 -
Egg boxes are a myth.
They reason it started, was because radio studios have had trianglular cone shapes made from foam.
But the main purpose of this is to eliminate echo for the microphone.
For egg boxes to work as sound proofing from the outside of the garage / room, the back of the egg boxes would have to be filled in at the back, so no gaps at all. And would have to have more then one layer of different sound-proofing foam / plasterboard to be effective. And that would work without the egg box shape!
So it's a lot of troube to go to, when you could just put up large polystyrene sheets (with spray foam to fill the gaps for optimal results) behind a plasterboard wall.
The reason you need two or more layers of different materials is that sound waves pentrate the layers in different directions, which reduces the volume from outside. And the result would be more than the sum of each separate part, so well worth doing. I learned a lot about sound proofing a few years ago when I had to soundproof the floor of an 8 x 10ft room. It cost me £500+. All stuff from B&Q. (except I also had 6 x (6ft x 4ft) sheets of soundproofing rubber membrane from somewhere else included in that price, but I doubt you could do that for walls).
You would have to swap the floorboards for false walls, so it would be more expensive. And I suppose a garage is a lot bigger.Good luck!
Look at it this way... In a hundred years who's gonna care?2 -
Maxson said:
So a fibreglass tape instead of paper? On the wickes site it suggested a paper based tape. I don't know why you would want one over the other but fibreglass tape does seem like it would be more durable.FreeBear said:Maxson said: Are these the right things for filling in the tapered edge joints?Leave a gap between each board as you fix it up, typically 3-5mm. Or you can apply a bit of the jointing compound to the edge of the board already fixed up before sliding the next one in to place (gets the jointing compound right in to the gap). Before the compound has dried, run a length of mesh tape along the join, A thin smear of jointing compound over the top applied with a wide spatula or jointing knife will then fill the tapered edge.If you want a real smooth finish, have a look at wet sponge sanding - Basically, take a damp sponge float, and rub it over the dried compound to smooth it out. No dust compared to dry sanding.Mesh tape allows the plaster or jointing compound to go through the holes filling any gaps behind. Cracks are less likely to develop and the mesh will help to hold it all together.A paper based tape, if not stuck down properly, might lift and peel off. Mesh tape is also a fair bit cheaper per roll than the paper (although you do get less for your money). Assuming you are using 8x4 sheets, one roll should be enough.
Any language construct that forces such insanity in this case should be abandoned without regrets. –
Erik Aronesty, 2014
Treasure the moments that you have. Savour them for as long as you can for they will never come back again.1 -
Most of the pro's use paper tape. If done properly it's actually stronger than mesh. I've never had a problem with it. It's also easier to fold for internal angles and wall/ceiling joints. Mesh is probably better in a damp environment though. Paper might be a bit more difficult for a beginner, as you need to get the right consistency of the mud, and get all the air out of the tape as you run the knife along it.1
-
Sounds like mesh tape might be best for me as a beginner looking for an easy job and there may be damp as it's only a concrete garage.stuart45 said:Most of the pro's use paper tape. If done properly it's actually stronger than mesh. I've never had a problem with it. It's also easier to fold for internal angles and wall/ceiling joints. Mesh is probably better in a damp environment though. Paper might be a bit more difficult for a beginner, as you need to get the right consistency of the mud, and get all the air out of the tape as you run the knife along it.
Speaking of damp I've been reading around the internet some more and some say ply is better for lining a concrete sectional garage as it's more moisture resistant. I've also seen some recommendations to use a moisture membrane on the outside or under the plasterboard. Maybe I need to put some plastic sheet or even breathable house wrap on the outside of the framing? Or some rubber sheet on the framing before putting on the boards. Or both?0 -
I've just watched this video and just 2 layers of 5/8 (16mm) fire rated drywall is suggested as being very good even without insulation.
 https://youtu.be/GLjhrXFo0Kw
Edit: In the interest in moneysaving, what's a cheaper alternative to green glue?0


Confirm your email address to Create Threads and Reply

Categories
- All Categories
- 354.9K Banking & Borrowing
- 254.6K Reduce Debt & Boost Income
- 455.7K Spending & Discounts
- 247.7K Work, Benefits & Business
- 604.7K Mortgages, Homes & Bills
- 178.7K Life & Family
- 262.3K Travel & Transport
- 1.5M Hobbies & Leisure
- 16.1K Discuss & Feedback
- 37.7K Read-Only Boards