We’d like to remind Forumites to please avoid political debate on the Forum.
This is to keep it a safe and useful space for MoneySaving discussions. Threads that are – or become – political in nature may be removed in line with the Forum’s rules. Thank you for your understanding.
📨 Have you signed up to the Forum's new Email Digest yet? Get a selection of trending threads sent straight to your inbox daily, weekly or monthly!
The Forum now has a brand new text editor, adding a bunch of handy features to use when creating posts. Read more in our how-to guide
Screw help needed please
Comments
-
Can you isolate the supply to JUST the sink? If so, I think I'd be inclined to see if I could actually remove the originals first, before investing in the replacements - there's obviously still a fair chance you'll need a plumber to replace the WHOLE tap...
Looking at the style of handle you have, another method - other than a wrench - could be to open the tap fully so that the handle's lever is horizontal and pointing forwards, and then to repeatedly thump it further downwards with a soft hammer. Ie a rubber mallet, or a steel hammer but with a block of wood. Repeated firm thumps.
It'll either work - or break.
Obviously it won't work on the LH handle...1 -
Thinking about it, what's inside a ceramic cartridge that stops its movement after the quarter turn? Whatever it is would have to be strong if this idea is going to work.
Alas, I fear a conventional multi-turn tap would have a greater chance of success - it's a strong brass screwed shaft which will be at the end of its travel, whereas the ceramic type might have a relatively small and weaker 'stop'.
I'm not sure.
But, bear in mind there's a fair chance the tap insert will simply snap...
It's a shame you don't have a drill for that wee screw head - it's still the best way to tackle this job. No DIYing family, neighbours, anyone, who can do this?1 -
£250 in it?Bendy_House said:Yup!But don't come on here crying if... These are quarter-turn ceramic valves, then - I hadn't realised. But, it doesn't make any difference.Turn that miscreant handle down towards you - as if fully 'on' - and plant your wrench on it, so the wrench is pretty much horizontal over the sink - it's just easier that way. Press down steadily and firmly...Ideally, video this and show us - there should be £250 in it.
You've been Framed!
Harry Hill says something witty and shows the video of you pulling the wrench followed by yourself and your kitchen being totally drenched!0 -
Bendy_House said: Looking at the style of handle you have, another method - other than a wrench - could be to open the tap fully so that the handle's lever is horizontal and pointing forwards, and then to repeatedly thump it further downwards with a soft hammer. Ie a rubber mallet, or a steel hammer but with a block of wood. Repeated firm thumps.
It'll either work - or break.The tap is mounted on a pressed stainless steel sink - The metal is often very thin, and if you go whacking the tap with a hammer, there is a very good chance the sink/drainer will be knocked out of shape.Under the sink, there should be a single bolt holding the tap in place, and probably a pair of short flexible hoses. Assuming there are a pair of isolation valves under the sink, unscrew the hoses, remove the bolt, and lift the whole tap assembly out. Once clamped in a vice or on a workmate, you can hammer away to your hearts content. When the tap is beaten in to submission or destroyed beyond recognition, fit a new tap assembly - Had one from Lidl last year for £14. At that price, just not worth messing around repairing an old one.
Any language construct that forces such insanity in this case should be abandoned without regrets. –
Erik Aronesty, 2014
Treasure the moments that you have. Savour them for as long as you can for they will never come back again.2 -
Fair point, FB.
Yes, if hammering or wrenching, the left hand should be bracing the tap body as much as possible. Even then...
Since Daisy is struggling to find and use an electric drill - surely the most essential DIY tool - I'm going to assume that actually removing the whole tap - awkward nuts, plumbing fittings an' all - is just not going to be on the agenda.
Yes, using the wrench rather than a mallet might be wiser, and t'other hand bracing back on the tap body.1 -
I have a drill but I have tried to use it and it still hasn’t removed the screw. I don’t know what I’m doing wrong. All it’s done is drill into the screw.Bendy_House said:Thinking about it, what's inside a ceramic cartridge that stops its movement after the quarter turn? Whatever it is would have to be strong if this idea is going to work.
Alas, I fear a conventional multi-turn tap would have a greater chance of success - it's a strong brass screwed shaft which will be at the end of its travel, whereas the ceramic type might have a relatively small and weaker 'stop'.
I'm not sure.
But, bear in mind there's a fair chance the tap insert will simply snap...
It's a shame you don't have a drill for that wee screw head - it's still the best way to tackle this job. No DIYing family, neighbours, anyone, who can do this?1 -
That’s actually fine, to drill into the screw. What you want to do is to drill the whole of the screw head away. So, maybe you could post a photo of what you have done so far, please?Daisy_84 said:
I have a drill but I have tried to use it and it still hasn’t removed the screw. I don’t know what I’m doing wrong. All it’s done is drill into the screw.Bendy_House said:Thinking about it, what's inside a ceramic cartridge that stops its movement after the quarter turn? Whatever it is would have to be strong if this idea is going to work.
Alas, I fear a conventional multi-turn tap would have a greater chance of success - it's a strong brass screwed shaft which will be at the end of its travel, whereas the ceramic type might have a relatively small and weaker 'stop'.
I'm not sure.
But, bear in mind there's a fair chance the tap insert will simply snap...
It's a shame you don't have a drill for that wee screw head - it's still the best way to tackle this job. No DIYing family, neighbours, anyone, who can do this?You may need to use a larger drill bit, but a photo would help confirm.No reliance should be placed on the above! Absolutely none, do you hear?1 -
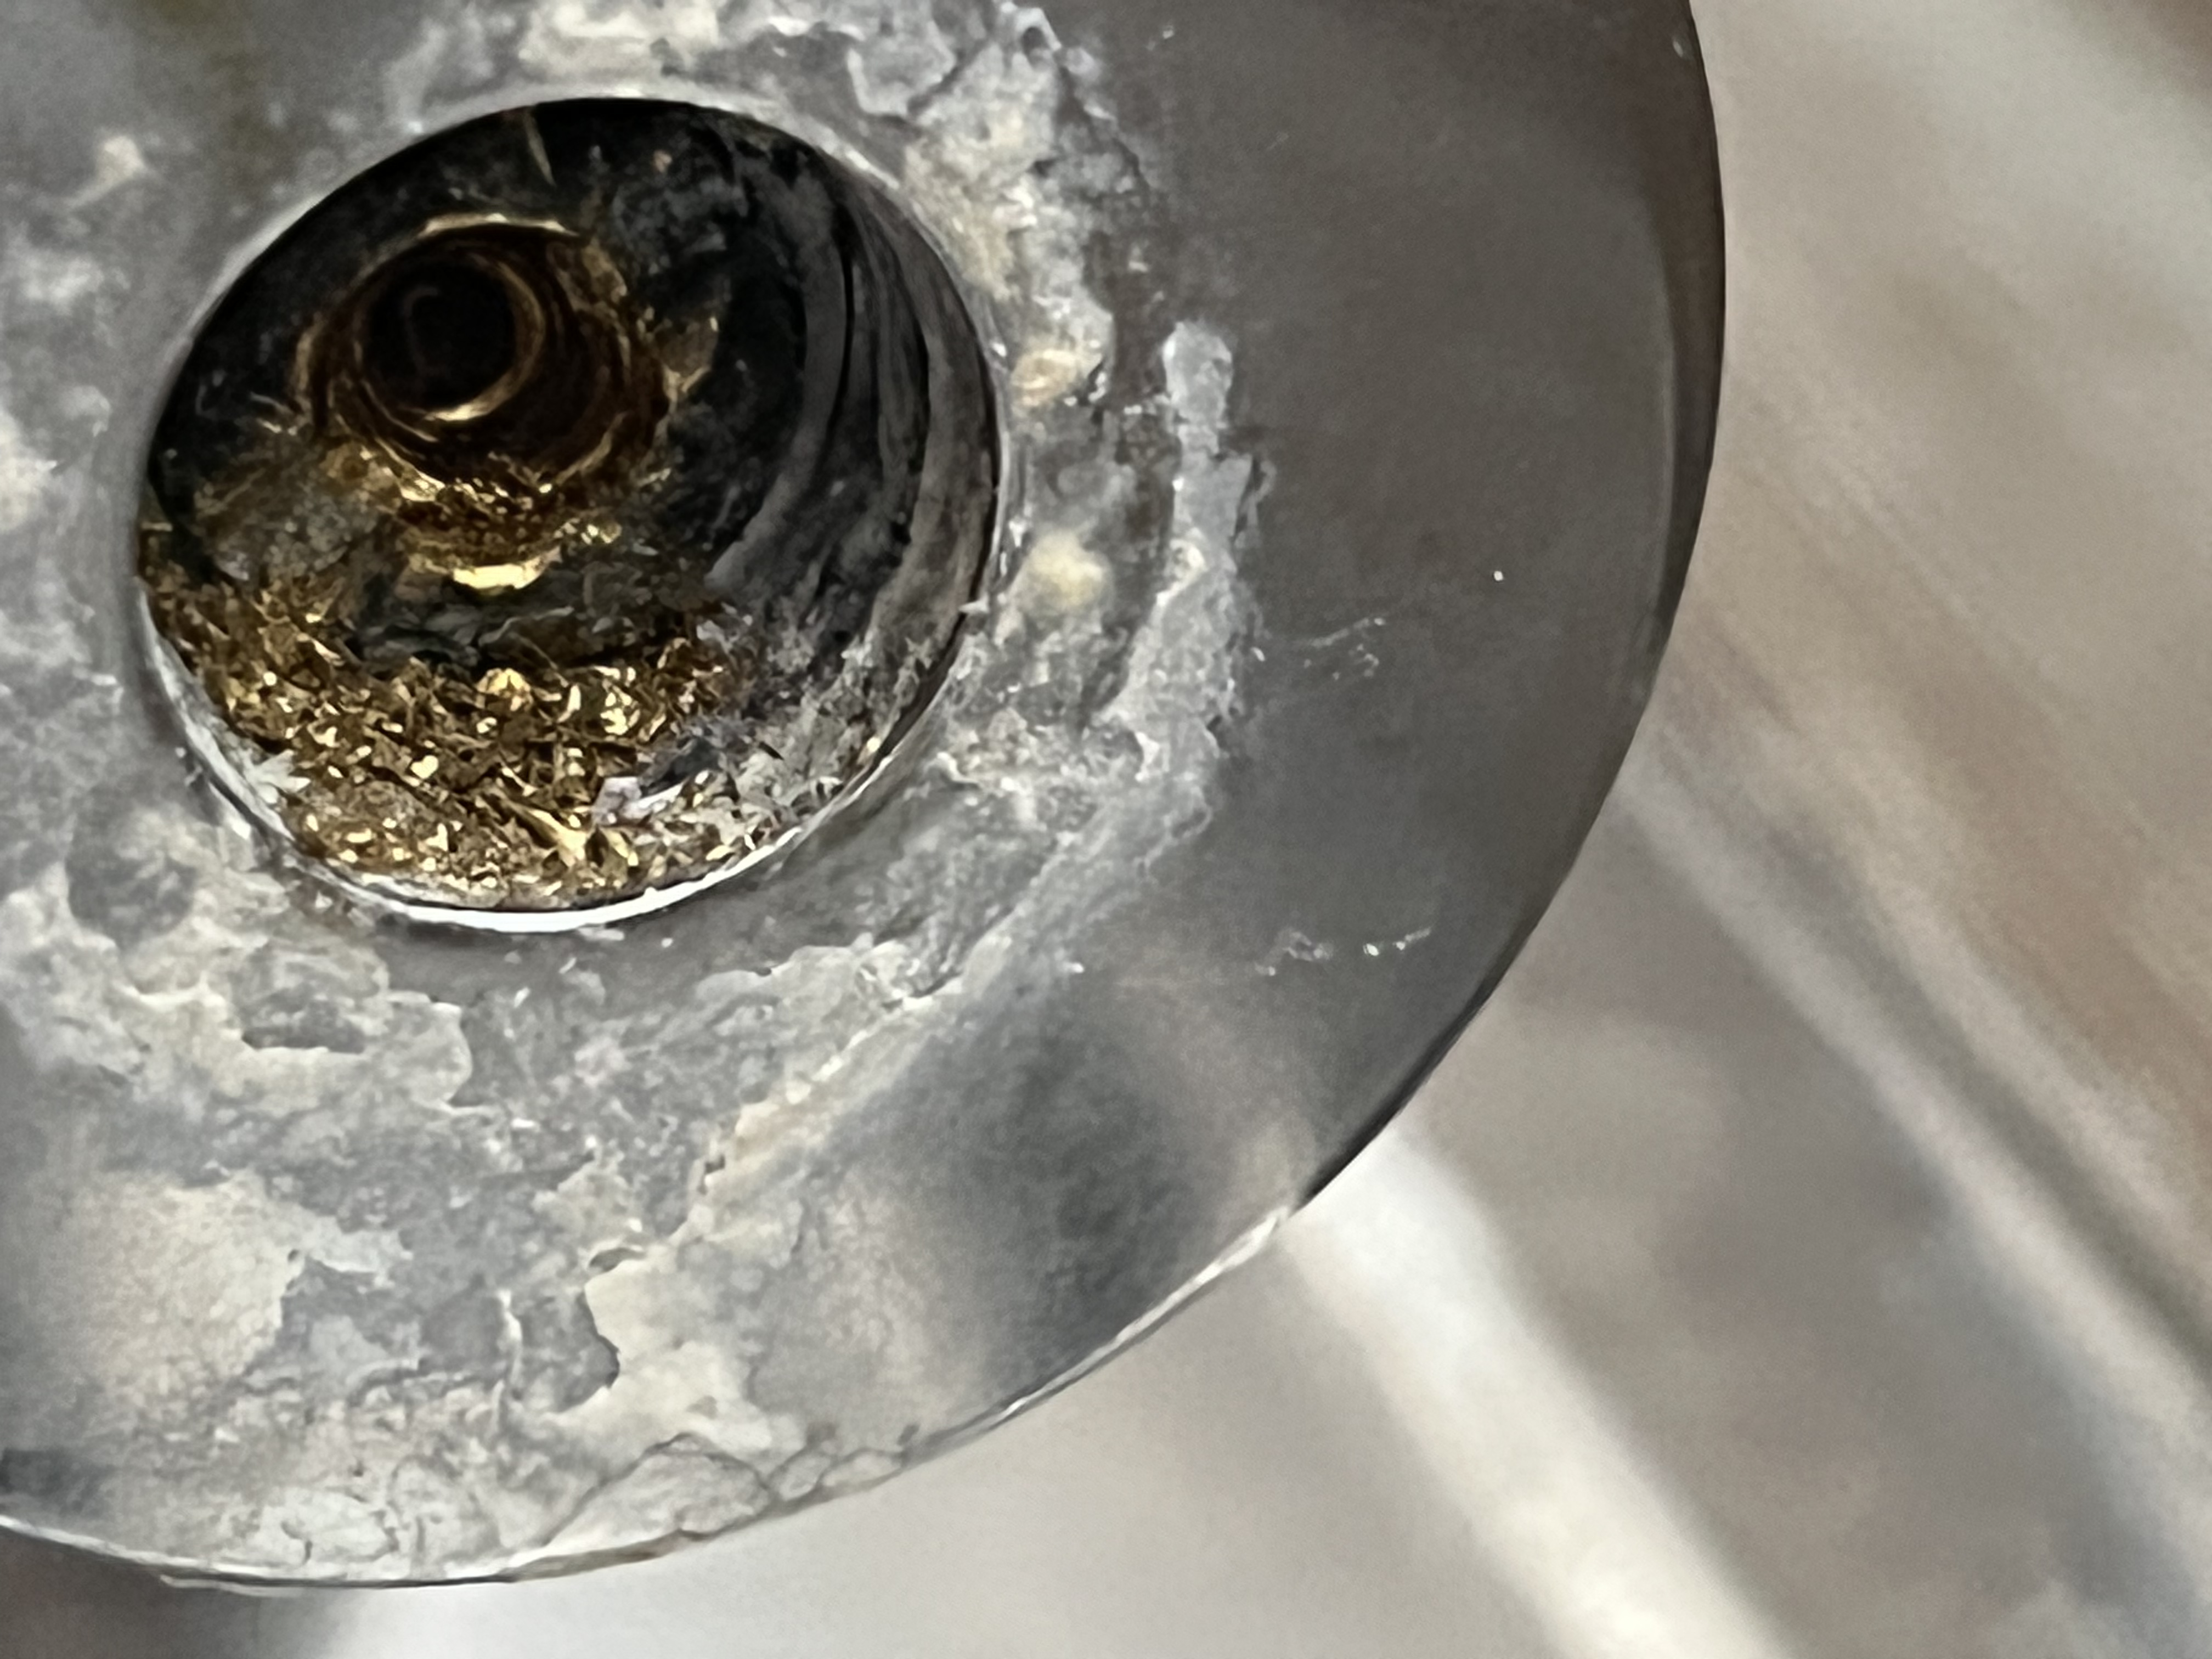
Thank you. It sounds like I need to keep going. I’ve attached a photo, how does it look? Sorry it’s not that clear due to limescale: I live in such a bad limescale region.GDB2222 said:
That’s actually fine, to drill into the screw. What you want to do is to drill the whole of the screw head away. So, maybe you could post a photo of what you have done so far, please?Daisy_84 said:
I have a drill but I have tried to use it and it still hasn’t removed the screw. I don’t know what I’m doing wrong. All it’s done is drill into the screw.Bendy_House said:Thinking about it, what's inside a ceramic cartridge that stops its movement after the quarter turn? Whatever it is would have to be strong if this idea is going to work.
Alas, I fear a conventional multi-turn tap would have a greater chance of success - it's a strong brass screwed shaft which will be at the end of its travel, whereas the ceramic type might have a relatively small and weaker 'stop'.
I'm not sure.
But, bear in mind there's a fair chance the tap insert will simply snap...
It's a shame you don't have a drill for that wee screw head - it's still the best way to tackle this job. No DIYing family, neighbours, anyone, who can do this?You may need to use a larger drill bit, but a photo would help confirm.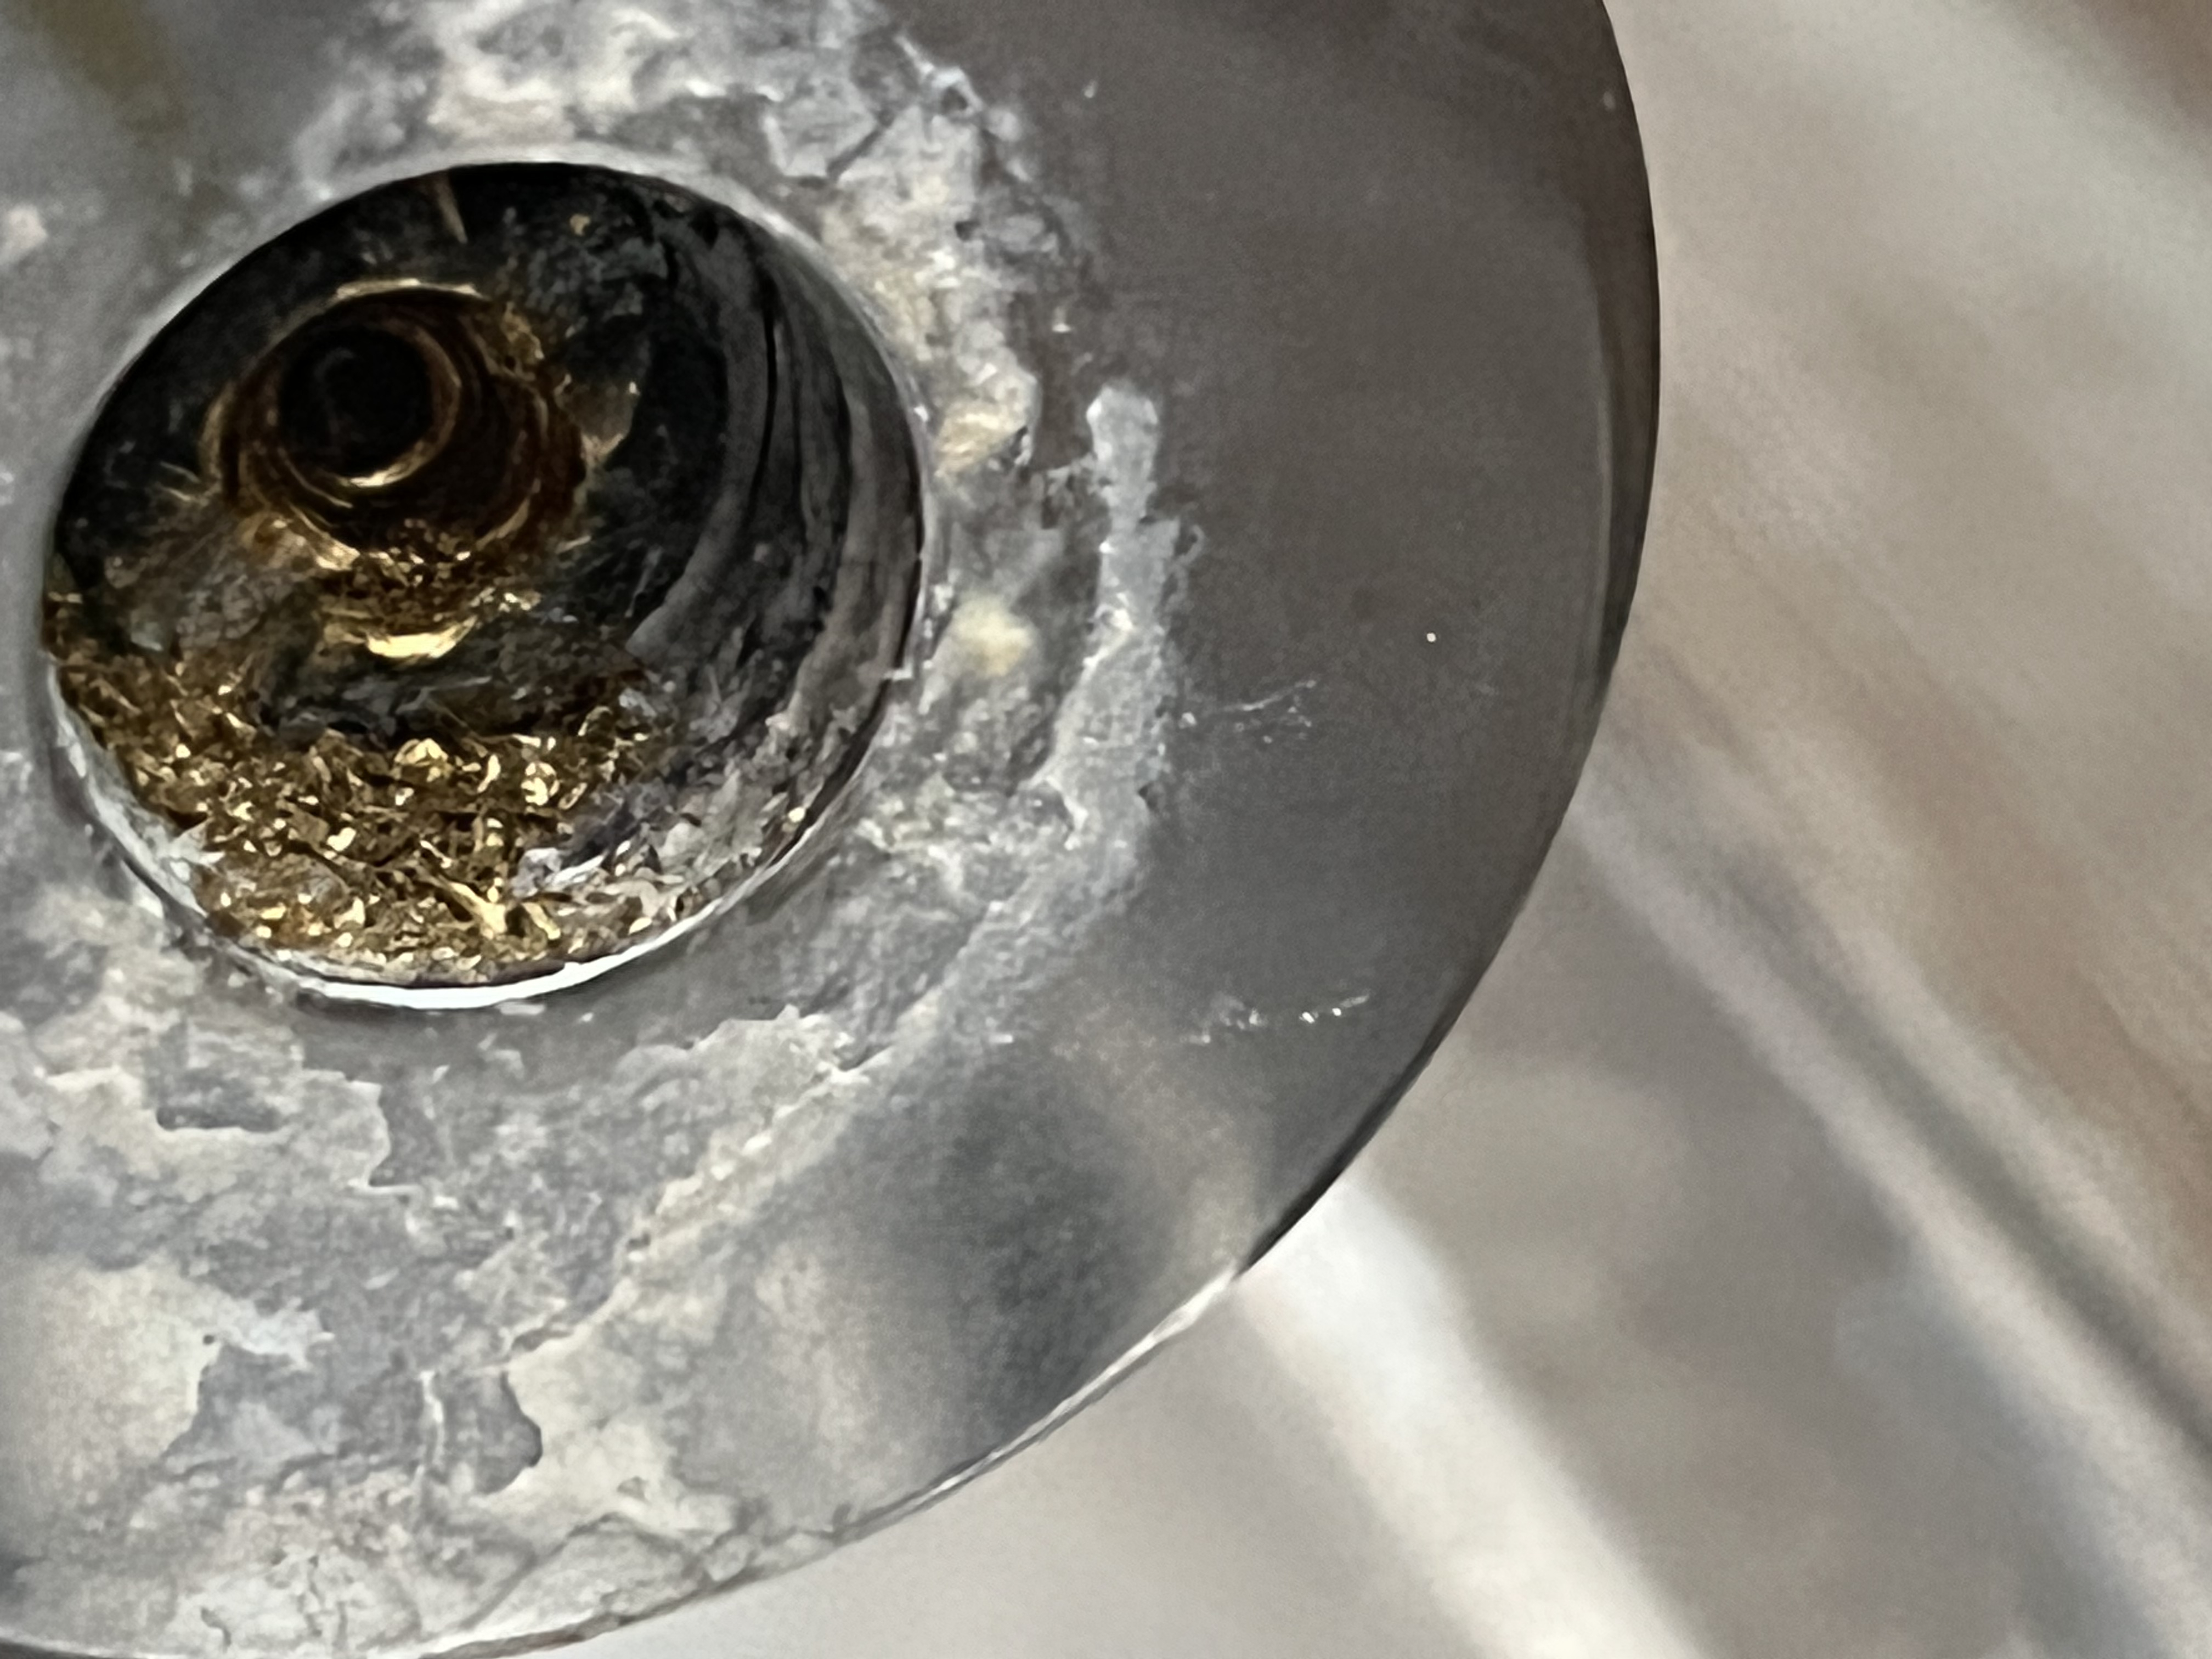
 1
1 -
Brilliant! Why didn't you say - you'd have saved me a lot of words!ALL you need to do it go up a size with your drill bit - say to 6mm. Repeat the process nice and slowly, keeping the drill held firmly and steadily - gentle drilling. In a few seconds, that screw head is just going to pop off!(You do wear safety glasses, don't you? LOTS of metal particles will be fired away from this...)You know what the screw will look like from the side? A straight threaded part, and then a flared wider top where the screwdriver goes? The idea is that the drill you use should be slightly larger than the threaded part. Once the drill goes through the head and hits the threaded part, it will have effectively cut the head away from the threaded bit.I think the threaded shaft is around 4mm in diameter, so a 5 or 6mm drill should do this.
0 -
Oh, the tension is almost unbearable... :-(
0


Confirm your email address to Create Threads and Reply

Categories
- All Categories
- 354K Banking & Borrowing
- 254.3K Reduce Debt & Boost Income
- 455.3K Spending & Discounts
- 247.1K Work, Benefits & Business
- 603.7K Mortgages, Homes & Bills
- 178.3K Life & Family
- 261.2K Travel & Transport
- 1.5M Hobbies & Leisure
- 16.1K Discuss & Feedback
- 37.7K Read-Only Boards