We’d like to remind Forumites to please avoid political debate on the Forum.
This is to keep it a safe and useful space for MoneySaving discussions. Threads that are – or become – political in nature may be removed in line with the Forum’s rules. Thank you for your understanding.
📨 Have you signed up to the Forum's new Email Digest yet? Get a selection of trending threads sent straight to your inbox daily, weekly or monthly!
The Forum now has a brand new text editor, adding a bunch of handy features to use when creating posts. Read more in our how-to guide
We're aware that some users are currently experiencing errors on the Forum. Our tech team is working to resolve the issue. Thanks for your patience.
First Time Soldering Copper Pipe

paperclap
Posts: 779 Forumite


 Hi all,
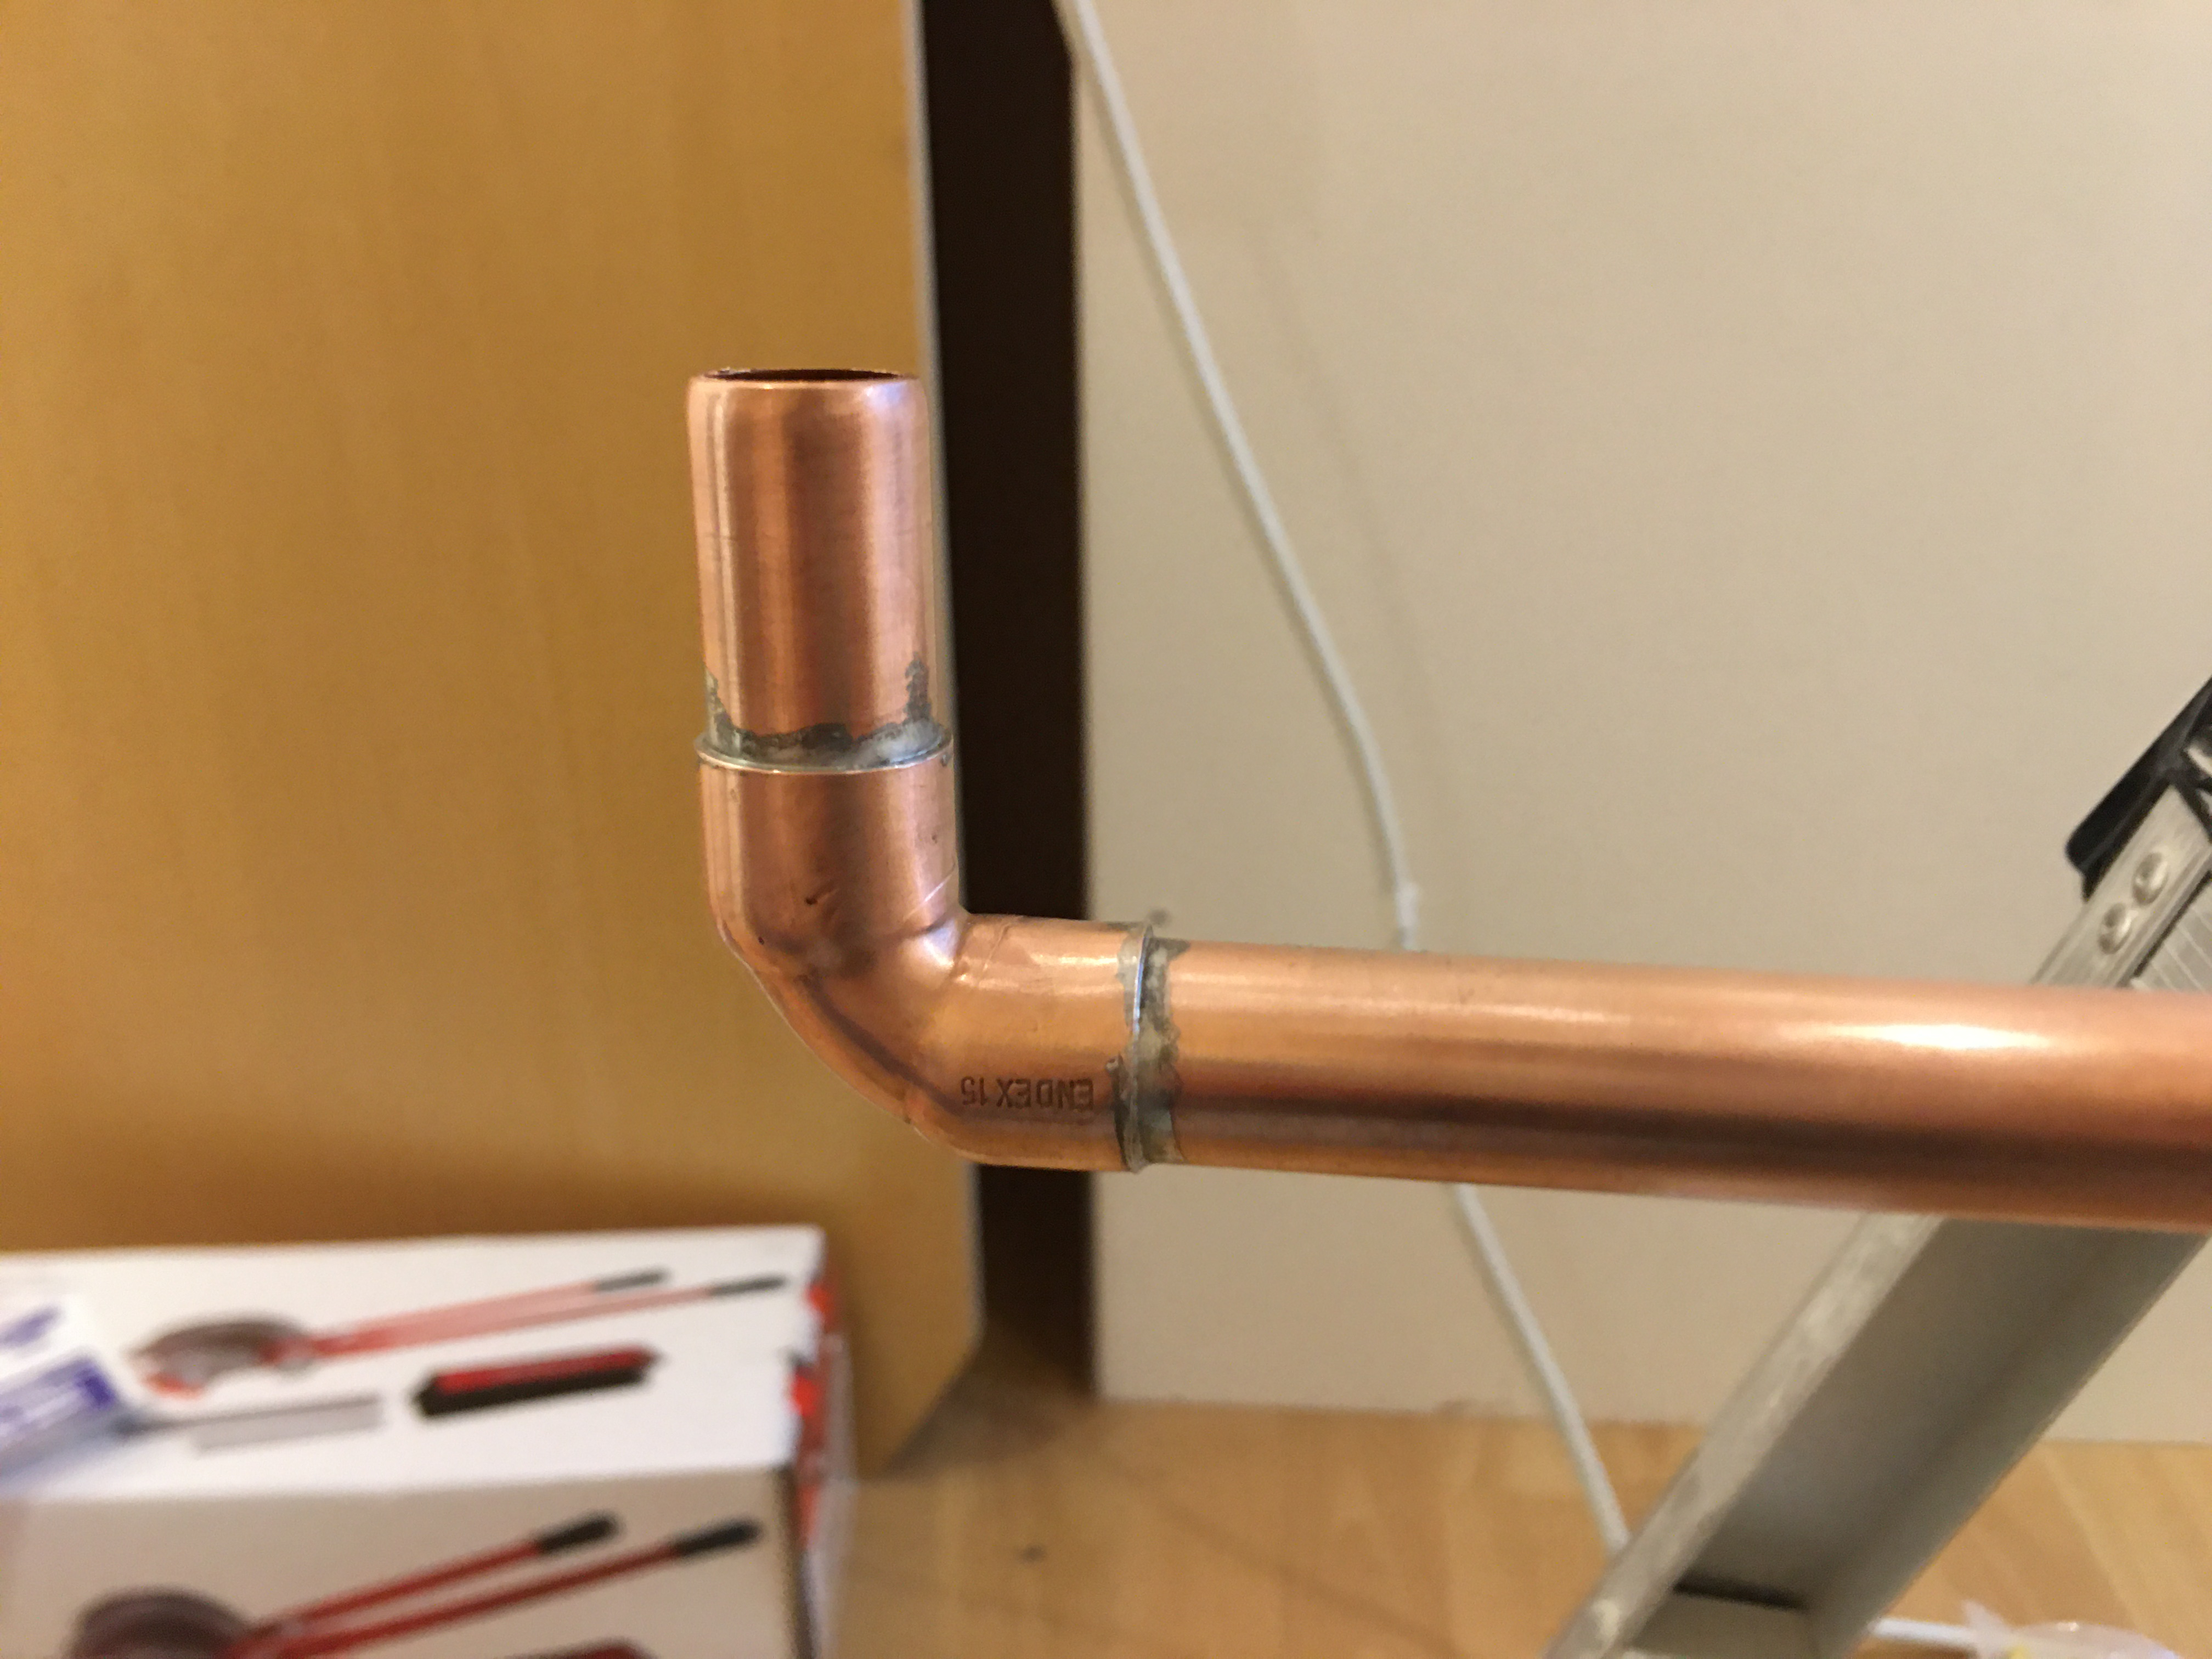
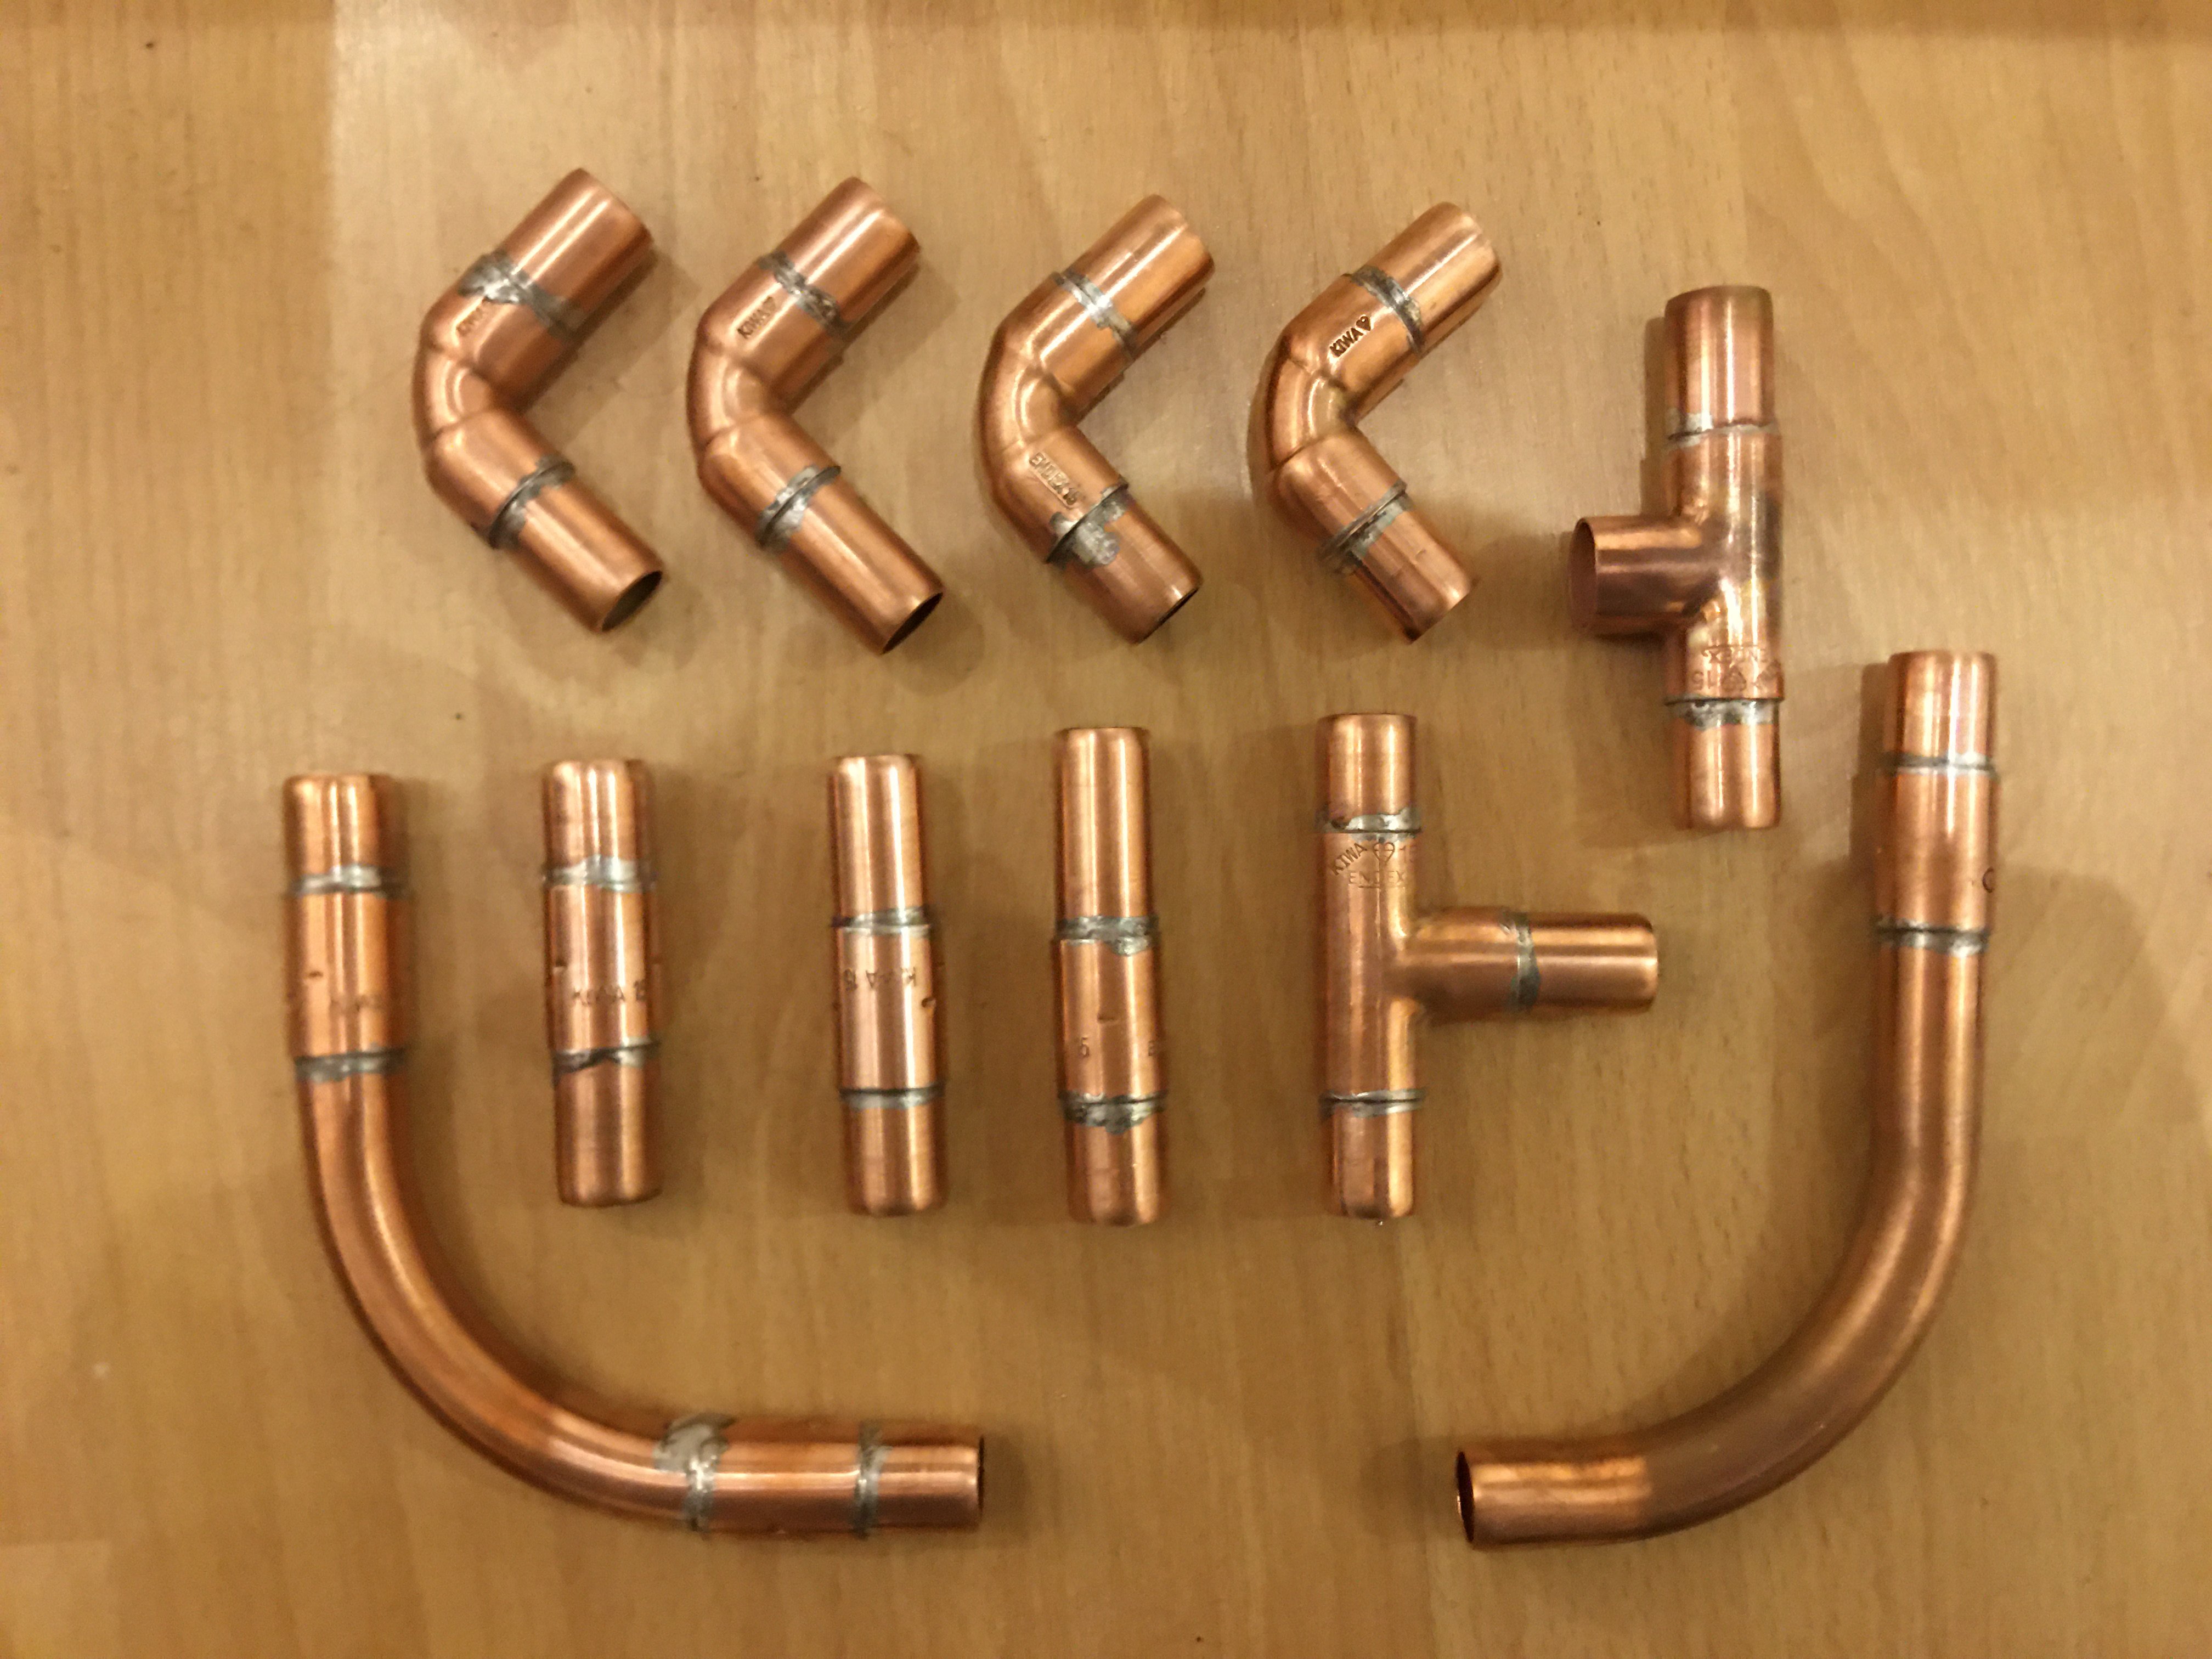
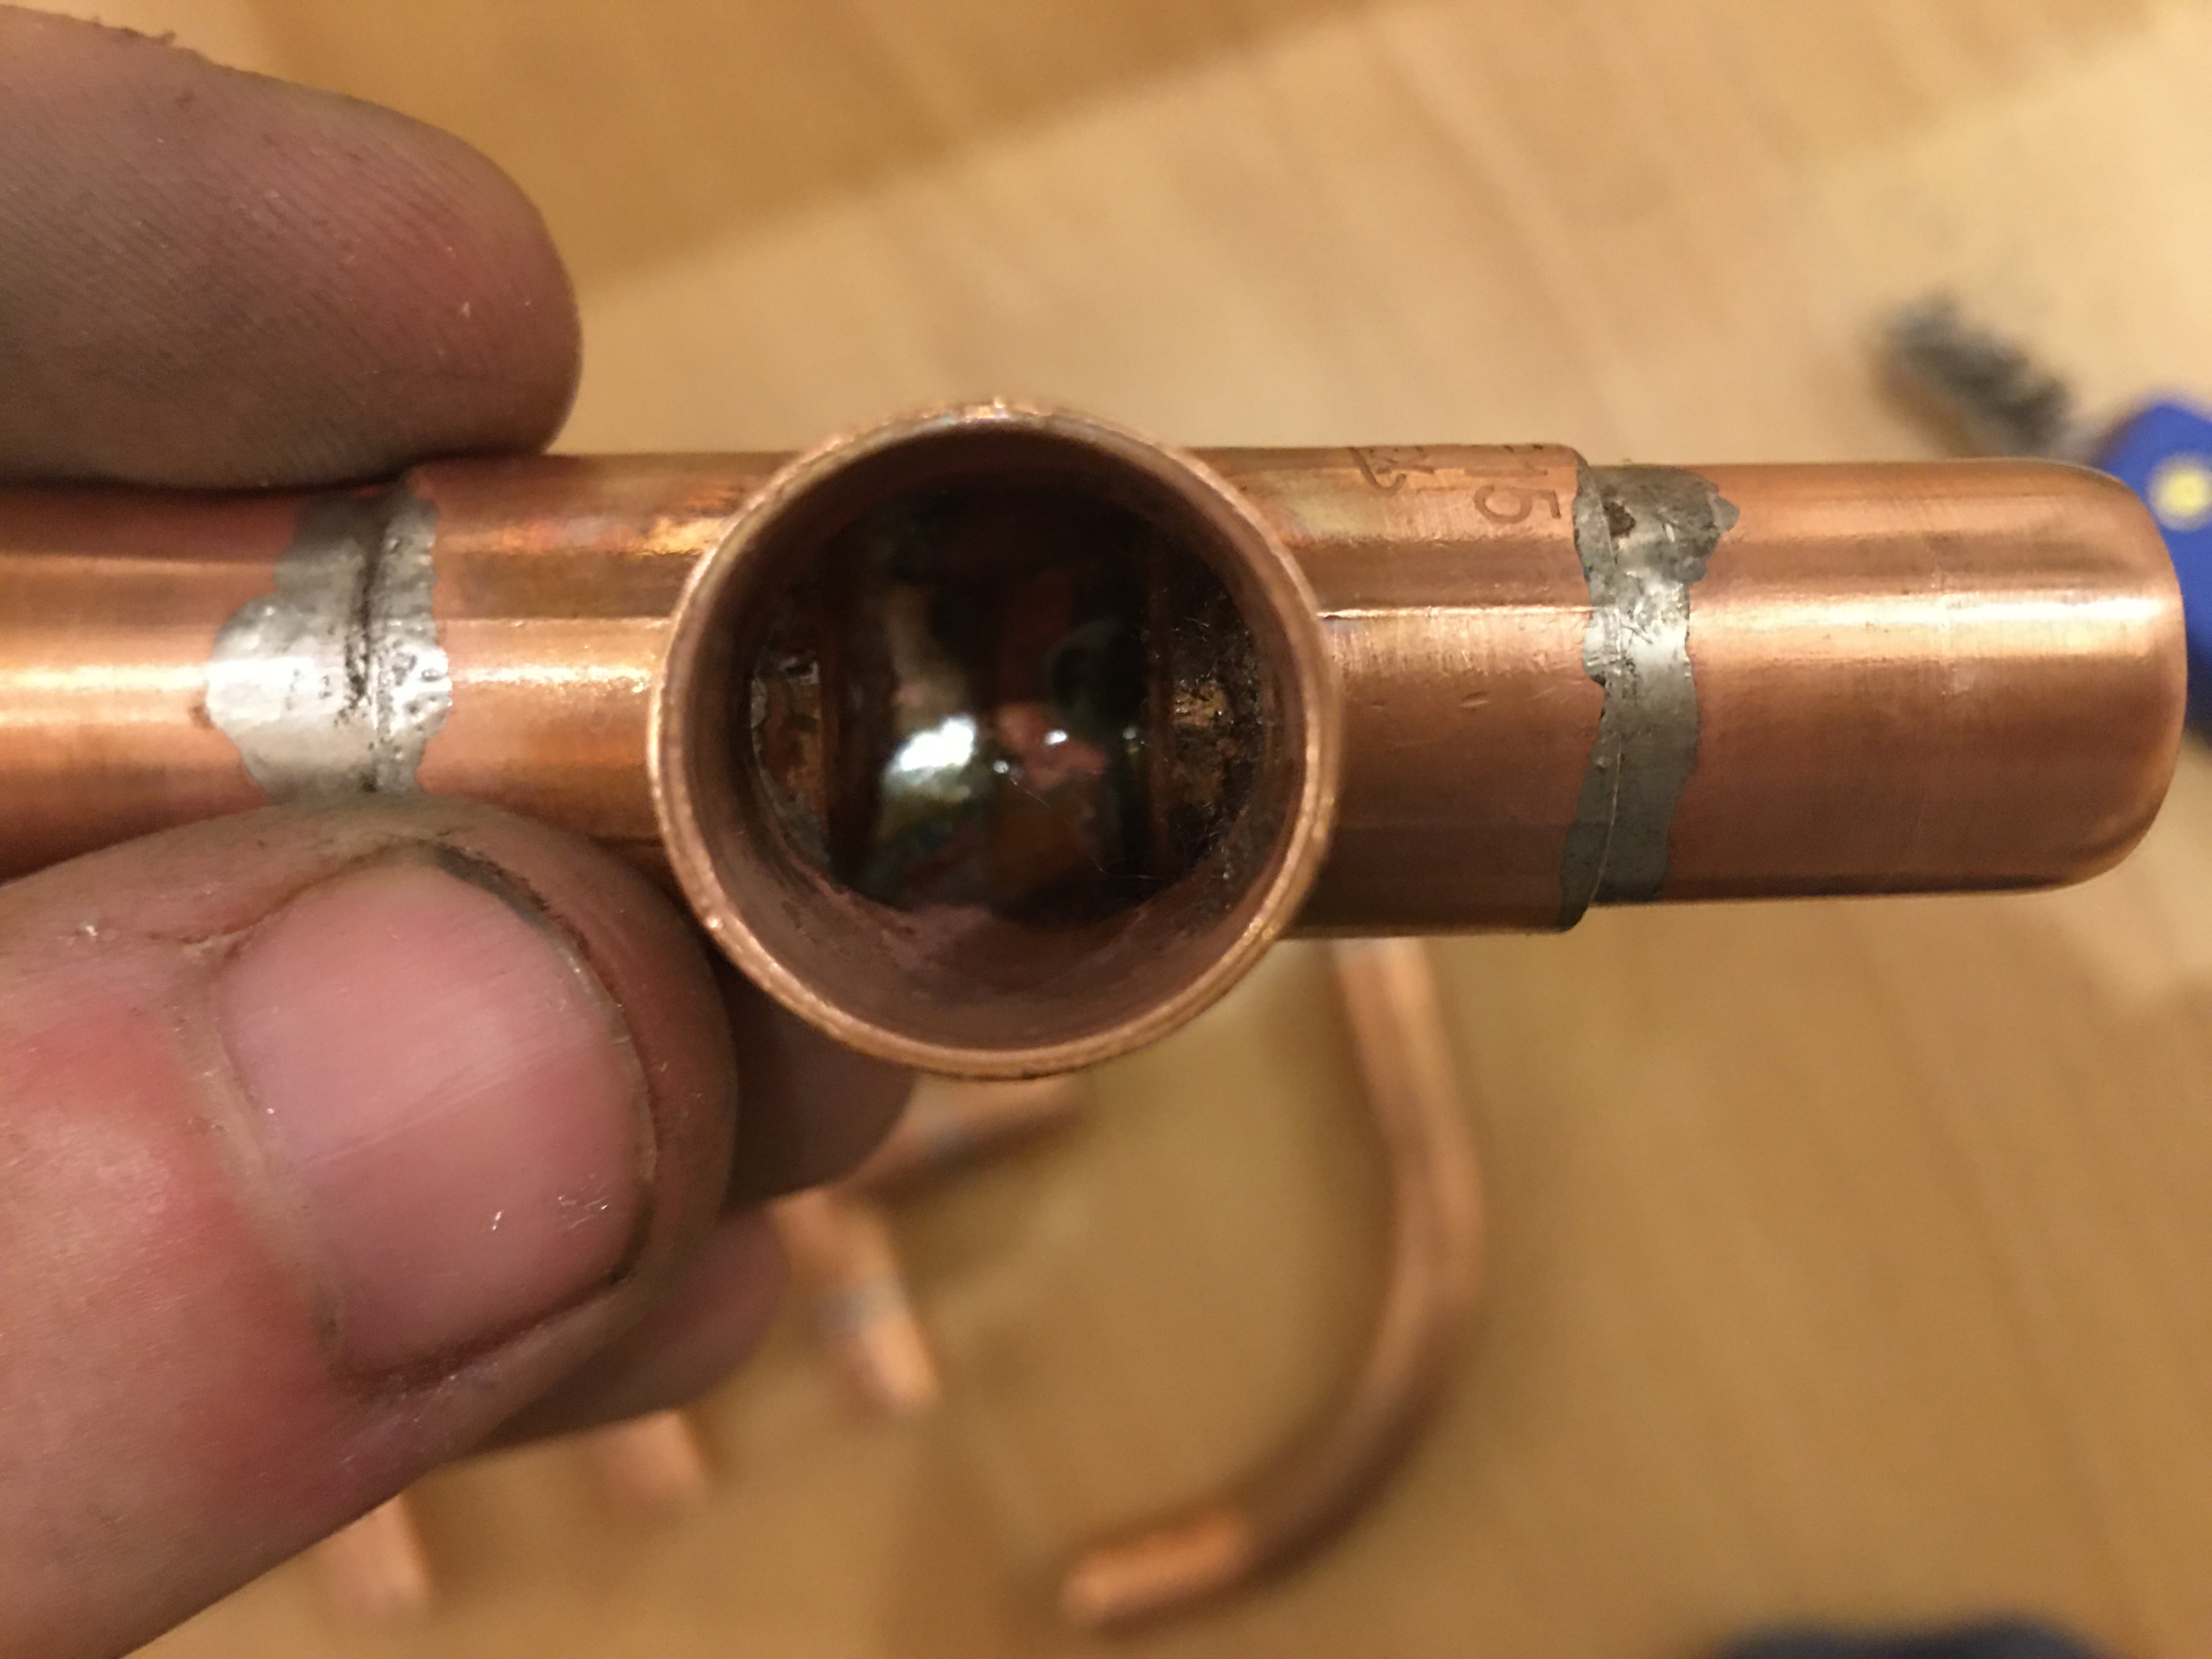
So, I’ve done it. I’ve had a crack at practicing soldering copper pipes for the first time, in run up to replacing my rads and pipework.
Please, critique!
It’s certainly far from perfect. Hoping to vastly improve, as the horizontal pipework (running to the radiators) will be on show.
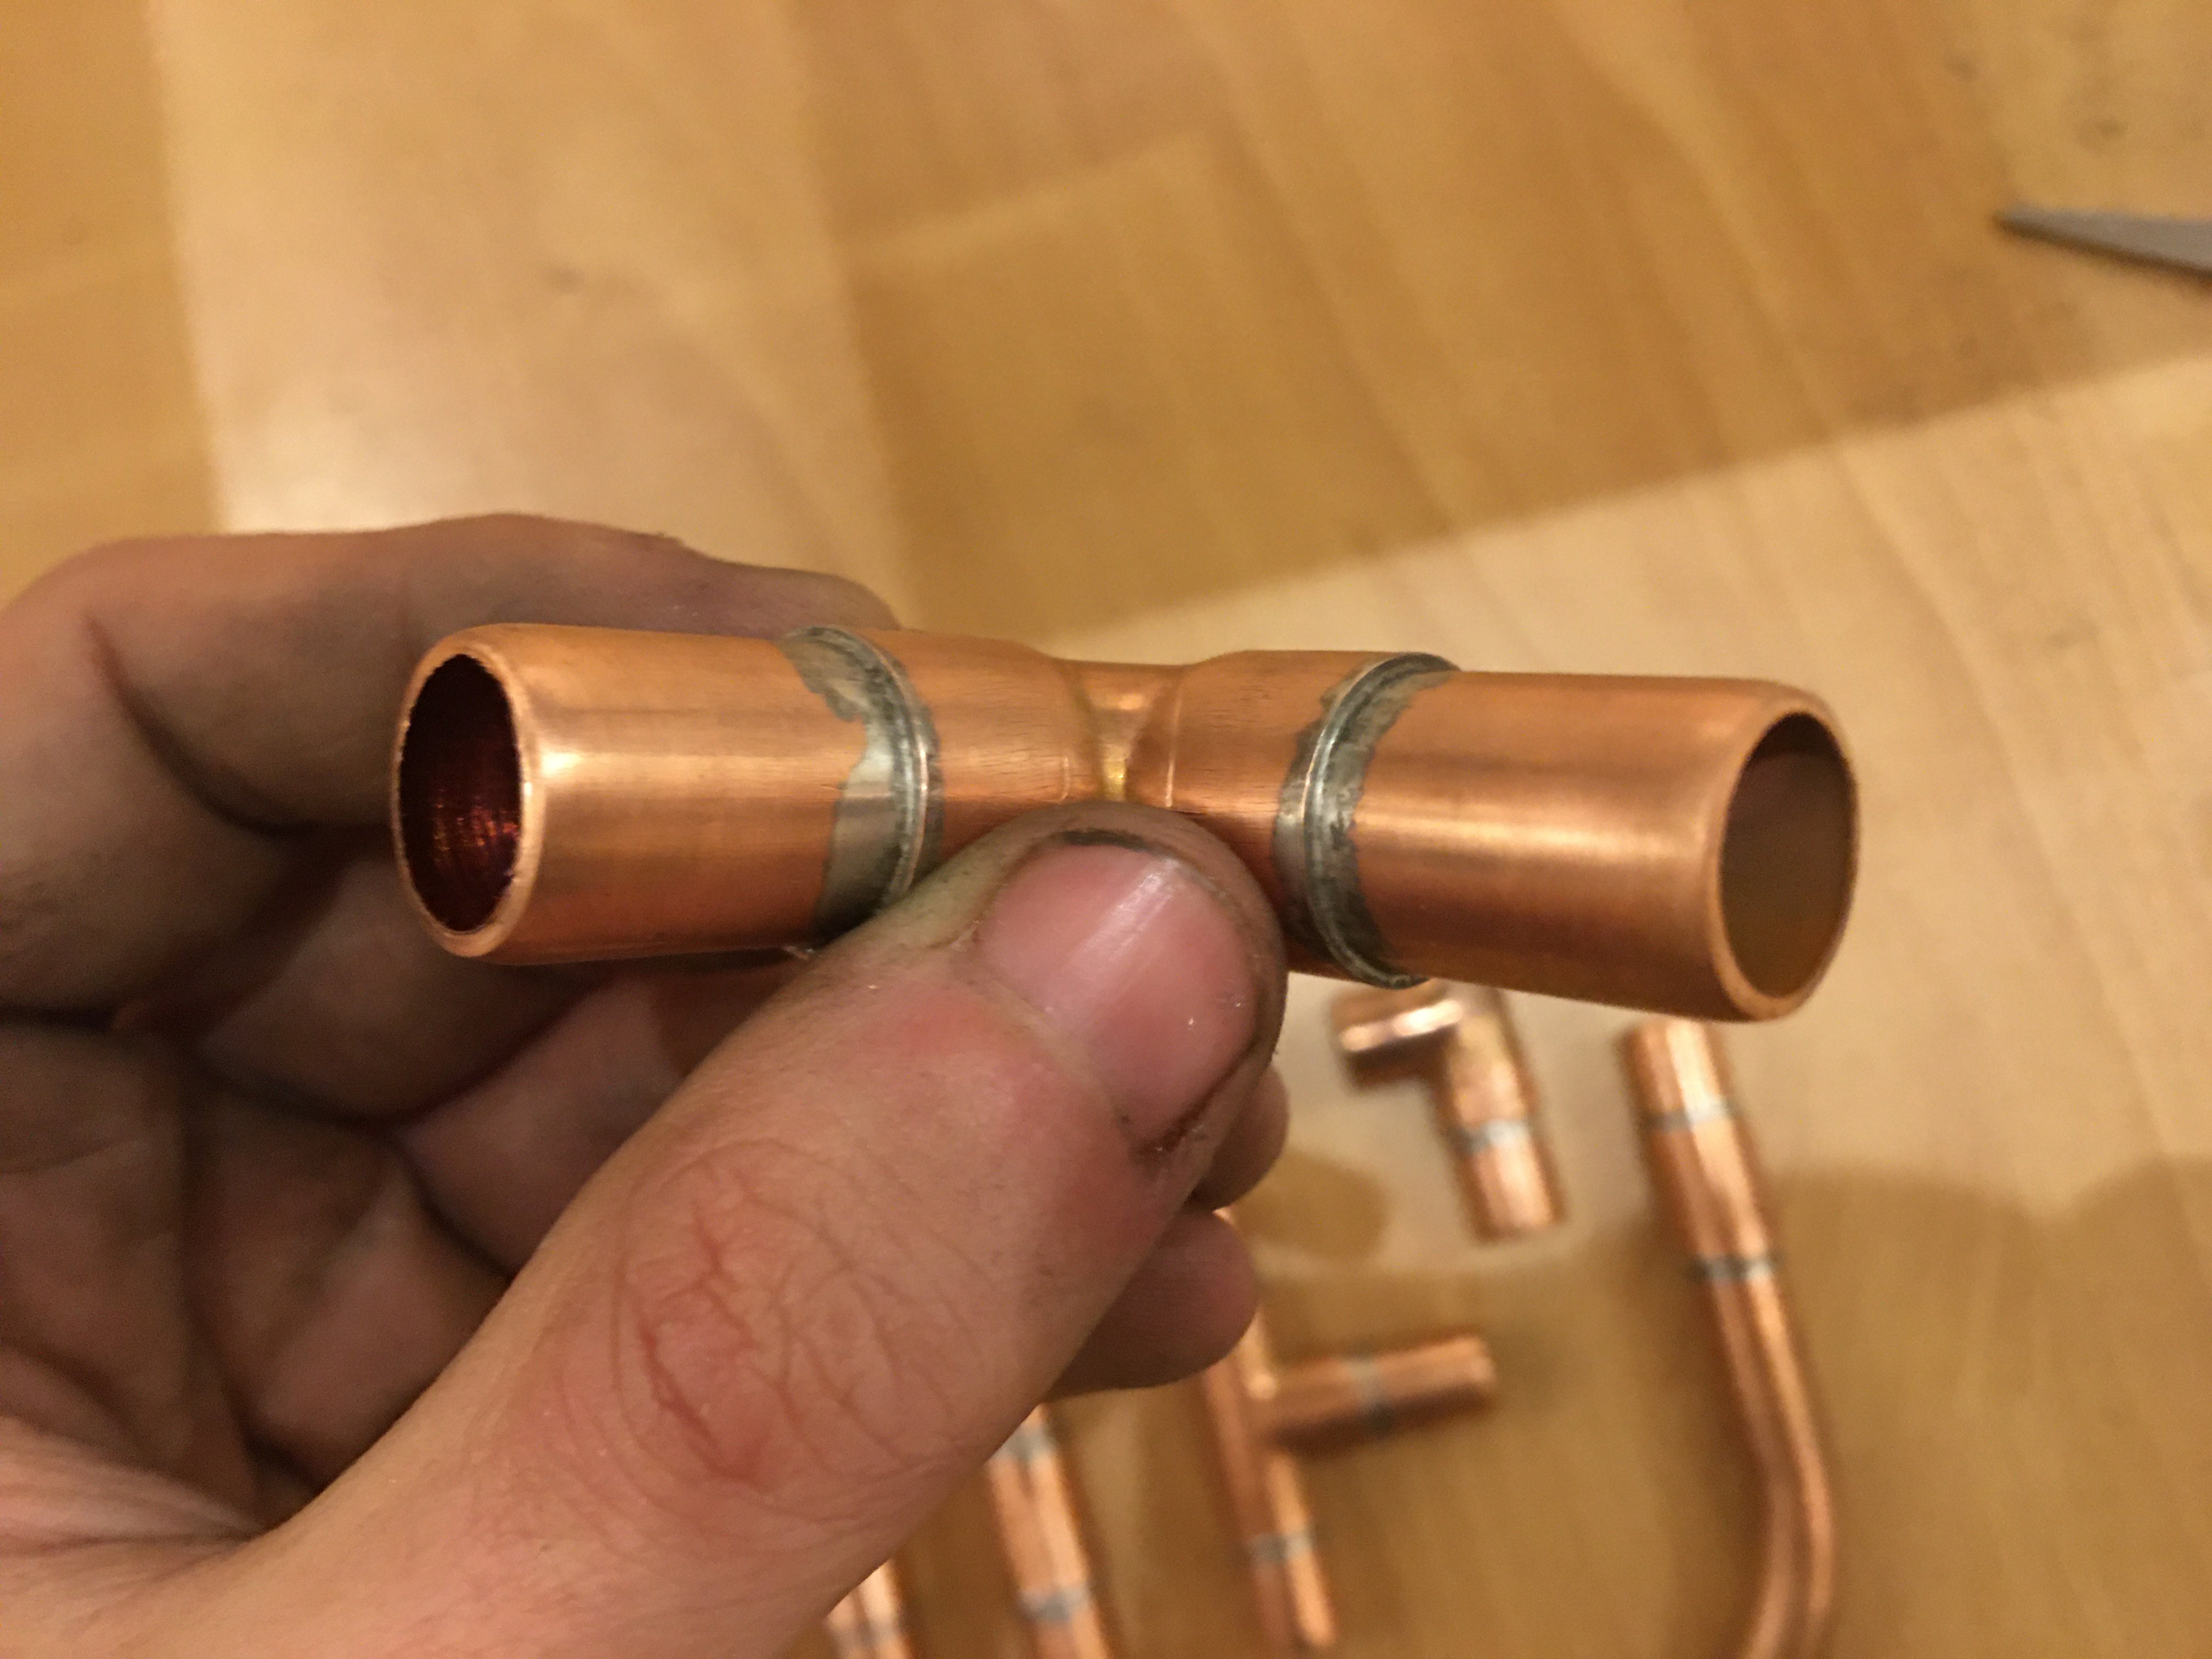
Some are “okay”… whereas others have excess solder in the pipework, “snot”, etc.
This is of course 15mm pipework. So, I’ve been trying to use 15mm worth of solder per join. I’ve heard this is a good rule of thumb).
Prior to heating the join, I’ve also been wiping away any excess flux. So any flux that is there, is wedged between the pipe and fitting. Have read this decreased running of the solder, especially on vertical pipework.
As for the flame, I’ve been keeping it about 1 inch from the join. About 3 inches in length (of the flame). And, trying to use the tip of the flame, working my way evenly around the join.
As for applying the solder, I’ve tried two methods:
1 - Manually creating a bead around the join (running the tip of the solder around).
2 - Pushing the solder on the top of the join, letting capillary action pull the solder via the flux.
Not sure which one has worked better!
Any tips and tricks?
Thanks!
3
Comments
-
Nice work. It's one of those things that gets better with practice. Tips-wise:
I normally bend the pipe's diameter in solder at 90 degrees so that I know I've used enough.
A dry cloth is useful for wiping down excess solder immediately.
I normally heat the whole area then just touch the solder to the opposite side of the torch and let it run round, then touch the last little bit on the opposite side.
2 -
Looks great to me - there's people who have been soldering for years who couldn't get that quality of result on end feed fittings.So, I’ve done it. I’ve had a crack at practicing soldering copper pipes for the first time, in run up to replacing my rads and pipework.
Please, critique!
Just a little bit too much solder in a few cases, but if you are painting the pipes it doesn't really matter. If you aren't painting then you'll want to try and minimise how far the solder runs along the outside surface of the pipe.
For me it has to be 2, although 'applying' rather than 'pushing'. Let the heat, flux, and solder do the work. The solder being pulled into the joint by capillary action - evenly and all around the circumference - is the proof you need that the joint is a good one.
As for applying the solder, I’ve tried two methods:
1 - Manually creating a bead around the join (running the tip of the solder around).
2 - Pushing the solder on the top of the join, letting capillary action pull the solder via the flux.
Not sure which one has worked better!
That's one of the reasons I would (counterintuitively) recommend beginners start with end feed fittings - because the skill is in getting the cleaning and heating just right, and the test of those is how well the solder flows into and around the joint.
1 -
Good work. If you did all those with the joints horizontal then try a couple with the pipe vertical e.g. vertical pipe, socket, vertical pipe.
To paraphrase Kung Fu (you are probably too young to remember the tv series!)
"Grasshopper, when you can solder a vertical joint without the solder running down the pipe you will have learned"
Sorry I can't think of anything profound, clever or witty to write here.2 -
Nice work indeed, Laurence.Smooth shiny solder rings around the fittings - I think you can be certain that none of these will leak
 Another reason for not using excessive flux is that it boils and bubbles away, 'popping' out the solder which can leave hollows. Did you notice this? If not, you seem to have got it spot on (certainly one of my first fundamental mistakes when I started).The few with solder 'drips' is just a case of slightly too much solder, so simple to rectify - tho' not even an issue unless visible.I've read of a few ways folk use to clean up the solder rings before they set, but I've always been worried trying this in case I disturbed - slightly moved - the joint before the solder set, which could lead to a 'dry'. And if using a damp cloth for this, I'd be paranoid about the joint contracting unevenly and again possibly causing ditto.So my Q to the more knowledgeable on here - what method can safely be used to clean up a solder ring if, say, a drip is forming that you want to clear away?0
 -
I use either the flux brush to flick it off, a bit of wire wool or I have an old heat mat that's nearly the consistency of a cloth and I use like a cloth - anything that won't burn or get your fingers burned. I suspect some will do similar and others frown upon this.Bendy_House said:So my Q to the more knowledgeable on here - what method can safely be used to clean up a solder ring if, say, a drip is forming that you want to clear away?
Edit: I've just noticed you were asking the more knowledgeable so you might want to ignore everything I said.Sorry I can't think of anything profound, clever or witty to write here.2 -
NSG666 said:
I use either the flux brush to flick it off, a bit of wire wool or I have an old heat mat that's nearly the consistency of a cloth and I use like a cloth - anything that won't burn or get your fingers burned. I suspect some will do similar and others frown upon this.Bendy_House said:So my Q to the more knowledgeable on here - what method can safely be used to clean up a solder ring if, say, a drip is forming that you want to clear away?
Edit: I've just noticed you were asking the more knowledgeable so you might want to ignore everything I said.Ha ha - I prostrate myself before your flux brush, NSG.On that point, does anyone use a brush of any type to do this job? Would seem like an idea solution - clears away excess solder, but not disturb the joint.0 -
Bendy_House said:On that point, does anyone use a brush of any type to do this job? Would seem like an idea solution - clears away excess solder, but not disturb the joint.
Obviously choose your brush carefully - not one with bristles that melt instantly on contact with hot objects")
I do the same as NSG with a flux brush, else use a piece of clean stick which should be to hand* to encourage the drip to form properly so it comes away from the pipe without too much force.
Then just play a bit more heat over the joint to remelt the solder in case fiddling with it has made the joint dry.
*I normally to keep a couple of bits of stick-like wood nearby when doing any hot work - in case something hot needs picking up or manipulating. Wood - so it doesn't suck too much heat out of the workpiece. (obviously being aware wood burns though)
1 -
My tip is that you should get yourself a fibreglass mat that you can put behind a pipe to prevent your blowtorch flame from charring the skirting board! I came across an old school plumber who seemed never to have heard of such a thing and had presumably spent most of his working life charring people's woodwork based on what he did at my place!1
-
Ha ha have any of you guys ever wiped a lead joint , used tallow and a wiping cloth, and plumbers black.A thankyou is payment enough .2
-
Your showing your age!plumb1_2 said:Ha ha have any of you guys ever wiped a lead joint , used tallow and a wiping cloth, and plumbers black.Maybe, just once, someone will call me 'Sir' without adding, 'You're making a scene.'1


Confirm your email address to Create Threads and Reply

Categories
- All Categories
- 354.5K Banking & Borrowing
- 254.4K Reduce Debt & Boost Income
- 455.4K Spending & Discounts
- 247.4K Work, Benefits & Business
- 604.2K Mortgages, Homes & Bills
- 178.5K Life & Family
- 261.7K Travel & Transport
- 1.5M Hobbies & Leisure
- 16K Discuss & Feedback
- 37.7K Read-Only Boards