We’d like to remind Forumites to please avoid political debate on the Forum.
This is to keep it a safe and useful space for MoneySaving discussions. Threads that are – or become – political in nature may be removed in line with the Forum’s rules. Thank you for your understanding.
📨 Have you signed up to the Forum's new Email Digest yet? Get a selection of trending threads sent straight to your inbox daily, weekly or monthly!
Changing mixer tap - do I need to renew the fittings too?
Comments
-
NSG666 said:
Tools wise I'd buy a couple of pairs of adjustable spanners (you only need one pair to remove/refit the tap and fit the flexi to it but you will need two to attach the flexi to the copper pipe).
Yes you will need to cut the copper pipe back so you might also need to buy a pipe slice if you don't have one.
Looking at the photo I'd recommend taking the opportunity to fit an isolator in the horizontal section of the coper pipe (the one under the grey corrugated pipe). I'd also buy a 500mm flexi as the 300 might be too short to bend to the horizontal position but you could buy one of each and check.
Fit the tap then fit the 500 flexi to it and see where it will reach to easily on the horizontal pipe, cut the pipe then fit an isolator taking note of the arrow, cut a 50mm piece off the scrap copper you cut off earlier and use this to connect to the isolator and compression end of the flexi.
Are you on a combi boiler or a system that will stop the hot water flowing when you turn off the stop tap?
Hose 15mm x ½" x 500mm | Compression Hoses | Screwfix.com
Isolating Valve 15mm 2 Pack | Isolating Valves | Screwfix.comThat all sounds very much out of my league, I thought it was a case of unscrewing the old and screwing in the new!The boiler is a combi boiler so I think as long as I just turn the water off at the stopcock that's OK?0 -
NSG666 said:Sorry After writing my last post I read your further posts and it seems like you are replacing the tap because it is dripping. If it's otherwise ok why don't you just replace the 1/4 turn valves?
Do you know the make of the tap (as the valves are not standard)?
Are you anywhere in the country that has a James Hargreaves plumber's merchant?
Can you post a photo of the tap?
That was the original plan, first off all the stopcock was seized so when that was sorted I tried to get the old valves out but didn't have a socket big enough so bought a box spanner only to discover they were stuck fast. I'm female but not feeble and they just weren't budging so I bought the new tap and basin wrench to try and DIY it
0 -
OK and I understand. I've had occasions when I've had to fit a new tap for the customer as the valves had been overtightened in production and they just wouldn't budge. As you have discovered, plumbing is easy until you encounter something difficult and at least you've not got mid-way through and felt you were out of your depth. I often used to get calls on a Monday morning from the wife of someone who had got into a pickle before admitting defeat so no shame in calling a plumber at this stage.Working_in_pyjamas said:NSG666 said:Sorry After writing my last post I read your further posts and it seems like you are replacing the tap because it is dripping. If it's otherwise ok why don't you just replace the 1/4 turn valves?
Do you know the make of the tap (as the valves are not standard)?
Are you anywhere in the country that has a James Hargreaves plumber's merchant?
Can you post a photo of the tap?
That was the original plan, first off all the stopcock was seized so when that was sorted I tried to get the old valves out but didn't have a socket big enough so bought a box spanner only to discover they were stuck fast. I'm female but not feeble and they just weren't budging so I bought the new tap and basin wrench to try and DIY itSorry I can't think of anything profound, clever or witty to write here.1 -
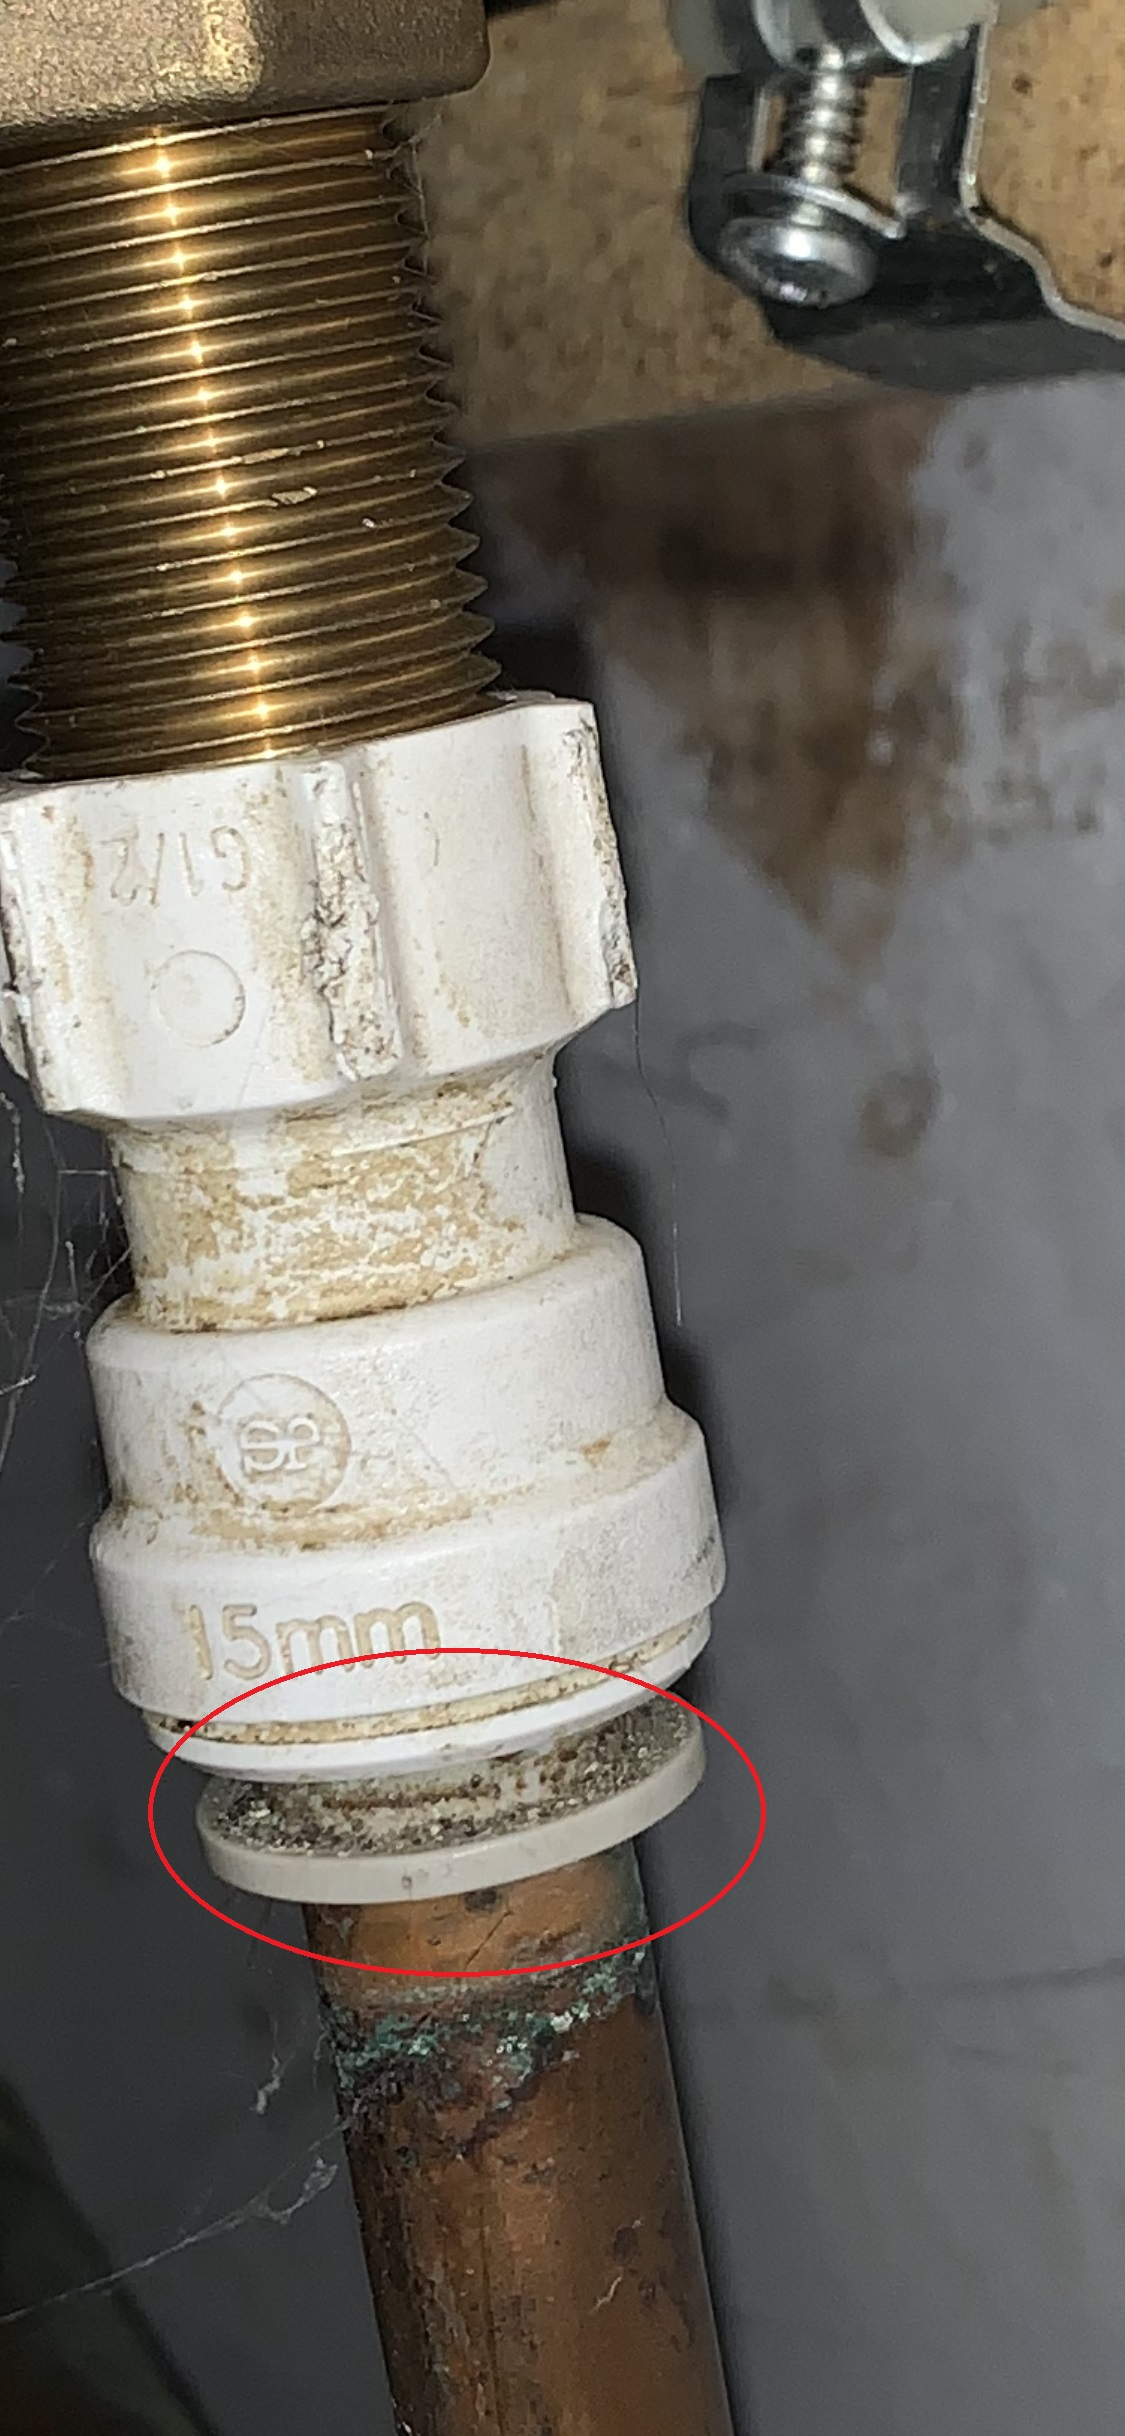
I mean the lowest part of the connector attached to the copper pipe. It is grey.Working_in_pyjamas said:
There isn’t a grey part, unless you mean the dirt on the rim on the lowest part?!No, you definitely don't just "yank it". See the grey part at the bottom at the copper pipe, you pinch that together with the rest of the body of the connector then pull it off the pipe.
TBH, anyone's capable of cutting pipe with the correct tools - https://www.screwfix.com/p/rothenberger-pipeslice-15mm-automatic-copper-pipe-cutter/36198
I really wouldn’t feel confident cutting a pipe so if that’s needed I’d have to get a plumber in
1 -
neilmcl said:
I mean the lowest part of the connector attached to the copper pipe. It is grey.Working_in_pyjamas said:
There isn’t a grey part, unless you mean the dirt on the rim on the lowest part?!No, you definitely don't just "yank it". See the grey part at the bottom at the copper pipe, you pinch that together with the rest of the body of the connector then pull it off the pipe.
TBH, anyone's capable of cutting pipe with the correct tools - https://www.screwfix.com/p/rothenberger-pipeslice-15mm-automatic-copper-pipe-cutter/36198
I really wouldn’t feel confident cutting a pipe so if that’s needed I’d have to get a plumber in
Ah yes, thanks - just watched a Youtube video so see what you mean. I'm going to buy the exact same fitting and hope that the lengths match up.
0 -
https://www.screwfix.com/p/jg-speedfit-plastic-push-fit-straight-tap-connectors-15mm-x-2-pack/29175Working_in_pyjamas said:neilmcl said:
I mean the lowest part of the connector attached to the copper pipe. It is grey.Working_in_pyjamas said:
There isn’t a grey part, unless you mean the dirt on the rim on the lowest part?!No, you definitely don't just "yank it". See the grey part at the bottom at the copper pipe, you pinch that together with the rest of the body of the connector then pull it off the pipe.
TBH, anyone's capable of cutting pipe with the correct tools - https://www.screwfix.com/p/rothenberger-pipeslice-15mm-automatic-copper-pipe-cutter/36198
I really wouldn’t feel confident cutting a pipe so if that’s needed I’d have to get a plumber in
Ah yes, thanks - just watched a Youtube video so see what you mean. I'm going to buy the exact same fitting and hope that the lengths match up.
1 -
That’s why as a apprentice we were always told to loosen the tap heads and retighten before fitting taps. Only take a couple of minutes saves hours in the future.OK and I understand. I've had occasions when I've had to fit a new tap for the customer as the valves had been overtightened in production and they just wouldn't budge.A thankyou is payment enough .2 -
Save and reuse those brass backnuts and throw away the plastic ones you now get with new tapsA thankyou is payment enough .1
-
One thing to note before you start is when you switch off the water, as well as opening the taps, see if there's anywhere with a lower outlet than the kitchen tap connections, for example a washing machine feed, and open these too to drain the water from the pipes else you will get a bit wet when you replace the tap connectors.1
-
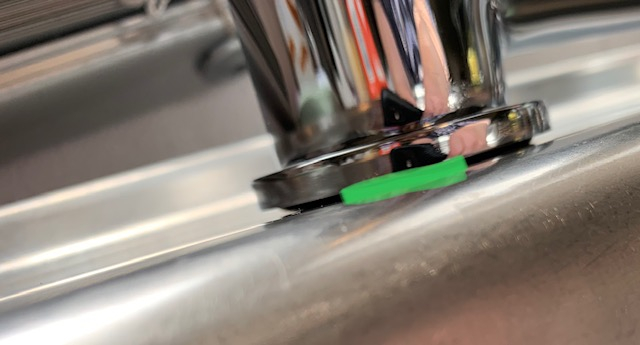
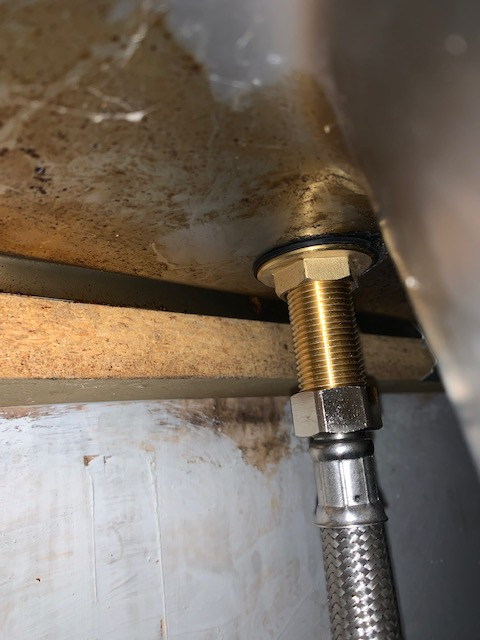
Thanks to all who contributed, after much swearing and losing the feeling in my thumb/finger I think I've cracked it! There were a few mishaps along the way, as nothing ever goes to plan, but the tap is on and not leaking at either of the fittings.I had a real job getting the old short/fixed pushfitting off to replace it with an identical/clean/new one, although I managed it eventually I decided to leave the metal flexi pipe with the pushfitting as it is (had bought a new one as so cheap to replace) in case that went pear shaped too.The only snag is that the hot tap isn't sitting flush to the deck of the sink, I could understand if the cold did this as the cold was limited by the length of the threaded tap fitting where it meets the copper pipe/plastic pushfit (which as luck had it seemed to be the exact same length as the old one) whereas the hot side had the flexi tail. It's tightened up to the max with a basin spanner but is still not completely flush to the deck - have highlighted in green on the pic.Any ideas to get it to sit flush? The new tap came with a rubber washer and metal back nuts.


0
Confirm your email address to Create Threads and Reply

Categories
- All Categories
- 352.9K Banking & Borrowing
- 253.9K Reduce Debt & Boost Income
- 454.7K Spending & Discounts
- 246K Work, Benefits & Business
- 602.1K Mortgages, Homes & Bills
- 177.8K Life & Family
- 259.9K Travel & Transport
- 1.5M Hobbies & Leisure
- 16K Discuss & Feedback
- 37.7K Read-Only Boards


