We’d like to remind Forumites to please avoid political debate on the Forum.
This is to keep it a safe and useful space for MoneySaving discussions. Threads that are – or become – political in nature may be removed in line with the Forum’s rules. Thank you for your understanding.
📨 Have you signed up to the Forum's new Email Digest yet? Get a selection of trending threads sent straight to your inbox daily, weekly or monthly!
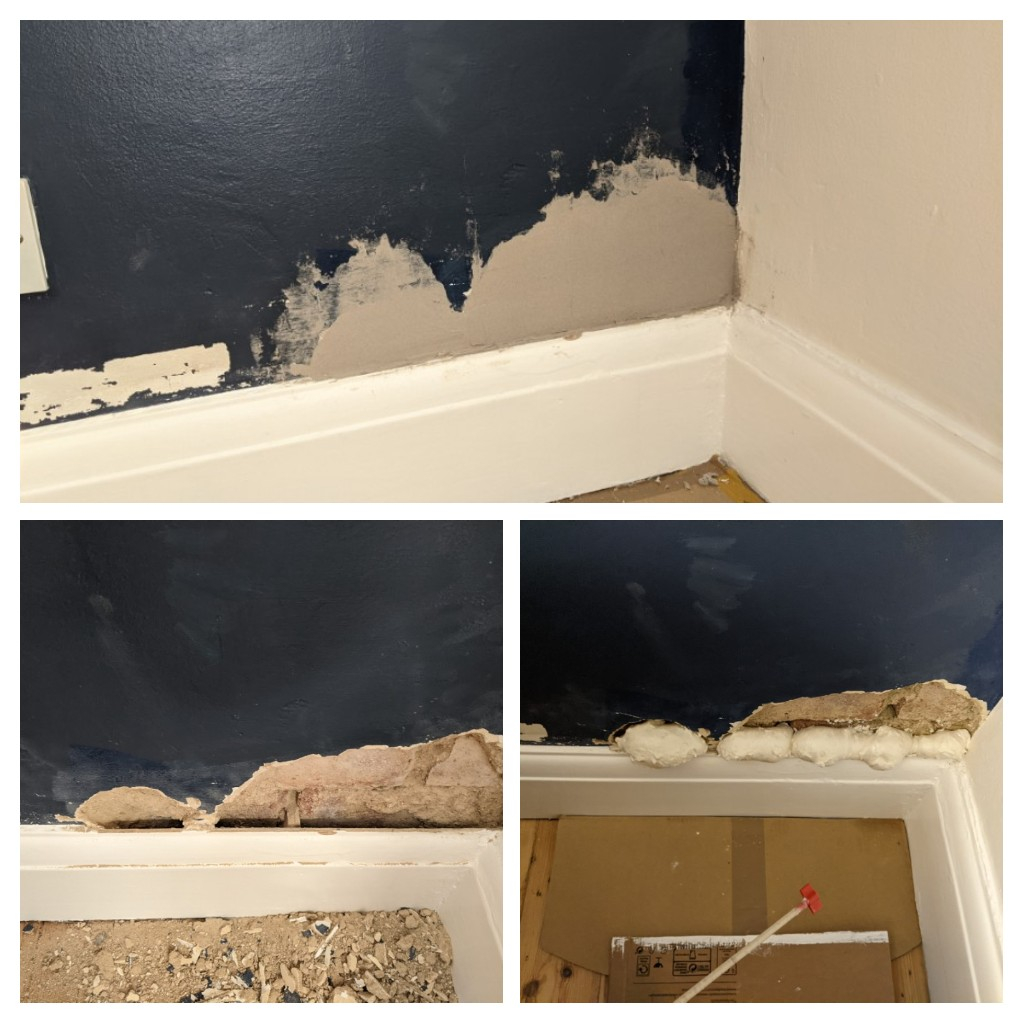
Help - plaster crumbling near skirting board!
Comments
-
As FB says, you've done with the PVA now! It's great stuff for stabilising dusty or porous surfaces, or ones with poor adhesion.You should find that filler/plaster sticks to filler/plaster just fine from now on.One possible issue, tho', is that - once the applied layers of filler are fully dry - it will tend to suck the moisture out of subsequent layers, and might even make it go crumbly as you work it smooth. This will happen more and more as the dry layer is thicker, and you apply fresh skims on top. In severe cases, the water is sucked out so much that the new layer won't bond properly to the dry layer below.You just need to judge this - it might be fine. It probably depends on the filler used. But if it's noticeable that the new skim is thickening/drying up quickly as soon as it's applied, due to the moisture being drawn out of it, then you may wish to slightly dampen the dry filler first before applying the next layer. Just give it a light brush with water.As the filled layer becomes thicker - as you get up towards wall surface level - It'll very likely become a bigger issue; there's far more dry filler there to do the suckin'.0
-
Thanks FreeBear. I tried to be careful with not spraying too much expanding foam. I left it for 2 days to swell at the top as much as it could before cutting it out - so hope that in its semi-liquid form while it solidified and cured it followed the path of least resistance (like liquids do) and swelled excess from top instead of pushing the skirting. But I do see your point, it was advised by a handyman friend and I didn't know enough to question or think otherwise.
Thanks about the PVA suggestion. I should be able to fill it in 1-2 more layers. I wont find time before the next weekend so there should be enough time for it to dry.1 -
kaboo said: I tried to be careful with not spraying too much expanding foam. I left it for 2 days to swell at the top as much as it could before cutting it out - so hope that in its semi-liquid form while it solidified and cured it followed the path of least resistance (like liquids do) and swelled excess from top instead of pushing the skirting.Not how it work - The stuff forms a skin, so any liquid centre is contained. Once it has spread out, it keeps expanding from the inside putting pressure on what ever it is in contact with. On the plus side, after 20-30 minutes, the chemical reactions will have ceased, and it is unlikely to expand any further. A couple of hours later, the foam will be solid and you can cut & trim to your hearts content. No need to wait 2 days.A light spray of water will speed up the setting process a little.Any language construct that forces such insanity in this case should be abandoned without regrets. –
Erik Aronesty, 2014
Treasure the moments that you have. Savour them for as long as you can for they will never come back again.1 -
Ohh that makes sense. I really hope it doesnt damage the skirting because it is Ovolo profile original skirtng and I have been struggling to find a replacement for another location in the house which has skirting missing. But hopefully that I can cover with any plinth and hide behind a TV table. Fingers crossed that no where else it needs replacement.
My waiting time is dictated by my three year old , between him and a job generally takes a while to get back to DIY, so easily meet any minimum wait time requirements! So next layer is likely to go on after 4-5 days anyway, unless like JC said if its better to put the next layer sooner so that its not too dry!
The can of Polyfilla plaster repair says wait at least for 24 hours longer for deeper repair and never fill more than 50mm in one application. I assume they mean 50 mm depth? and not width! But anyway, I though it would be more comfortable handling it in 2-3 layers. Can I attempt to fill it in next layer or spread it out over 2 more?
0 -
The foam will almost certainly be fine.As for layers, if you are using ready-mixed stuff, then you HAVE to let each layer fully dry or else the bottom coats will remain soft for ages.Just see how it goes when you apply subsequent layers to the dried ones below - if it goes on ok and you can spread it out and level it without issues, that's great. If instead you find it becomes stiff and even 'crumbly' when you apply it, then it's having the moisture sucked out of it, and I think it could compromise how well it adheres. So you may need to lightly dampen the under layer first just to reduce this suction. This shouldn't soften it or anything - once dry, it's usually set pretty solid even if dampened.Try it as it is - apply a further layer. Very good chance it'll be fine. It was just a warning in case you applied it and wondered, "What the 'eck?!"1
-
Yuhooo...i think i have got it. Uploading the pic. I think was holding my breath while doing this 😂
 2
2 -
You have made a nice job of that. Well done.1
-
Nice job - so good to see a task carried out.When fully dry, sand with a large flat block, apply a mist coat or two, allow to dry, and check if any imperfections show up. Very likely some will.In which case sand further to remove them if they are 'high', and add a tiny skim of 'fine surface' filler if 'low'.You'll get to the point it's perfectly acceptable.1
-
THANK YOU
 yes once its dry I will have a go at improving any imperfections. That I am much more confident of since have been fixing dents and holes around in the skirting boards and what not! Also you haven't seen the rest of the wall - if I try to make this patch better it will make the wall look bad
Now trying to paint over this horrid dark blue will take lots of coats (sorry but I prefer light and bright colours).1 -
That blue looks like a silk finish? Worth a light keying with the 120 or 180 grit to ensure a good adhesion with the new paint.
2


Confirm your email address to Create Threads and Reply

Categories
- All Categories
- 354.9K Banking & Borrowing
- 254.6K Reduce Debt & Boost Income
- 455.7K Spending & Discounts
- 247.7K Work, Benefits & Business
- 604.7K Mortgages, Homes & Bills
- 178.7K Life & Family
- 262.3K Travel & Transport
- 1.5M Hobbies & Leisure
- 16.1K Discuss & Feedback
- 37.7K Read-Only Boards