We’d like to remind Forumites to please avoid political debate on the Forum.
This is to keep it a safe and useful space for MoneySaving discussions. Threads that are – or become – political in nature may be removed in line with the Forum’s rules. Thank you for your understanding.
Christmas Radiator Blues!

Hi Guys,
Seasons Greeting to all.
Re thread heading I’ve had a Christmas hitch – Background (NB sorry if some of the terms I use are not the correct technical ones!)
Got a call early Christmas morning from my elderly Dad, water spraying out from behind a radiator.
I got over his house, isolated both ends of the leaking radiator at the valve/pipework joint at bottom, removed the bleed screw from top end of radiator, and let the radiator drain off via the leak into containers. I.E. the initial emergency has been resolved….. But…
Obviously I will need to fit a new radiator, and here’s problem 1) my Dad has a habit of painting everything, I leave my radiator valves and there connection nuts ect bare / unpainted, whereas my Dads ones have many coats of gloss paint on them.
What will be the best way to remove the paint so as I can undo the required nuts to remove / replace radiator without placing too much stress on any pipework?
And onto problem 2) I checked round all the other radiators to see that they were all functioning ok, one of the radiator was very hot bottom 2/3 but top 1/3 only luke warm, aha I thought air in the radiator, just needs bleeding.
Used radiator key on bleed screw, But did not hear the hiss of any escaping air, I actually managed to fully unscrew bleed screw still no hiss of air or any water coming out.
I must admit to having a slight panic and quickly screwed back in bleed screw/bolt.
Anybody know what's going on here, could the end of the bleed screw/bolt have sheared off, or can there be any other reason why with the bleed screw/bolt removed no trapped air or water comes out! I had always though that any sludge build up would affect the lower part of a radiator, not the top?
If any of you lovely people have any help or advice on either/both of my above two problems they would be most gratefully received,
Thanking you in advance.
Comments
-
1, Use 2 pairs of adjustable spanner or wrenches, one to brace the radiator valve itself, and the other one to turn the nut (clockwise) to remove the radiator. Also, bear in mind, if you haven't actually opened the radiator valve nut yet then you wouldn't have fully drained the radiator, all you've done at the moment is switched off the supply to the rad and reduced the pressure so no water can spray out.
2, In you process of taking out the pressure for the rad you've reduced the pressure on the entire system by the sounds of it. Assuming your dad has a combi boiler you need to refill via it's filling loop to at least 1 bar then go and bleed the rads again.1 -
I don't know about the second radiator, but to avoid "placing too much stress on any pipework", just try using two wrenches (in opposite directions) instead of one.Heatgun can be good for making paint softer. And three are various paint remover/stripper solutions that soften paints.
1 -
neilmcl said:1, Use 2 pairs of adjustable spanner or wrenches, one to brace the radiator valve itself, and the other one to turn the nut (clockwise) to remove the radiator. Also, bear in mind, if you haven't actually opened the radiator valve nut yet then you wouldn't have fully drained the radiator, all you've done at the moment is switched off the supply to the rad and reduced the pressure so no water can spray out.
2, In you process of taking out the pressure for the rad you've reduced the pressure on the entire system by the sounds of it. Assuming your dad has a combi boiler you need to refill via it's filling loop to at least 1 bar then go and bleed the rads again.Hi neilmcl,Thanks for you prompt advice, no need to worry about combi boiler pressure, my Dads boiler fitted sometime in the 70's is one of the old cast iron monsters, still serviced once a year with the boiler man every year saying thats its still good to go! ( I know that the new boilers are more energy eficient, but will any of the boilers fitted today still be in active use 45 years later?)
I am, therefore I think.0 -
Check the tank in the loft has water in it. Plus perhaps a good flush of the system is needed.1
-
I_am_spartacus said: my Dads boiler fitted sometime in the 70's is one of the old cast iron monstersA word or two of caution - If the radiators are of a similar age, they could well be an old imperial size. The threaded fittings may not be compatible with newer ones..If you are getting new radiators from somewhere like Screwfix with a free lockshield kit, check the threads on the tails - I had a dickens of a job to get one tail to seal, and ended up having to use an old spare. The "new" tail had a very rough thread... If you need to remove the backing nut & olive from the pipework (which you'll probably need to do), use an adjustable spanner as a sliding hammer behind the backing nut.Run some CH cleaning/flushing fluid through the system before draining it down, and don't forget to add some corrosion inhibitor when you are done.Any language construct that forces such insanity in this case should be abandoned without regrets. –
Erik Aronesty, 2014
Treasure the moments that you have. Savour them for as long as you can for they will never come back again.1 -
I_am_spartacus said:Hi neilmcl,Thanks for you prompt advice, no need to worry about combi boiler pressure, my Dads boiler fitted sometime in the 70's is one of the old cast iron monsters, still serviced once a year with the boiler man every year saying thats its still good to go! ( I know that the new boilers are more energy eficient, but will any of the boilers fitted today still be in active use 45 years later?)Don't knock it. I had one of those for 40yrs, it gave me no trouble, easy to adjust heating and was cheaper to run than my current one.Paint on metal and empty radiator I'd use Nitromorse on it. It's a gel so should be quick and effective. I've tried the cheaper stuff and it's not as good. You don't need to worry about affecting washers or anything because you are going to replace.
I can rise and shine - just not at the same time!
viral kindness .....kindness is contageous pass it on
The only normal people you know are the ones you don’t know very well
1 -
Icedrist said:It was interesting, thanksHi Icedrist,I am glad I've brighten up your Boxing Day ;-)
I am, therefore I think.0 -
I_am_spartacus said:
Hi Guys,
Seasons Greeting to all.
Re thread heading I’ve had a Christmas hitch – Background (NB sorry if some of the terms I use are not the correct technical ones!)
Got a call early Christmas morning from my elderly Dad, water spraying out from behind a radiator.
I got over his house, isolated both ends of the leaking radiator at the valve/pipework joint at bottom, removed the bleed screw from top end of radiator, and let the radiator drain off via the leak into containers. I.E. the initial emergency has been resolved….. But…
Obviously I will need to fit a new radiator, and here’s problem 1) my Dad has a habit of painting everything, I leave my radiator valves and there connection nuts ect bare / unpainted, whereas my Dads ones have many coats of gloss paint on them.
What will be the best way to remove the paint so as I can undo the required nuts to remove / replace radiator without placing too much stress on any pipework?
And onto problem 2) I checked round all the other radiators to see that they were all functioning ok, one of the radiator was very hot bottom 2/3 but top 1/3 only luke warm, aha I thought air in the radiator, just needs bleeding.
Used radiator key on bleed screw, But did not hear the hiss of any escaping air, I actually managed to fully unscrew bleed screw still no hiss of air or any water coming out.
I must admit to having a slight panic and quickly screwed back in bleed screw/bolt.
Anybody know what's going on here, could the end of the bleed screw/bolt have sheared off, or can there be any other reason why with the bleed screw/bolt removed no trapped air or water comes out! I had always though that any sludge build up would affect the lower part of a radiator, not the top?
If any of you lovely people have any help or advice on either/both of my above two problems they would be most gratefully received,
Thanking you in advance.
1) Paint is not usually a problem - just use a good adjustable spanner for the nice nuts and an adjustable wrench to hold the valve bodies steady so the pipes don't take the strain. The paint will simply crack where the nuts undo. If you are hoping to reuse the existing valves, then just clean any paint that's on the threads - that's all. If you plan to renew the valves, then you'll need to drain down the whole system (not a bad idea anyway) and - again - the paint won't be an issue. Except an eyesore.2) Why didn't the rad bleed? I guess either (a) because the screw bleed valve was faulty, or else (b) you had no system pressure. (Or (c) because both valves were fully shut - but they weren't since the rad was hot...)(a)When you fully removed the bleed screw, did the end have a point on it - a taper? They usually do. If so, then it's unlikely to be broken. That would leave - as you suspect - a layer of sludge blocking off what is a smallish hole. The whole bleed valve can be undone to check, and this will be necessary if you are draining the system at some point.(b) I guess this old system will be 'vented'? Ie there is a small 'header' tank in the loft? If the reason the valve didn't 'bleed' is down to lack of system water/pressure, then the first thing to check is that tank - is it 3/4 full, and does it fill further if you push down the ballcock?Yes, sludge build-up usually shows itself as a cold area along the middle-bottom. A cold top usually means trapped air.If that leaking rad is truly rotten (as opposed to having a faulty weak seam), then expect others to also be in a poor state :-(When you replace the rad, chuck in a really nice dose of inhibitor to try and stop any further rot in its tracks.1 -
Jeepers_Creepers said:I_am_spartacus said:
Hi Guys,
Seasons Greeting to all.
Re thread heading I’ve had a Christmas hitch – Background (NB sorry if some of the terms I use are not the correct technical ones!)
Got a call early Christmas morning from my elderly Dad, water spraying out from behind a radiator.
I got over his house, isolated both ends of the leaking radiator at the valve/pipework joint at bottom, removed the bleed screw from top end of radiator, and let the radiator drain off via the leak into containers. I.E. the initial emergency has been resolved….. But…
Obviously I will need to fit a new radiator, and here’s problem 1) my Dad has a habit of painting everything, I leave my radiator valves and there connection nuts ect bare / unpainted, whereas my Dads ones have many coats of gloss paint on them.
What will be the best way to remove the paint so as I can undo the required nuts to remove / replace radiator without placing too much stress on any pipework?
And onto problem 2) I checked round all the other radiators to see that they were all functioning ok, one of the radiator was very hot bottom 2/3 but top 1/3 only luke warm, aha I thought air in the radiator, just needs bleeding.
Used radiator key on bleed screw, But did not hear the hiss of any escaping air, I actually managed to fully unscrew bleed screw still no hiss of air or any water coming out.
I must admit to having a slight panic and quickly screwed back in bleed screw/bolt.
Anybody know what's going on here, could the end of the bleed screw/bolt have sheared off, or can there be any other reason why with the bleed screw/bolt removed no trapped air or water comes out! I had always though that any sludge build up would affect the lower part of a radiator, not the top?
If any of you lovely people have any help or advice on either/both of my above two problems they would be most gratefully received,
Thanking you in advance.
1) Paint is not usually a problem - just use a good adjustable spanner for the nice nuts and an adjustable wrench to hold the valve bodies steady so the pipes don't take the strain. The paint will simply crack where the nuts undo. If you are hoping to reuse the existing valves, then just clean any paint that's on the threads - that's all. If you plan to renew the valves, then you'll need to drain down the whole system (not a bad idea anyway) and - again - the paint won't be an issue. Except an eyesore.2) Why didn't the rad bleed? I guess either (a) because the screw bleed valve was faulty, or else (b) you had no system pressure. (Or (c) because both valves were fully shut - but they weren't since the rad was hot...)(a)When you fully removed the bleed screw, did the end have a point on it - a taper? They usually do. If so, then it's unlikely to be broken. That would leave - as you suspect - a layer of sludge blocking off what is a smallish hole. The whole bleed valve can be undone to check, and this will be necessary if you are draining the system at some point.(b) I guess this old system will be 'vented'? Ie there is a small 'header' tank in the loft? If the reason the valve didn't 'bleed' is down to lack of system water/pressure, then the first thing to check is that tank - is it 3/4 full, and does it fill further if you push down the ballcock?Yes, sludge build-up usually shows itself as a cold area along the middle-bottom. A cold top usually means trapped air.If that leaking rad is truly rotten (as opposed to having a faulty weak seam), then expect others to also be in a poor state :-(When you replace the rad, chuck in a really nice dose of inhibitor to try and stop any further rot in its tracks.Hi Jeepers_Creepers,
I was hoping you would read / reply to my situation. As per usual you have offered me lots of excellent advice and things that I can check when over there next.
If I could ask your personnel advice / clarification on a couple of points raised.
1) So you think provided I brace the pipe using two spanners / wrenches I will not need to strip / remove any of the paint?
2) What I intend to do with the radiator not heating up at the top, when next over after checking the other things you have suggested, is to isolate the radiator at both ends, fully remove the bleed screw/ bolt to see if its sheared off, and if not then to poke a piece of wire into the opening to clear any blockages.
My only concern with this is if any sludge ect is dislodge will this cause problems with blockages around the system/boiler itself i.e. similar to a dislodged blood clot in the human body causing major problems elsewhere?
I am thinking as you have said, that when I have removed the leaking radiator and see exactly where the hole is, that the rest of my Dads radiators will be in a similar condition :-(
Looking forward to your reply, thank you for the advice already given.
I am, therefore I think.0 -
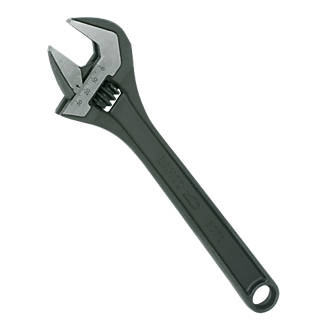
Blimey, no pressure... :-)1) The valve nuts will be tight anyway, and the presence of a coat or 5 of paint will add little difference. Once the nut moves, the paint will crack and have zero effect after that.I use one of these:
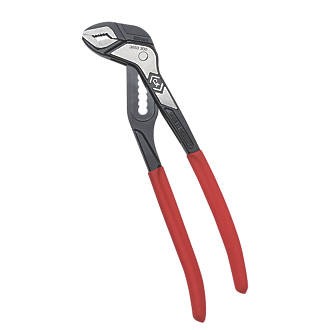
 on the actual nut on the connection between the valve and the rad, and one of these:
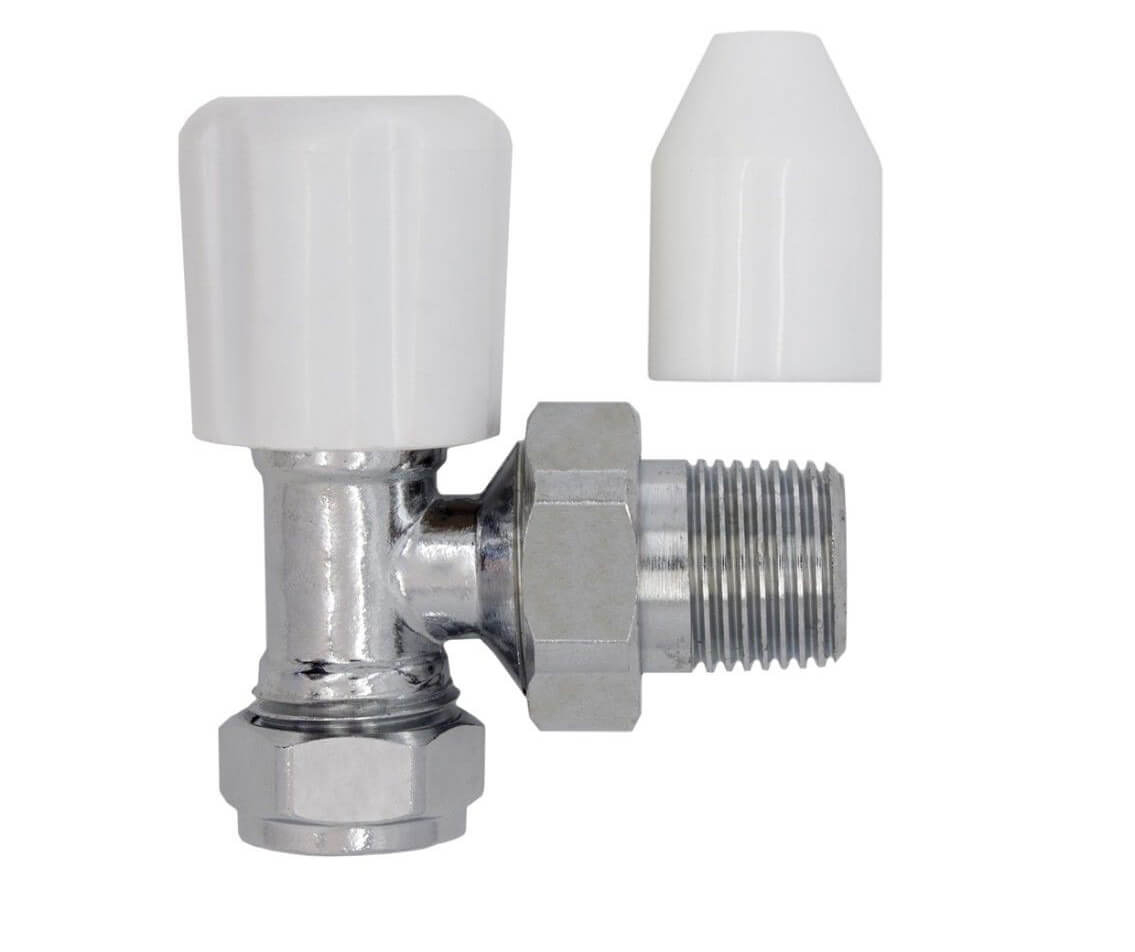
 set to the right opening to grip the valve body in a near-vertical way to prevent it from turning which would risk affecting the pipe. Set it so that it clamps on the valve body tightly when the handles are close enough to be held firmly in one hand. On nice chrome valves, add a layer of card or similar to prevent marking. Hold that tightly, and then undo the nut with the other spanner. Make sure you are turning it the correct way.It really shouldn't be a problem - the pipe itself is strong and will be doing a lot of the holding - but you are right in that you don't want the valve body moving too much because this could loosen the seal between the pipe and the olive and so cause a drip. You should easily be ok, tho'.Typical rad valve:
 in which case the large nut between the valve and rad is undone anticlockwise when looked at from the right. Slip spanner on, and push it down.2) Prod away. I really wouldn't worry too much about a tiny particle like that flying around an old boiler which has large waterways. I guess, if you can, try unscrewing the whole bleed screw assembly, but I bet it'll be tight.When you remove that leaking rad, watch out for black gunge coming out and making a mess. Drain it down fully, protect the floor, and turn the rad upside-down as soon as it's off. Take it outside and tip it on its side - see what comes out. Hose through - and stand back...Let us know what the corrosion is like.
1
Confirm your email address to Create Threads and Reply

Categories
- All Categories
- 353.6K Banking & Borrowing
- 254.2K Reduce Debt & Boost Income
- 455.1K Spending & Discounts
- 246.7K Work, Benefits & Business
- 603K Mortgages, Homes & Bills
- 178.1K Life & Family
- 260.7K Travel & Transport
- 1.5M Hobbies & Leisure
- 16K Discuss & Feedback
- 37.7K Read-Only Boards


