We’d like to remind Forumites to please avoid political debate on the Forum.
This is to keep it a safe and useful space for MoneySaving discussions. Threads that are – or become – political in nature may be removed in line with the Forum’s rules. Thank you for your understanding.
How to fix crumbling cement(?) under external door





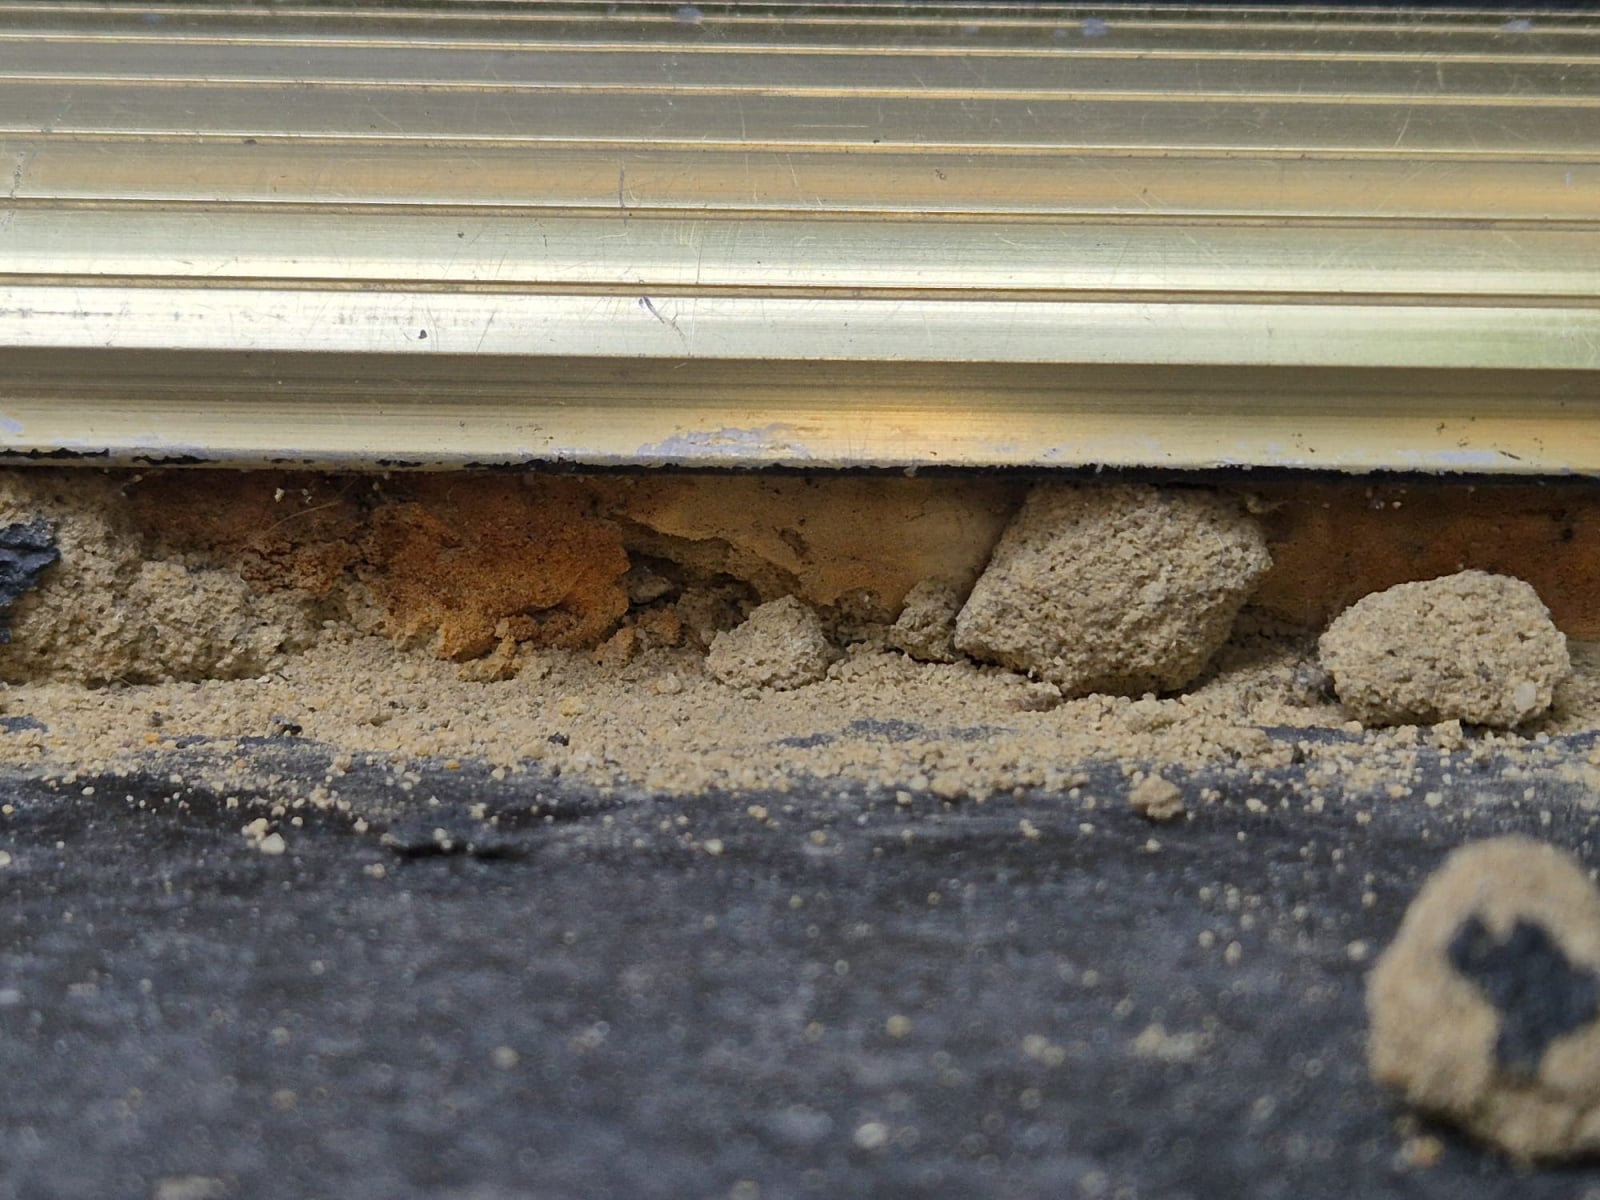
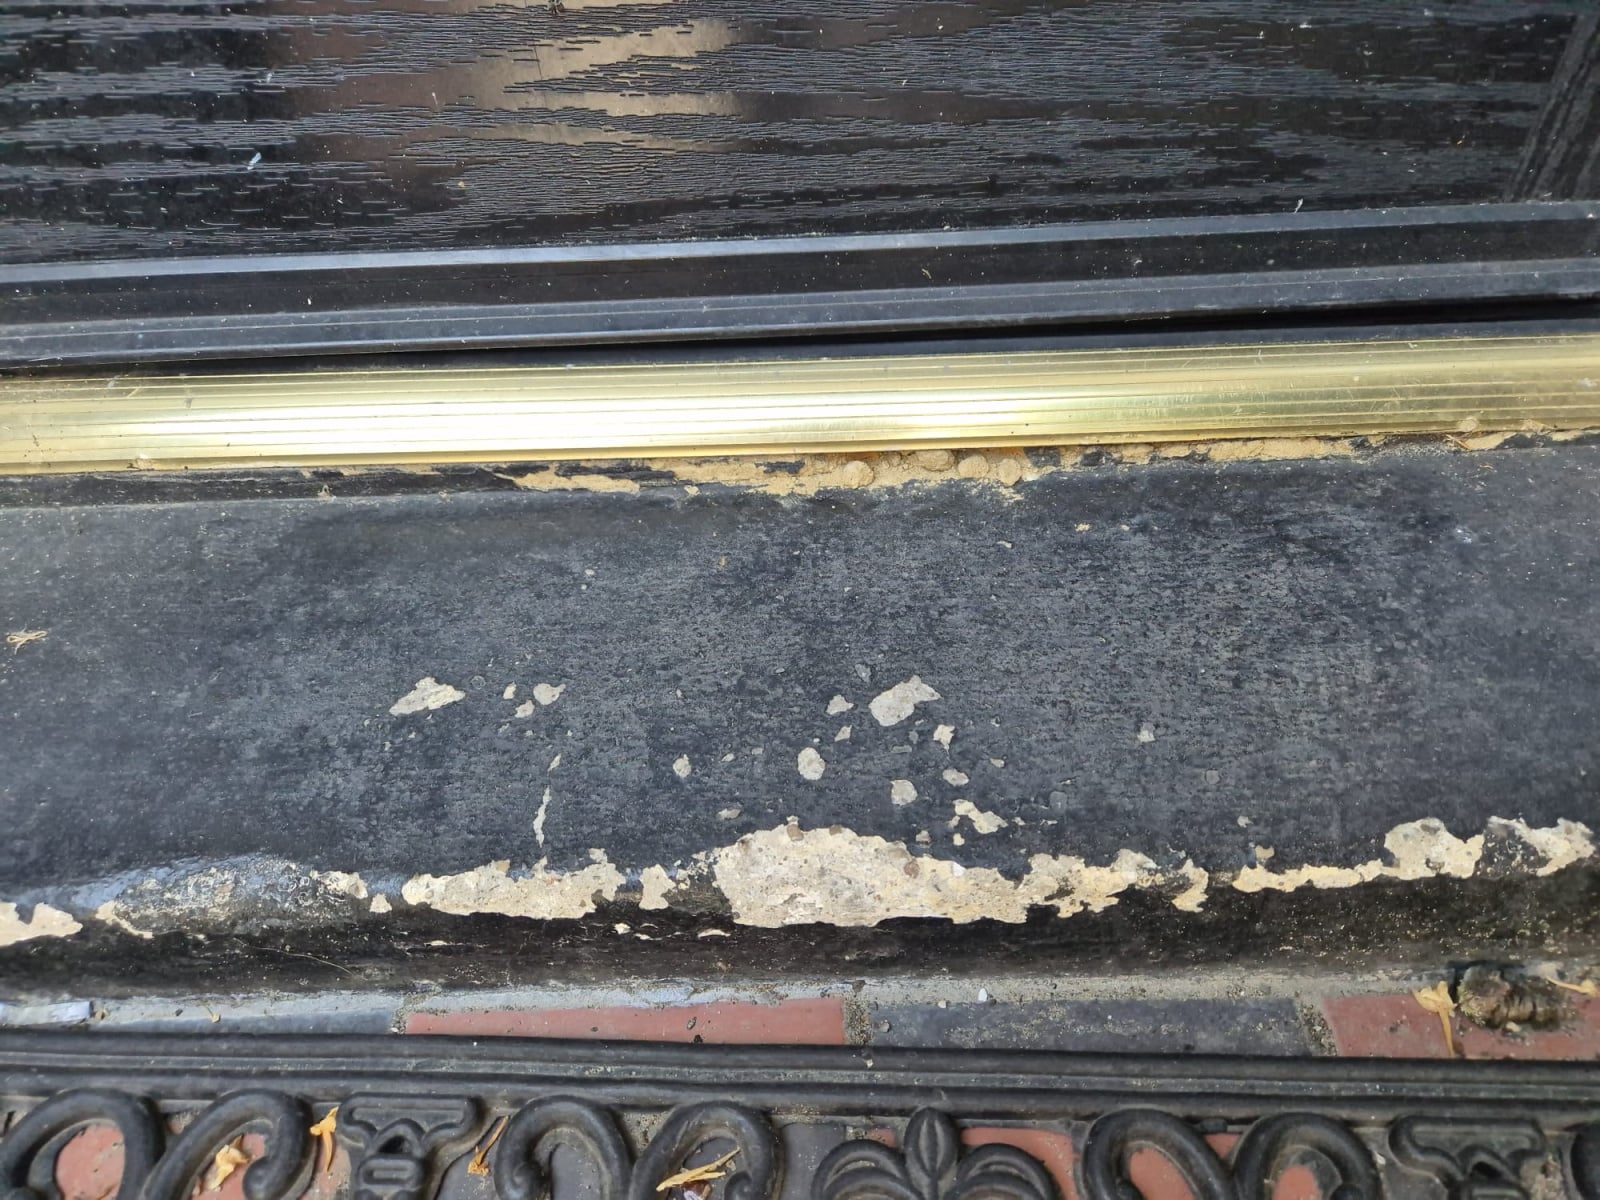
Small ants are coming in under my front external doorframe as this sandy cement is crumbling away. It looks like they squeeze in between the sandy component and the metal bar.
How do I prepare this area for fixing since its crumbling and what can I use to fill it in?
I currently have an unused tube of 'Fischer DEC Express Cement Premium'- Can I use that here or should I really use something else? I dont know if this mixture I have will expand and stop the door from shutting properly or something like that - or perhaps just not be a good filler for the other materials its touching.
Comments
-
Looking at the tiles, in the last picture, I have to ask - Is this a Victorian property ?
If so, ideally you'd want to be using a lime mortar. But for such a small repair a weak sand/cement mix would do the job. Your tube of Express Cement is not likely to go far and isn't just sand & cement - Not suitable for this application in my opinion.
You can get small bags of readymix mortar from Screwfix - 5kg should be enough. Just rake out the loose stuff, give the area a good soak, and then pack the mortar in. If it is hot when you do the job, put some wet towels over the area so that it doesn't dry out too fast.
Any language construct that forces such insanity in this case should be abandoned without regrets. –
Erik Aronesty, 2014
Treasure the moments that you have. Savour them for as long as you can for they will never come back again.2 -
It may indeed be Victorian, I am not 100% sure.
When you say my tube wont go far, you mean you think there wont be enough in it or that there is another problem with it? I was going to squirt it in and then pack it further in with a little garden shovel if necessary.
Most of the existing cement/mortar is intact. Does 'rake it out' mean remove everything, including what looks to be solid?
I was trying to keep the job as small as possible but maybe that's a mistake.. If I remove all the mortar, I dont know if the metal strip on top will be supported in the edges or fall down and this becomes a bigger task than I anticipated where I need to make sure the strip stays level and the same height etc?
Apologies for the questions I am DIY illiterate but keep trying to do small jobs like this with support from the forum.
0 -
Hi FCF.
At first glance I'd assumed that gap was inches tall! But it actually looks narrow - 1cm max? Please confirm.
There are two issues - the first is to stop the existing mortar from crumbling away, and the other is to fill and seal the gap.
The Fischer DEC is good stuff for making basic repairs in mortar, and it should hopefully be spot-on here too. But, you'd first need to ensure the existing mortar under there is kept secure. Just how crumbly is it at the moment?
If the existing mortar is reasonably strong, I would probably tackle that job by first brushing/vacuuming away every single loose grain. Use a screwdriver or similar to also clear away a good cm depth all the way along, so it can all be filled over evenly and matching. I'd then apply repeated coats of SBR, soaking & brushing it well in, trying to force it right in there, and recoating as soon as the last coat is sucked up. Continue applying as long as it's being soaked up. But wipe away excess smeared on the outside using a wet cloth before it dries. If you can get SBR drawn in there, it should set and bind the loose bits together.
Allow at least a day - more if a lot got sucked in - for the SBR to dry. The mortar under there should now hopefully be stable. Then inject a bead of the DEC in as far in as you can (do you have a skeleton gun?) and finish it off with a suitable tool, even a kitchen knife - get everything together first, and do a 'dry run'!
Read the instructions on the DEC - does it say you can sprinkle a few drops of water on it to help it bind/smooth it down?
A small 1L tub of SBR can be bought from, say, Wickes for around £8.
Make sure you are happy doing this. Alternatively, if you see a builder working in t'hood, ask if they'll pop round and sort it the next time they 'mix a batch'.
1 -
Apologies- I should have left something for scale in the picture. The gap between the 'golden' metal bar and the big black 'slab' is roughly 1.5 cm. Depth is a few cm mostly, but a few areas may be deeper than it looks. There's no internal issues, it doesnt go all the way through.
Your questions made me go and dig a bit more in it to see how crumbly it is. Turns out:
- Internally there is no issue. The colour is grey, it seems solid, cant find faults.
- Externally it is sandy, and its been painted black on top to match the 'slab' its standing on. (though as you can see the black paint is also peeling since the mixture is crumbling.
- Between the two layers there appear to be something else. A spongy orange material- some sort of thing they have 'sprayed' in and it expands to fill gaps perhaps? The dark orange part in my picture is the spongy material that appears when I dig further in. The light sandy mortar appears to just be a couple of cm layer on the external side.
It would make sense that the sandy concrete mix cant adhere to this spongy material and perhaps thats why its crumbled away. It's been there for years.. how bad idea is it to just remove the thin layer and add my bottle on top?
I have a skeleton gun I can use from previous recommendation on here when caulking skirting board- it does fit my 310ml bottle.
Notes from the Fischer DEC Express Cement Premium bottle: (no mention of water drops)
- No primer required or common construction materials eg concrete, masonry, stone and cement.
- Can be used on vertical damp surfaces
- Surfaces must be clean and free of grease
- Leave for no longer than 5-10 minutes before removing excess with brush
- Not recommended for water immersion or movement joints.
- Cures 1 mm per day.
1 -
Better still!
The inner grey mortar will be doing the supporting of the cill - I really don't think you have anything to worry about if you temporarily scrape out the crumbling mortar on the outside - obviously don't jump up and down on the threshold. Yes, the orange bit is either Trump trying to hide or is expanding foam - this is a quick and easy gap-filler, and has good insulation properties, so that's all good too.
The outer mortar was almost certainly just not done properly, either too weak a mix, or it had begun to set before being used. It's just too weak, and that's why it's crumbling.
So, slight change of approach - no need for the SBR, just scrape away all the loose mortar right to the foam, and try not to damage/remove the foam too much (but not critical). Brush and hoover away all the dust and debris.
You can lightly dampen the surfaces in there, either with a fine mist spray, or by using a paint brush - but just 'damp'. If you get it too wet, just leave it for a bit to half-dry.
That DEC, although effectively the same 'product' as I used (No Nonsense 664+), is seemingly smooth mortar, whereas mine was sandy/gritty, so more like building mortar. But, same stuff, and I'm sure will be ideal.
Clean it all out, dampen it, and get a suitable tool for finishing off - if you have a gently-round-tipped kitchen knife, for example, that could be good; try it, do dry-runs. Run the tip along that gap, touching against the top and bottom edges, and check it looks as tho' it will give the mortar a gentle concave finish that you will be happy with. Failing that, you can use a flat filling knife or blade, and - if needed - finish off by gently running a paint brush along the whole job to get it even. Decide on this before you start!
Once you are happy, cut the nozzle tip to's it gets right in there - you want to fill that gap right up tight against the foam, and pressing firmly against the top and bottom surfaces. Do it in bead-runs if you want, adding another bead until it's flush with the front. Then run the knife blade along it, wiping away excess on the cloth you remembered to have beside you. Any gaps, add a wee blob more, and start 'knifing' again from before that bit to blend it in.
You can 'mist' it to make it easier if you want.
It will start to skin after five or ten minutes, so don't knife it any more after this. Use the knife to scrape away any tramlines left on either side - it might be easier to do this once it's partially set - and carefully use a damp cloth to clean up - but avoid touching the good bit.
Leave for a good week or so before painting it, if you want to.
Oh, and come back on here with photos so's we can have a good lau… offer some praise.
1






Confirm your email address to Create Threads and Reply

Categories
- All Categories
- 355.8K Banking & Borrowing
- 254.9K Reduce Debt & Boost Income
- 456.2K Spending & Discounts
- 248.3K Work, Benefits & Business
- 605.9K Mortgages, Homes & Bills
- 179K Life & Family
- 263.7K Travel & Transport
- 1.5M Hobbies & Leisure
- 16.2K Discuss & Feedback
- 37.7K Read-Only Boards