We’d like to remind Forumites to please avoid political debate on the Forum.
This is to keep it a safe and useful space for MoneySaving discussions. Threads that are – or become – political in nature may be removed in line with the Forum’s rules. Thank you for your understanding.
Little bit of plastering


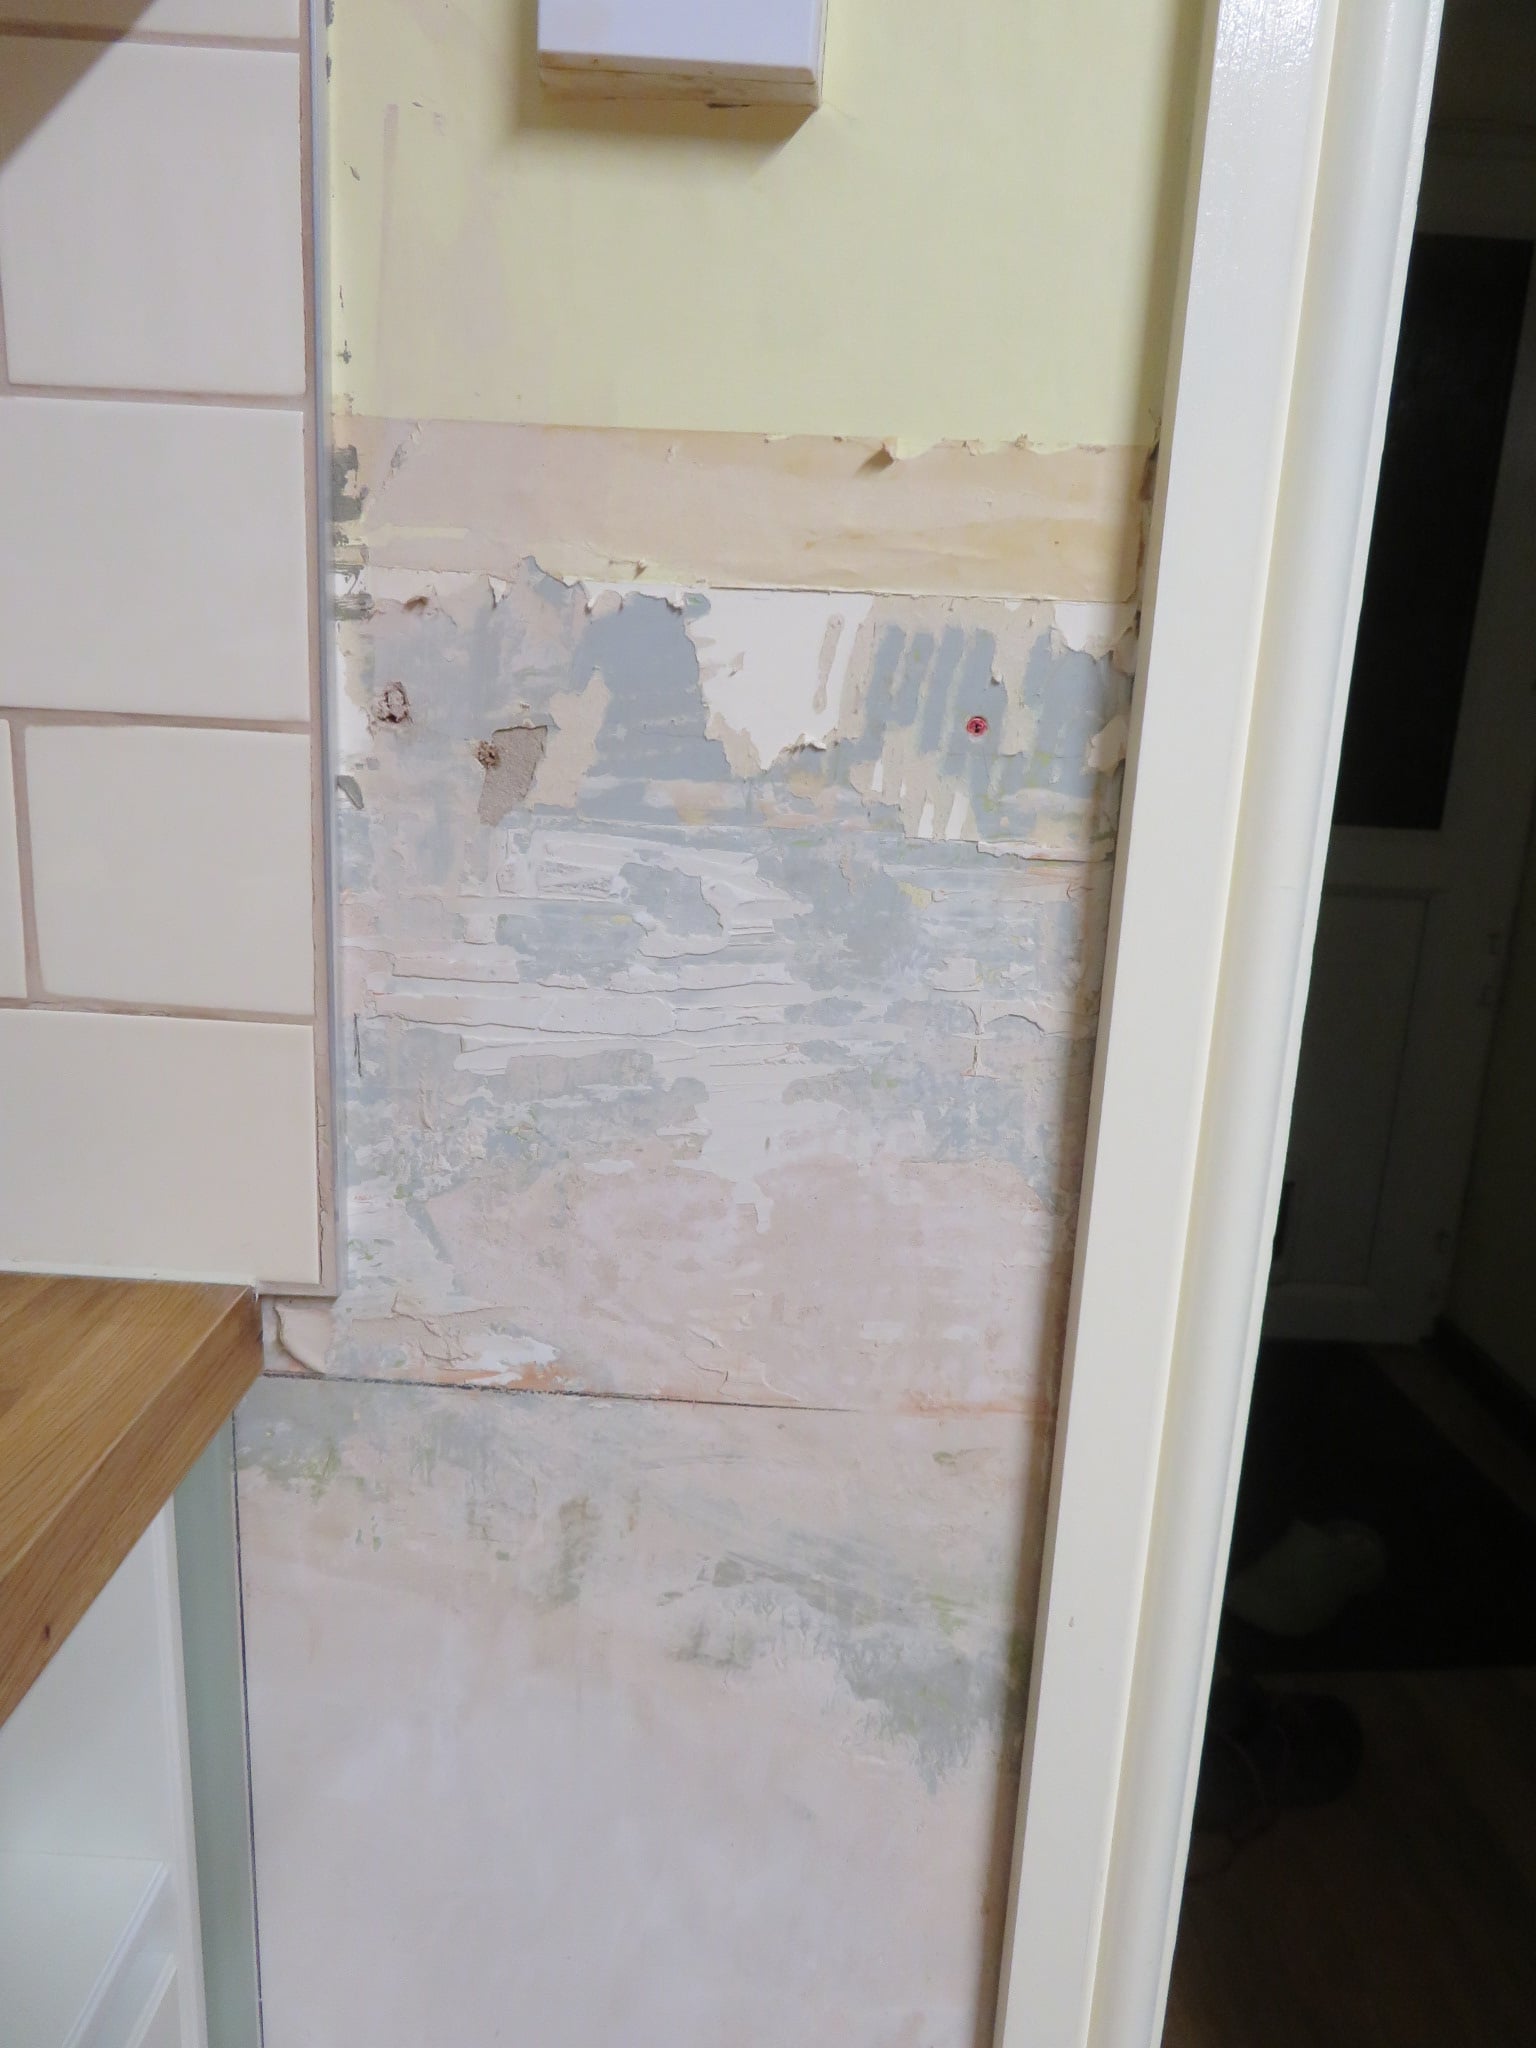
When I had my kitchen installed, a new electric circuit was hacked into the wall along above the cabinets. It's about a 2m run I guess. It's been roughly filled but needs skimming over. There's also a small patch on another wall which is bit rough because there were tiles there before, probably about a foot square.
I'm a bit reluctant to get a plasterer in for such a small job, also because I'm a bit drained from all the kitchen drama. Is it a really bad idea to try and do this myself?
Comments
-
IME, plastering is an art, best left to those who do it day in, day out, as a profession. Especially if you want a decent finish you can paint over!
However, I'm sure there will be others along who say otherwise. 🙂
I’m a Forum Ambassador and I support the Forum Team on the In My Home MoneySaving, Energy and Techie Stuff boards. If you need any help on these boards, do let me know. Please note that Ambassadors are not moderators. Any posts you spot in breach of the Forum Rules should be reported via the report button, or by emailing forumteam@moneysavingexpert.com.
All views are my own and not the official line of MoneySavingExpert.
1 -
Photos, Sapi, please.
Yes, plastering is an art, but this is 'filling-in', and a perfect finish can be achieved by pretty much anybody.
The choice of finishing filler will have a large bearing on this, and I'm sure folk will provide their thoughts.
Do have things like a sanding block and filling knife?
0 -
Knauf Fill & Finish will provide a decent surface. If you get it wrong, go over with a wet sponge and hit it with a trowel again. But buying a 5Kg tub is a bit wasteful.
B&Q (and probably other sheds) do small bags of 7.5Kg bags of finishing plaster, but again, you won't need a whole bag. It takes a bit of practice to get a decent finish though. You also need to get it right first time as once hard, you can't rework it. And no, you never, ever sand gypsum plasters smooth.
Easyfill is another product to look at - This stuff you can sand back IF you wear a suitable dust mask and can suck up the dust as it is being generated.
Any language construct that forces such insanity in this case should be abandoned without regrets. –
Erik Aronesty, 2014
Treasure the moments that you have. Savour them for as long as you can for they will never come back again.0 -
Yes I filled in a wall where wires had been chased in.
I had some rough plaster left by someone and bought some fine finishing plaster. It was quite easy and a good flat finish.
I was taught after levelling with the wall using a blade to very lightly brush over with a barely damp paint brush to really smooth it off.
I can rise and shine - just not at the same time!
viral kindness .....kindness is contageous pass it on
The only normal people you know are the ones you don’t know very well
0 -

my body is 9 characters too short
1 -
Sanding block filling knife yes or can be obtained. 5kg tub would not go to waste there are a couple of other places round the house where it would find a home.
Used to be able to quote several people and single out the bits of their post you wanted to respond to. Don't seem to be able to any more.
0 -
For the ex-tiled area, first chip/scrape away all the old adhesive. Take care not to dig into the wall.
For the top wall channelling, you ideally want a filling knife blade, or trowel, which is wider than the channel, so it can be slid along the wall below, using this as the levelling guide. The filled areas will need dampening down first, so it doesn't suck the thin layer of filler dry!
0 -
The filled areas will need dampening down first, so it doesn't suck the thin layer of filler dry!
Or slap a bit of dilute PVA/SBR on to reduce the suction. Having wall units there, they will get in the way. Probably not going to be easy to remove them first. But the chimney for the extractor should just pop off once a couple of screws have been removed.
Looks like the ceiling could do with a skim, so it might be worth getting quotes from a a couple of plasterers.
Any language construct that forces such insanity in this case should be abandoned without regrets. –
Erik Aronesty, 2014
Treasure the moments that you have. Savour them for as long as you can for they will never come back again.0 -
The ceiling can stay like it is until it falls off. The wall units will also have to stay on I think. Yet another example of kitchen fitter not really knowing his job, he probably should have allowed for getting the wall patched before putting up the units. Not sure about the cooker hood as he said it was a pain to fit so I may have to leave that too. Good tip on sealing the wall with PVA first. The patch where the tiles were has already been dug into when the tiles came off, but can try and get it as smooth as possible otherwise.
0 -
Personally, having once tried it, I'd avoid using PVA, but just dampen it.
What I found was, after the new patch had set and was being sanded flat, the PVA sketch n became obvious at the join, and showed up once painted. It needed repeated sanding and coats of paint before it was disappeared.
Also, any PVA left on the top surface of the surrounding wall will cause issues when sanding - it'll shred like a plastic skin (which is what it is), and be a pain. Any bits left behind will likely reactivate when emulsioned - another pain.
It doesn't matter that the tiled area has donks it it - they will be filled. The important first step is to remove any high spots, and bits of tile adhesive.
By not digging in excessively, I'm making ndful that it appears to be plasterboard, so has a delicate paper skin best left as undamaged as possible. So, it doesn't 'matter' too much, but is best avoided, so suggest keeping the scraper blade at a low, flush, angle.
Once all the high spots are removed, you then fill all the obvious dips and damage using a filling knife, running it firmly on the wall to guide the level. Let it dry, and gently sand using 180 (or 120 if layer is a bit thick) on a flat sanding block.
You'll then see the new finish, and you check it for further blemishes requiring filling. If it seems ok, but you ain't sure, then roll on a slightly thinner coat of emulsion paint and let it dry - that should make it clear. Fill any dips, and sand down any peaks.
You keep going like this - it'll likely need at least two 'fills' - until the finish is acceptable.
Sounds intensive, but filling that tiled area is a 2-minute job.
Access will make the wall top channel awkward. Again, tho', it's 'minimum skim fill', let dry, sand flat. You can get sanding blocks on handles, which may help.
1


Confirm your email address to Create Threads and Reply

Categories
- All Categories
- 354.3K Banking & Borrowing
- 254.4K Reduce Debt & Boost Income
- 455.4K Spending & Discounts
- 247.3K Work, Benefits & Business
- 603.9K Mortgages, Homes & Bills
- 178.4K Life & Family
- 261.5K Travel & Transport
- 1.5M Hobbies & Leisure
- 16.1K Discuss & Feedback
- 37.7K Read-Only Boards