We’d like to remind Forumites to please avoid political debate on the Forum.
This is to keep it a safe and useful space for MoneySaving discussions. Threads that are – or become – political in nature may be removed in line with the Forum’s rules. Thank you for your understanding.
Redo Fitted Wardrobe
Comments
-
Good point. The carpet is new and was fitted to the wardrobes so I'm guessing there's no carpet under the existing ones. So I'm hoping I'll be able to make the plinth to but up to the carpet gripper then the skirting will sit on the carpet attached to the plinth (painted first!!)
0 -
In the kitchen in a previous house, and in a bathroom and part of the kitchen in this house, we have floor-standing units that are on plinths fixed to the floor. It is fairly simple to build a level plinth, you can use whatever timber you have available to make the main structure, then face it with the final product, in your case some skirting board. Having a solid and level plinth makes it easy for the cupboards to be lined up. They were then screwed together, and fixed down into the plinth and back to the wall.
Our bathroom units were hand made for this house 39 years back by my OH, we decided we would retain them when we renovated the bathroom, so used the original plinth as the main supporting structure, but made it a little shallower in depth, then faced it with Iroko to match the bench tops. It has a front and back bit that the units sit on, screwed to the floor, then bits between those to keep it all nice and parallel. We screwed the finished front in place from the back so no screws are visible.
I would fit the matching skirting then run the carpet up to it, that way it will exactly match the adjacent skirting. And make it easy should you ever wish to change the carpet.
Our daughter has multiple Pax wardrobes in her bedrooms, some that came with the house, some she brought from her previous house. Those floors were all laminate, so no missing bits where wardrobes stood.
There were far too many in 2 of the rooms in the new house, and fitted so they made the rooms narrow, so she decided to reduce the number and move them to a different wall. When they were dismantled, she found the carpet was fitted round them, just as well she had planned to remove the carpets in favour of laminate!
0 -
I'm pretty confident in constructing the plinth, I have some wood in mind for it already, and whilst not commonly seen in videos I'm tempted to put some thin ply over the top too, to make a complete surface, which may come in handy for the nook area, undecided yet.
As with many things, the finer details can't be ironed out until the existing setup is dismantled and I can see what I'm dealing with fully. I've been able to put my phone behind the little cupboards as theres a cut out for a plug but it's not 100% clear what's there, might put a tilt and turn baby camera in there!
I'm fairly sure the pax plinth will be about 1cm shallower than the existing plinth we have, so I just need to see how pax plinth + skirting comes out. Ogee looks to be 18mm deep. So I reckon I'll come out perhaps 5mm in front of where I am now. The side infils stick proud of the existing plinth thouguh, by 18mm +10mm roughly.
There's some gripper rods somewhere, so I just need to make sure my plinth doesn't sit on them!
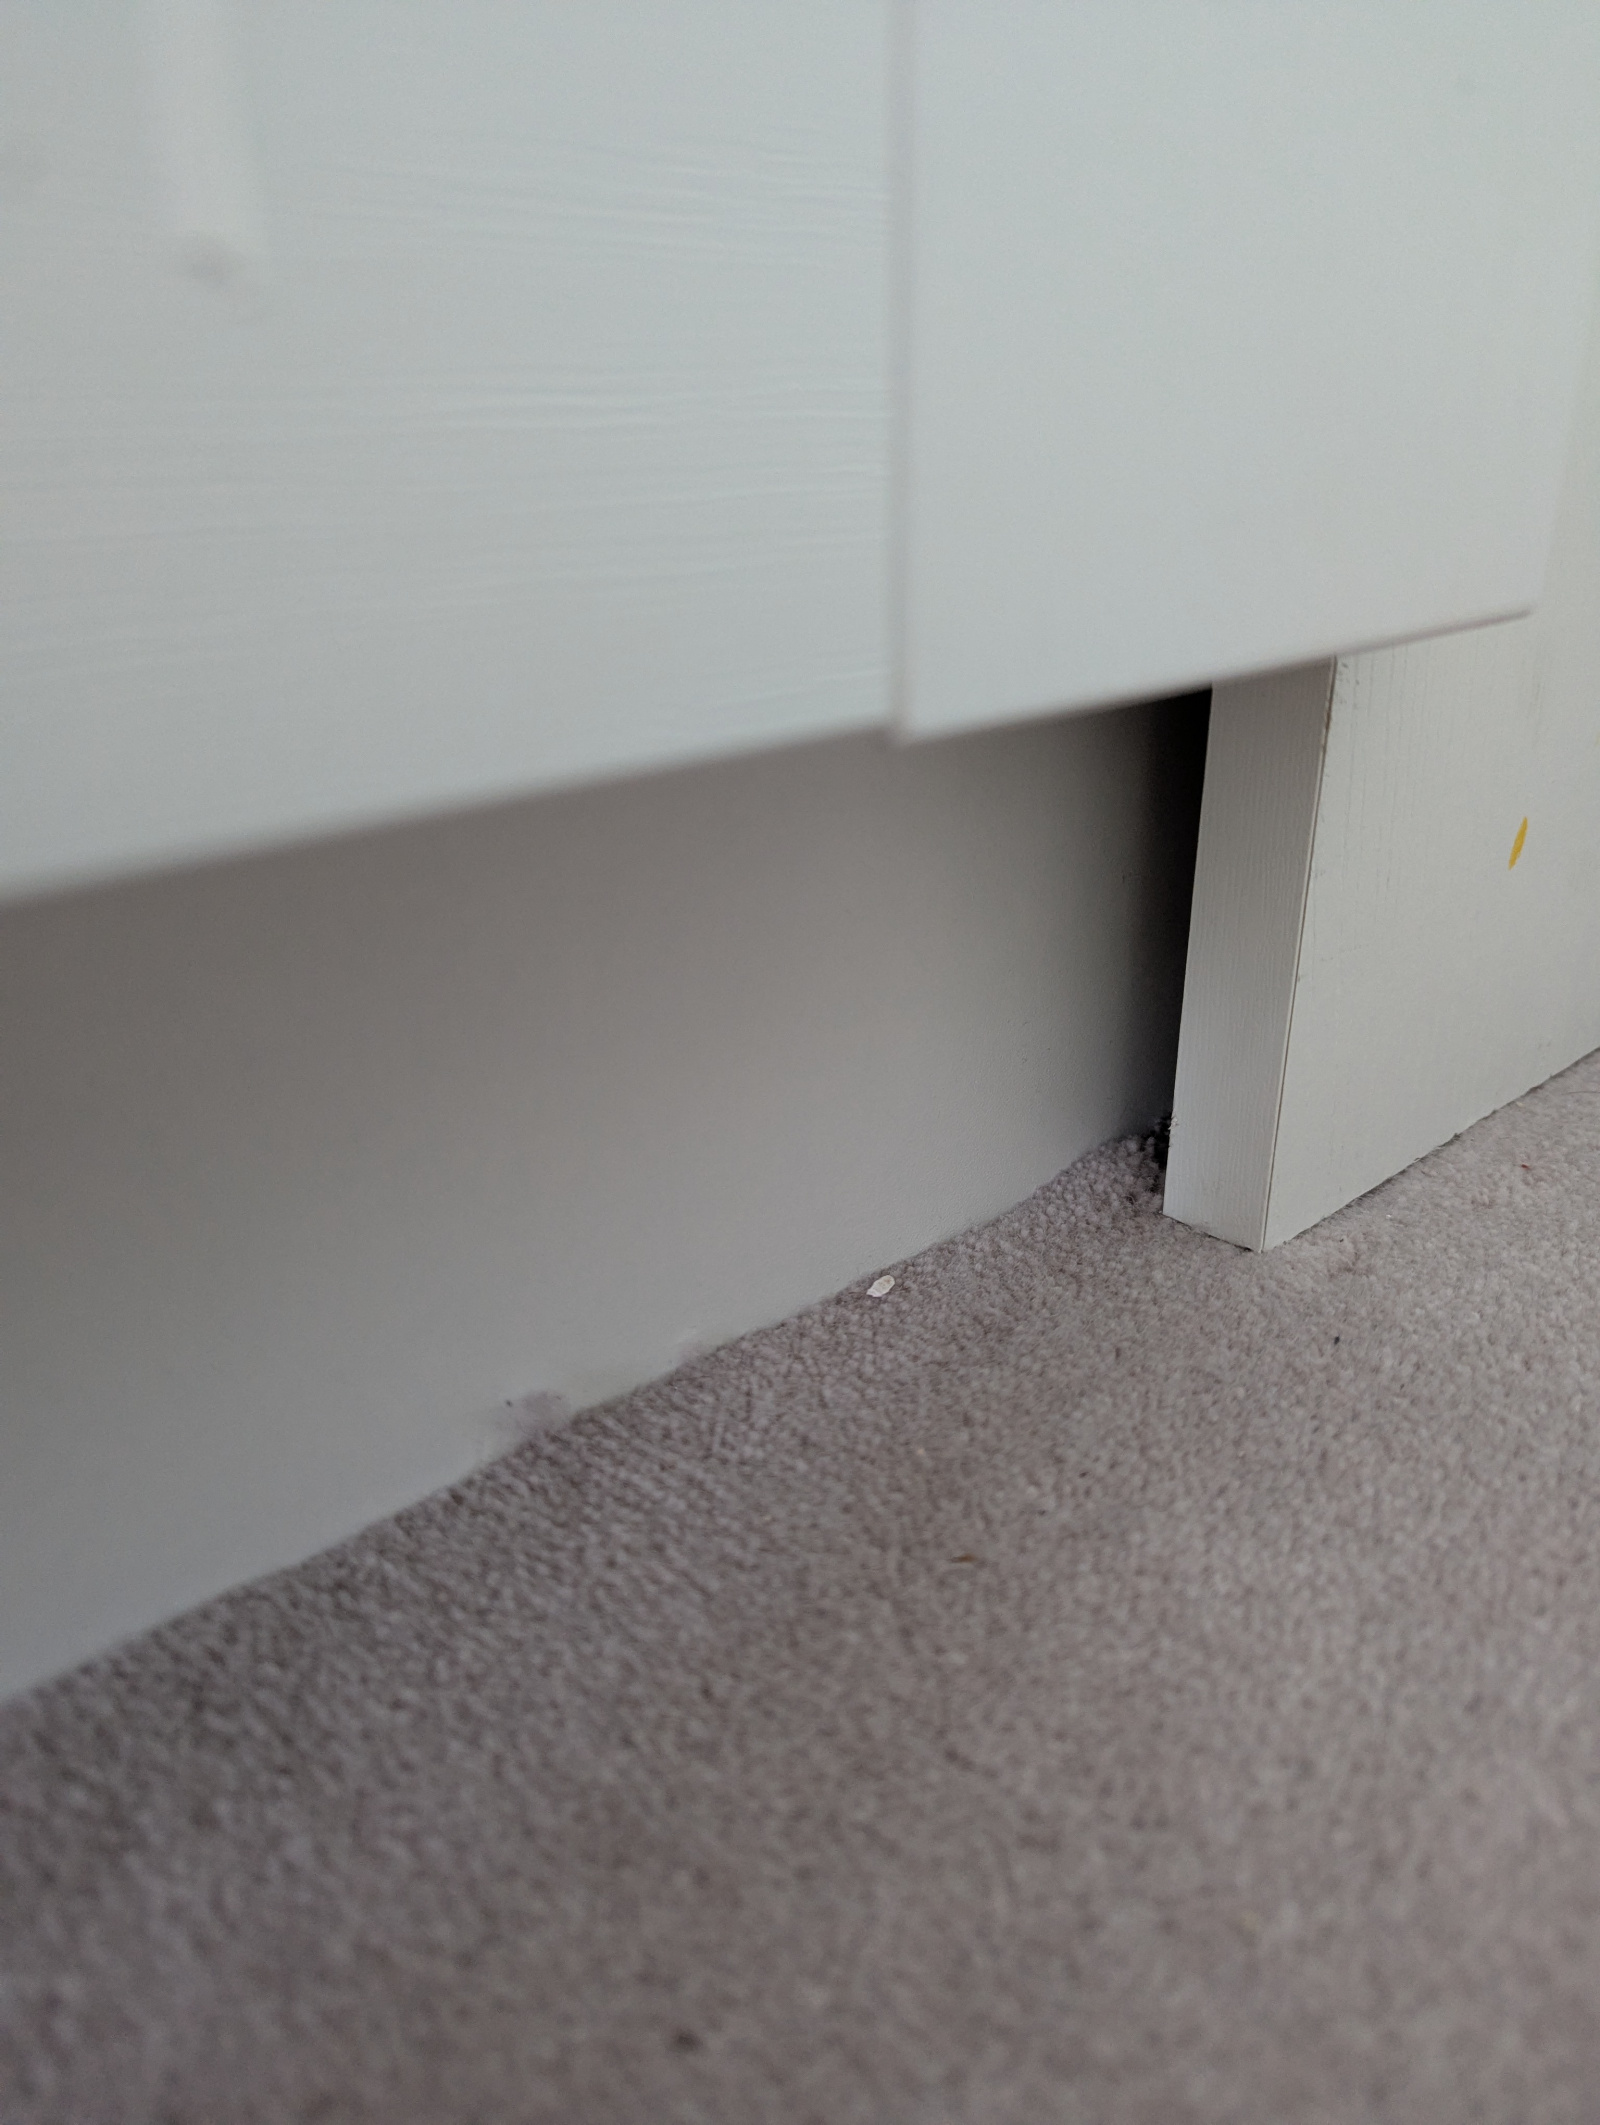
I'm pretty sure grippers will be butted up to the bit that sticks out.
0 -
I've tried to measure as best I can, but until stuff is out it's tricky. At this stage I think I may need a stepped of staggered plinth. Basically 100mm high in total, so split into two 50mm builds, the bottom one being 10mm shallower so it sits behind the gripper.
The top one will be the full depth of the pax, then the skirting gets stuck to the top one.
Well, that's one theory to get around it!
Then I'll probably find the skirting seems too high since it'll sit more 'on' compressed carpet, so will probably need to trim 5-10mm from the bottom perhaps. Joy!
0 -
The Pax does not really have a proper plinth, not like say kitchen units do. The sides go all the way down to the floor, there are height adjustable legs under the bottom shelf, and the front is in line with the shelf, unless they have changed them in the last few years.
You idea of a plinth in 2 parts would work well as you could sit the pax on top of the bottom bit, which could be made to a height such that it plus the Pax base lifted the bottom of the doors above the height of the skirting……..if you see what I mean?
https://www.ikea.com/gb/en/p/pax-wardrobe-frame-white-20214566/0 -
Yeah, I have the idea clear in my head but I think measurements are unknown until I have a pax assembled or have measured in the shop, and have stripped out...
The design has changed for sure, as recently as this year I believe.
0 -
I just took a look at the assembly instructions for the Pax, they look the same to me as when we assembled the ones our daughter has.
Sides go right to floor, 2 adjustable feet at the front , adjusted through the base in case the floor is not quite level. Have you looked at the assembly instructions? They show a lot of detail, and sizes are on the website, which is useful. But I think your idea to have 2 layers of plinth will still work.
https://www.ikea.com/gb/en/assembly_instructions/pax-wardrobe-frame-white__AA-1289393-10-100.pdf1 -
Honestly, no, I've not looked at the build instructions - seen a couple of videos as part of bigger builds. I guess I just figured that's probably the easiest step of what I'm doing so I didn't interrogate it like I am other bits!
Your comment about the carpet was super useful as it got me thinking about the gripper rods and stuff.
As regards how the design differs, I had heard stuff about if being 'tool free' practically, something different with the back etc.
I may look on some ikea forums to see if anyone advises 'hacks' to strengthen them - like perhaps ply over the back too or something.
Thanks :)
0 -
I think it would be useful for you to check out the assembly instructions and dimensions, just to make sure you know how it fits together and will turn out, especially the plinth part.
The depth of the Pax may be more than your current set up, in which case the carpet edge and fixing will need to be altered.
You should only need a suitable screwdriver to tighten up the joining devices, maybe a small hammer for tapping in dowels and attaching the back. The instructions will say if you need anything else.
The pieces are large and heavy, so you will need an assistant, two assistants would be even better. You should not need to strengthen the back, unless the quality has seriously gone downhill recently!
0 -
I certainly will, for sure. I have plenty of tools, I was just referring to the 'new' build which is supposed to need less tools, which I guess is a clever idea for some folk.
Indeed, my wife will semi be on hand, but for the main build/lift I think I'll enlist the help of our gym keen 18 year old nephew!
I'm keen to get cracking now, shame I need to wait until September! I'm convinced my wife will change her mind and I'll do it sooner!
Now to plan out the little nook part for me daughter!
0





Confirm your email address to Create Threads and Reply

Categories
- All Categories
- 354.6K Banking & Borrowing
- 254.5K Reduce Debt & Boost Income
- 455.5K Spending & Discounts
- 247.5K Work, Benefits & Business
- 604.4K Mortgages, Homes & Bills
- 178.6K Life & Family
- 262K Travel & Transport
- 1.5M Hobbies & Leisure
- 16.1K Discuss & Feedback
- 37.7K Read-Only Boards