We’d like to remind Forumites to please avoid political debate on the Forum.
This is to keep it a safe and useful space for MoneySaving discussions. Threads that are – or become – political in nature may be removed in line with the Forum’s rules. Thank you for your understanding.
📨 Have you signed up to the Forum's new Email Digest yet? Get a selection of trending threads sent straight to your inbox daily, weekly or monthly!
The Forum now has a brand new text editor, adding a bunch of handy features to use when creating posts. Read more in our how-to guide
Dark marks after painting

UncleZen
Posts: 880 Forumite


I have dark marks on a wall im painting.
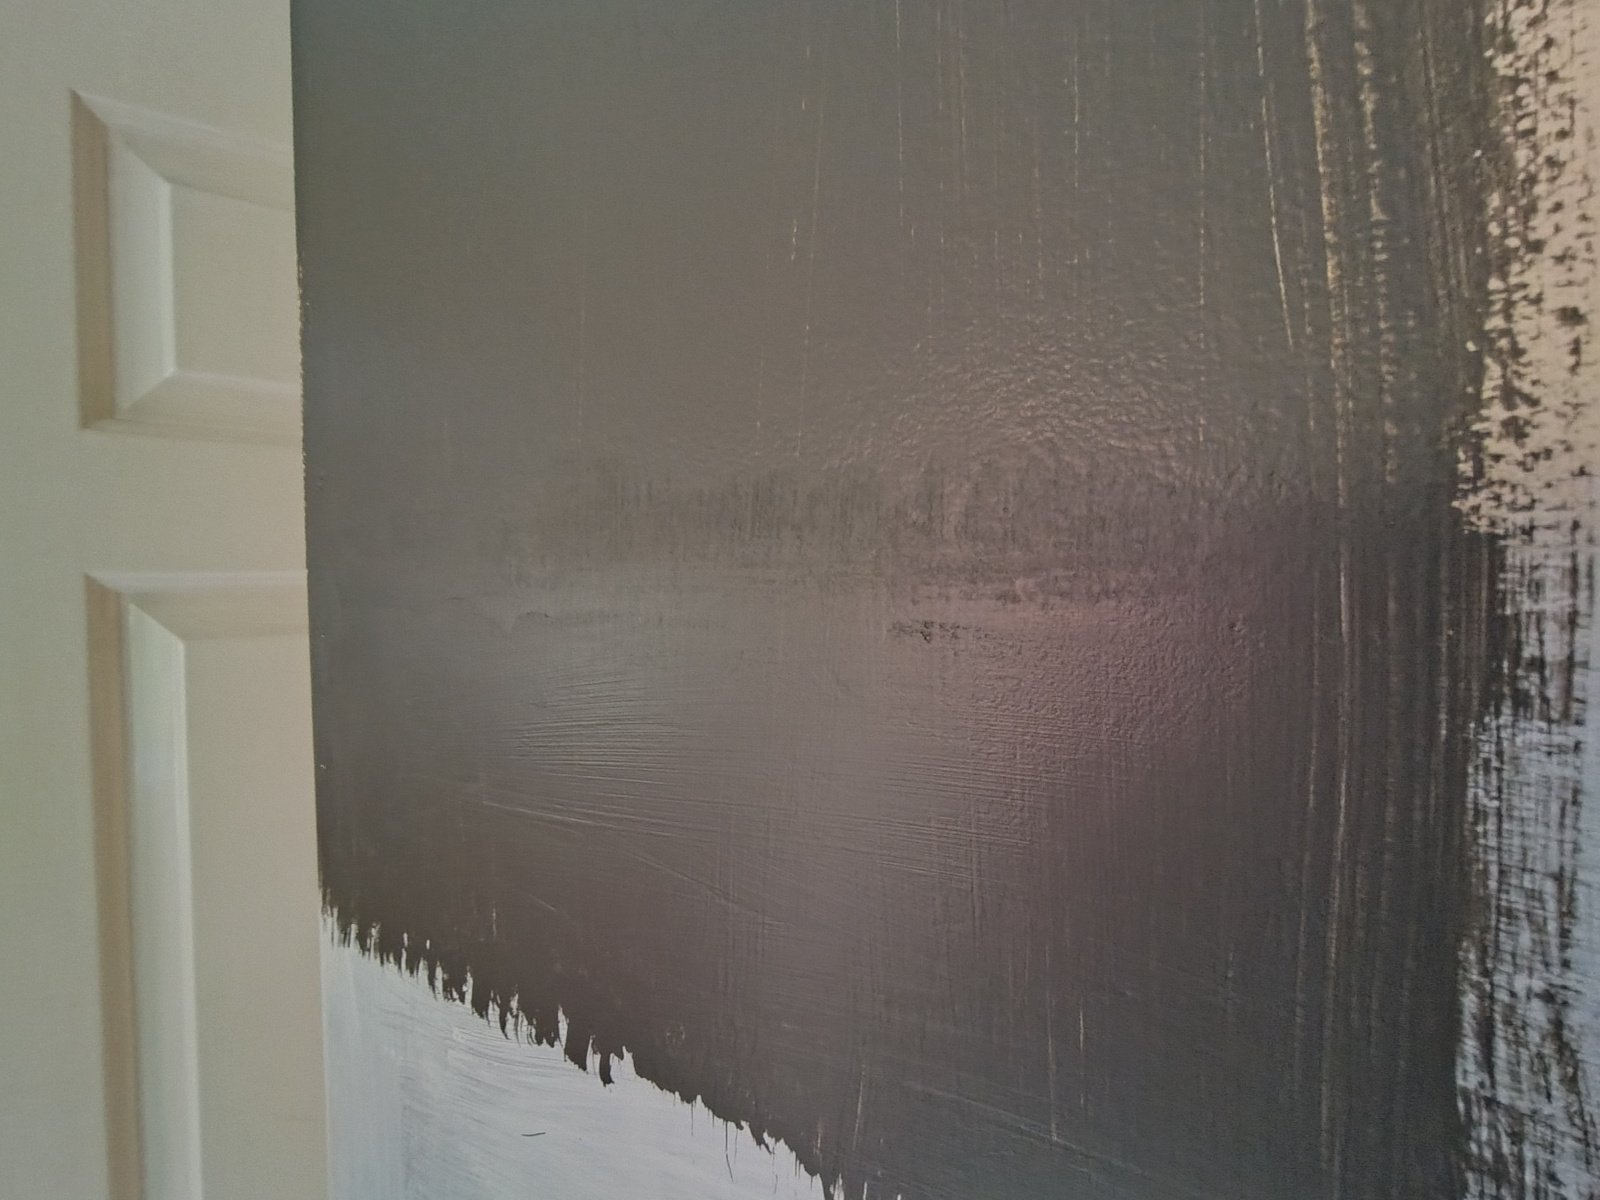
The wall used to have tiles on it. The tiles and glue have been removed. What's remaining was bare plaster and the odd bit of stubborn paint which ive smoothed as much as i can. Ive PVA'd the area, filled and smoothed. Then I've primered - zinsser 123. Now I've painted a test area, but i can see a dark area where the filler was (filler is ronseal smooth finish). It looks to me like the paint has been absorbed into the filler (?). What can I do to prep the area to stop this happening (more PVA?).
Pic of test area (it looks worse in real life).
0
Comments
-
Sorry but PVA shouldn’t be used under paint and emulsion won’t adhere properly to it. It’s a great woodworking glue and a good primer when plastering over blocks, but it’s used for all kinds of things now that it really isn’t intended for.
You may be able to clean the emulsion off the wall then seal it with something like Gardz to stop the filler flashing through. I’m not sure. Maybe ask on a decorators forum like the Screwfix forum?0 -
Some fillers do cause the paint to flash more than others. I always use Toupret fillers. Another tip is to do a apply a watered down mist coat of your paint before applying two full coats. I usually water down with around 20% water for an initial coat before two full top coats.2
-
What type of paint, Zen? It looks to have a sheen - is it 'silk'?
If so, why?
Silk is usually chosen for extra durability - washable and scrubbable - or to cope with moist areas like shower rooms, but is otherwise generally avoided 'cos it just doesn't look good. It also highlights any imperfections in the wall surface, and - lawdie - you shoor have some
And, as btw says, you don't PVA walls. This is very likely to 'reactivate' with the water in the paint and become soft again, and will often become tacky when rolled over, adding an unwanted texture.
However, if you applied Zinsser 123 over it all, then I'd have expected this to have sealed the PVA and made it even. Or did you just 123 the filled bits?
Anyhoo, the surface looks to be in poor condition to begin with - sorry.
I'd get a comfy sanding block, and some good quality aluminium oxide paper, say 120 grit. Work at it gently using large circular sweeps, without pressing too hard - give the surface a chance to powder away, without hopefully blocking the grit. You really need to get that wall looking smoother, and the filled parts as flat as the rest - and vice versa. I hope the PVA won't cause a sticky mess...
Once you actually get that wall flat and level, you may need to go finer - say 180 grit - for a bit, but hopefully not.
Wipe down thoroughly, and see what the finish is like. If acceptable, then roll on the Zin 123. Allow to dry fully, and then apply your paint - MATT.
Nice colour - what is it?0 -
The EASIEST WAY to SKIM COAT a wall!!!
You might want to consider this method.2 -
Or use ready-mixed, eg https://www.screwfix.com/p/no-nonsense-joint-filler-5kg/842RT?
Prob best to key the wall first using 120 grit.
0 -
I used that filler once when I ran out of Knauf fill and finish, and the customer had a tub of it. I thought the Knauf was a much higher quality filler, although it saved me a trip to Bradfords.WIAWSNB said:Or use ready-mixed, eg https://www.screwfix.com/p/no-nonsense-joint-filler-5kg/842RT?
Prob best to key the wall first using 120 grit.1 -
I would expect the Knauf to be better :-)stuart45 said:I used that filler once when I ran out of Knauf fill and finish, and the customer had a tub of it. I thought the Knauf was a much higher quality filler, although it saved me a trip to Bradfords.
Since these fillers do not 'set' like multifinish, I guess it'll be hard to get an acceptable finish from a trowel or blade - ie it cannot be 'polished'? So the expectation is presumably that it'll require sanding afterwards?0 -
It'll definitely need sanding, but you can get it so It'll only need a light sand. The advantage for a DIYer is that with a bit of patience you can get a really flat surface. It really depends on how good you want the work to be, and how much time you want to spend on it. To me, the wall's surface in the photo looks too rough to get a decent finish.1
-
To answer these questions specifically.WIAWSNB said:What type of paint, Zen? It looks to have a sheen - is it 'silk'?
If so, why?
Silk is usually chosen for extra durability - washable and scrubbable - or to cope with moist areas like shower rooms, but is otherwise generally avoided 'cos it just doesn't look good. It also highlights any imperfections in the wall surface, and - lawdie - you shoor have some
And, as btw says, you don't PVA walls. This is very likely to 'reactivate' with the water in the paint and become soft again, and will often become tacky when rolled over, adding an unwanted texture.
However, if you applied Zinsser 123 over it all, then I'd have expected this to have sealed the PVA and made it even. Or did you just 123 the filled bits?
Anyhoo, the surface looks to be in poor condition to begin with - sorry.
I'd get a comfy sanding block, and some good quality aluminium oxide paper, say 120 grit. Work at it gently using large circular sweeps, without pressing too hard - give the surface a chance to powder away, without hopefully blocking the grit. You really need to get that wall looking smoother, and the filled parts as flat as the rest - and vice versa. I hope the PVA won't cause a sticky mess...
Once you actually get that wall flat and level, you may need to go finer - say 180 grit - for a bit, but hopefully not.
Wipe down thoroughly, and see what the finish is like. If acceptable, then roll on the Zin 123. Allow to dry fully, and then apply your paint - MATT.
Nice colour - what is it?
The paint is just for a colour test (valspar chain link), its mid sheen. Im using it as a reference to see if I want to buy darker or lighter, the end result will be matt.
I applied zinsser 123 over everything, bare walls and filled areas.
I do plan to sand this more to make it smoother as its not smooth enough for me yet. Then im undecided as whether to reprimer with zinsser gardz to (hopefully) prevent the dark area. I have the time, no hurry, I won't settle for anything not smooth.
Thanks for your feedback, but they don't address my question about the dark area.
1 -
UncleZen said:To answer these questions specifically.
The paint is just for a colour test (valspar chain link), its mid sheen. Im using it as a reference to see if I want to buy darker or lighter, the end result will be matt.
I applied zinsser 123 over everything, bare walls and filled areas.
I do plan to sand this more to make it smoother as its not smooth enough for me yet. Then im undecided as whether to reprimer with zinsser gardz to (hopefully) prevent the dark area. I have the time, no hurry, I won't settle for anything not smooth.
Thanks for your feedback, but they don't address my question about the dark area.The answer to your dark area is, I don't know.It could be as simple as the texture is different - the area above appears heavily orangepeeled, and the section below has horizontal lines. The filled area is just 'rough'.Or, it could be that the filled area is still partially damp? I suspect, if you ensure it's all bone dry, and then apply another coat, the actual 'colour' will then be even.Pleased you are going for a good finish.I'll just repeat - use 'coarse' high-quality paper to begin with, say 120 grit. Lightly, allowing the paper to do the cutting. Use an electric sander if you have one, but again lightly - just monitor the outcome.(Dust mask and goggles...)Just watch out for the PVA layer softening and making a mess - it could behave like a thin layer of clingfilm, and start peeling in shreds, and blocking up your grit. If so, reduce sanding pressure so's to use the 'dust' as a separating agent, so the sandpaper doesn't get blocked.See how well you get on - at the very least remove all the high spots, and try and leave the surface 'keyed'. Then consider the overall skim of plaster. Polyfilla used to make stuff specifically for such jobs, didn't they - easy spread, easy sand?
0


Confirm your email address to Create Threads and Reply

Categories
- All Categories
- 353.8K Banking & Borrowing
- 254.3K Reduce Debt & Boost Income
- 455.2K Spending & Discounts
- 246.9K Work, Benefits & Business
- 603.4K Mortgages, Homes & Bills
- 178.2K Life & Family
- 260.9K Travel & Transport
- 1.5M Hobbies & Leisure
- 16K Discuss & Feedback
- 37.7K Read-Only Boards