We’d like to remind Forumites to please avoid political debate on the Forum.
This is to keep it a safe and useful space for MoneySaving discussions. Threads that are – or become – political in nature may be removed in line with the Forum’s rules. Thank you for your understanding.
📨 Have you signed up to the Forum's new Email Digest yet? Get a selection of trending threads sent straight to your inbox daily, weekly or monthly!
The Forum now has a brand new text editor, adding a bunch of handy features to use when creating posts. Read more in our how-to guide
Best way to fill this gap

UncleZen
Posts: 885 Forumite


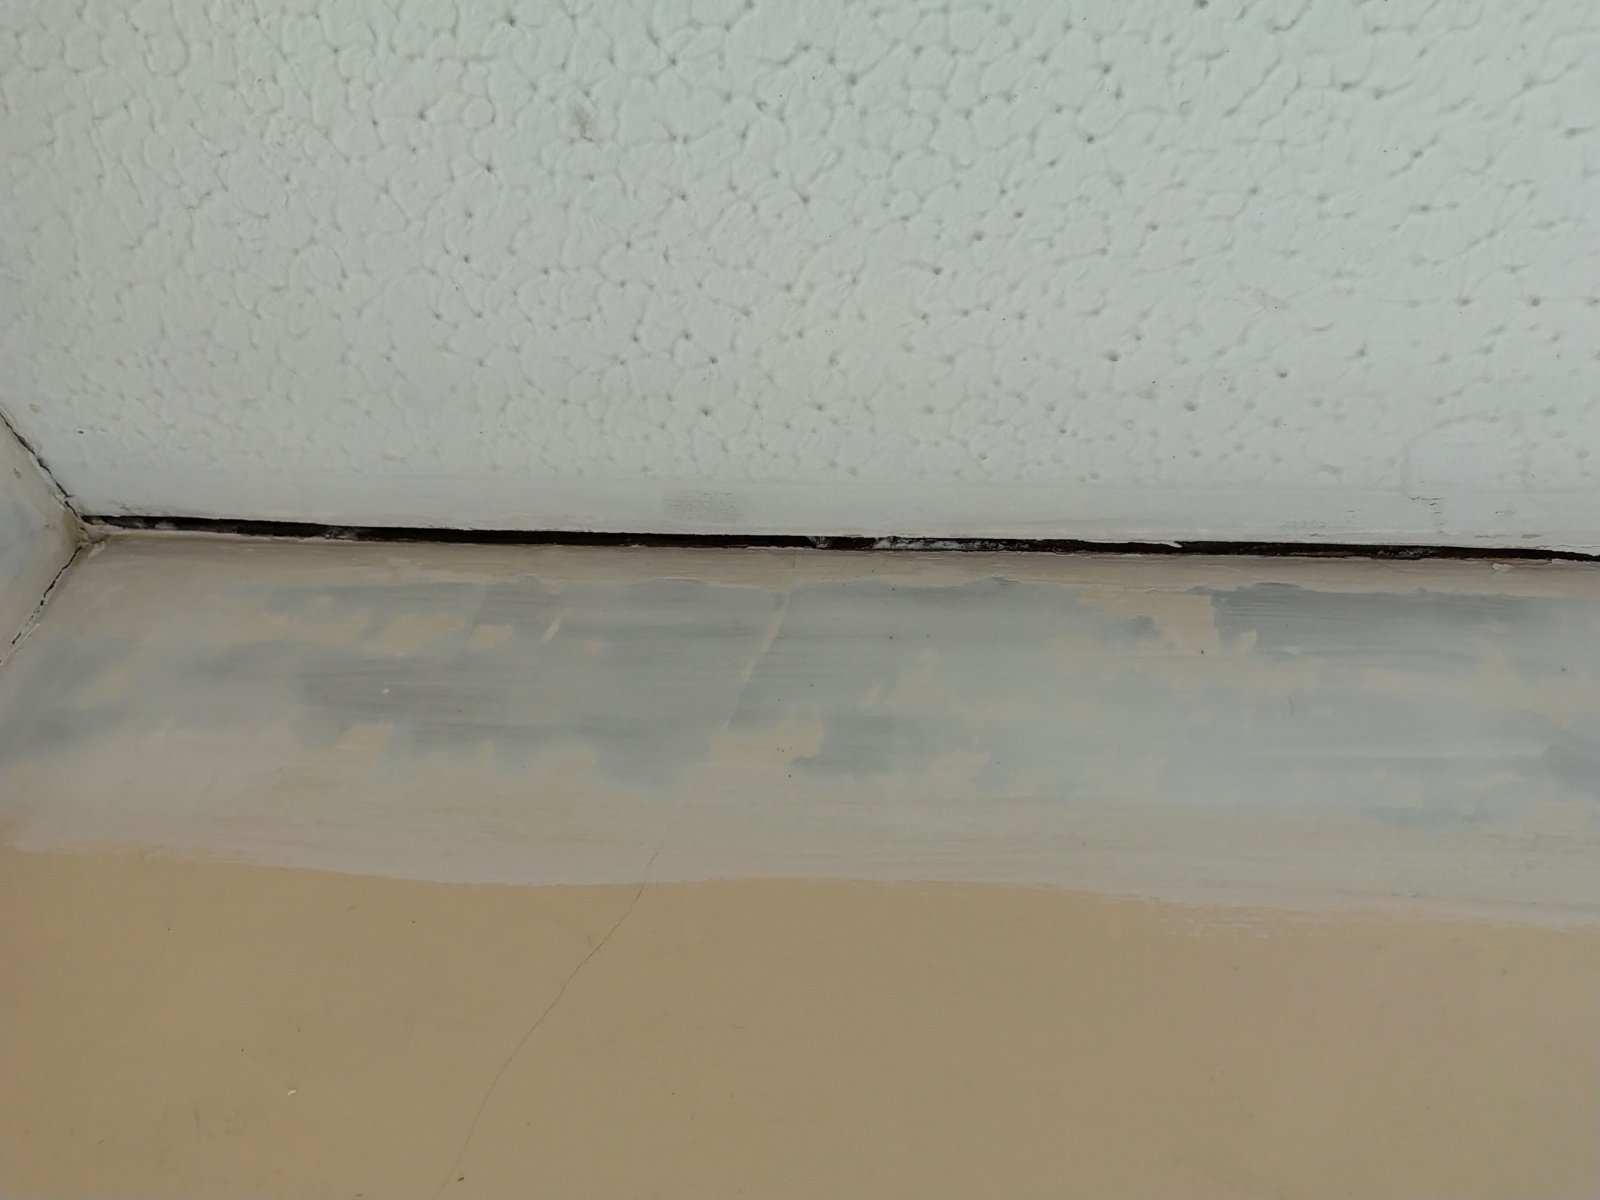
I have a gap between the wall and the ceiling.
Whats the best way to fill it for decorating/painting?
Here's a picture.
Whats the best way to fill it for decorating/painting?
Here's a picture.
0
Comments
-
Coving would be my choice.0
-
i would also go for coving.
Looks like Wicks have a kit for £48
Arthouse Pre Mitred Coving Room Kit | Wickes.co.uk
If ive read the description right, you get 16m in total (which is a room roughly 12f x 10f in size). Obviously check with Wickes first.I have a tendency to mute most posts so if your expecting me to respond you might be waiting along time!0 -
Just fill it with decorators caulk.
Easy to do.2 -
Decorators’ caulk would be fine and can be painted afterwards. It really depends on how neat a finish you want. Coving would look better, but it can be tricky if you’re not very handy.If you do use caulk, cut the end of the nozzle as wide as you can about 10 mm otherwise you’ll just be filling the cavernous void above when the nozzle goes past where it’s needed.If the gap runs the whole length of the room rather than just the section in the photo, I’d go with coving. Bear in mind that caulk will usually shrink a little over time. Some of the polyfiller tubs can fill the gaps up to 10mm, but I would only use that if the ceiling is rigid and not going to flex.2
-
I cant really do coving without doing the whole room. Im inclined to caulk it but the gap seems to big, maybe there is sometning i can put in there to give the aulk more to adhere to. Also, what i didn't, mention is that a new kitchen is going in and I'm trying to prep as much as possible before the fitter starts. But this is a visible area, i.e. not behind/above units that are fitted on the wall and a few inches from the ceiling.
0 -
The best method to get a good finish and not have the crack coming back is to tape and fill the gap. If it's quite big I'd prefill with expanding foam first. Then use a base joint filler and bed the tape in. Another coat of base filler, and then a cost of finish filler. Then sand it smooth. Alternatively use Knauf fill and finish for all coats. It's more work than just caulking it, but a better job.
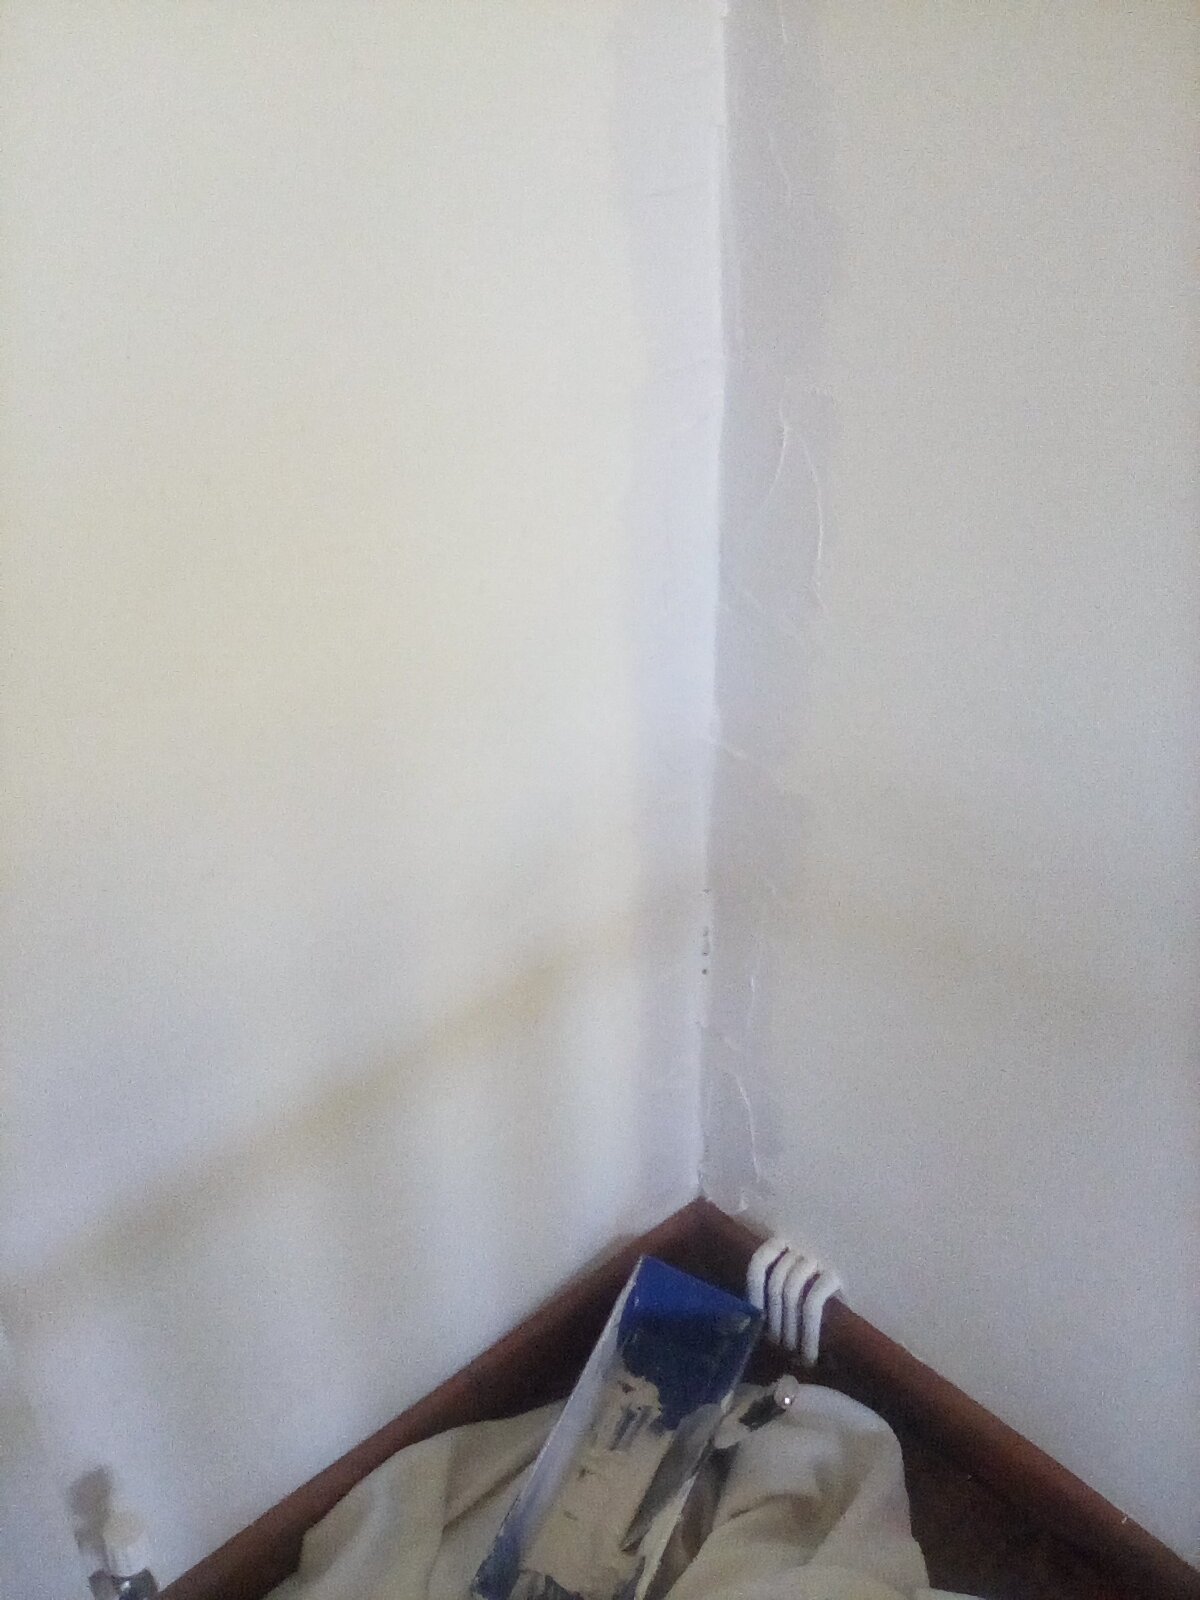
I've got a corner to do tomorrow. I'll stick a few photos on if it helps.0 -
Scrim tape and a lot of patience.0
-
 Fold the tape along the crease with the ridge towards the corner. Stick plenty of filler in the corner. Push the tape in place, hold it in place and run the knife down from the centre, the up from the centre. You need to make a few passes with the knife to take most of the filler off. You only want a thin bed under it.
Alternatively, you can use scrim, which has an adhesive back and doesn't need bedding, but flexes more than paper, so is more likely to crack.
0 -
search for foam joint backer rod - I used it round some window frames with a larger than normal gap. This will give the caulk something to 'grip' on. eg https://www.amazon.co.uk/Everbuild-Sealant-Joint-Backer-Metre/dp/B006PFYMLM/ref=asc_df_B006PFYMLM?
3 -
Backers are great, but you'll definitely want to tape as suggested above.0


Confirm your email address to Create Threads and Reply

Categories
- All Categories
- 354.5K Banking & Borrowing
- 254.4K Reduce Debt & Boost Income
- 455.5K Spending & Discounts
- 247.4K Work, Benefits & Business
- 604.3K Mortgages, Homes & Bills
- 178.5K Life & Family
- 261.8K Travel & Transport
- 1.5M Hobbies & Leisure
- 16.1K Discuss & Feedback
- 37.7K Read-Only Boards