We’d like to remind Forumites to please avoid political debate on the Forum.
This is to keep it a safe and useful space for MoneySaving discussions. Threads that are – or become – political in nature may be removed in line with the Forum’s rules. Thank you for your understanding.
📨 Have you signed up to the Forum's new Email Digest yet? Get a selection of trending threads sent straight to your inbox daily, weekly or monthly!
The Forum now has a brand new text editor, adding a bunch of handy features to use when creating posts. Read more in our how-to guide
Insulating sloped ceilings?

moneysaver1978
Posts: 679 Forumite


We have added insulation (Knauf wool 270mm on top of old 100mm) in the cold loft. There was so much old rubbish plus the number of loft legs but finally got there!
We need to work out what we could do to insulate the slopes and if this is something we could do ourselves or are we better off bringing someone in? Half expecting to simply push a PIR or similar through the gap down the slope from the loft but probably not a good idea for ventilation!
A thermal camera is arriving soon to find any cold spots/heat escape and make a work plan for spring.
It's a 1920s semi with solid walls and these slopes are pretty much everywhere.
0
Comments
-
We pushed kingspan board up the slopes and glued them to the back of the plaster board with gorilla glue. We used 50 mm board with a 50 m air gap. We used flexible batts of insulation on the side walls. They already had some batts between the wood which held in place with chicken wire stapled to the wood. We then added more batts over the top in a brick pattern to minimise the risk of gaps. We used cord to hold the batts to the already insulated bits.Cutting the PIR is relatively easy but accurately measuring the width of the gaps was hard. The rooms seem much warmer. Obviously you need some access to get it done. Most of our lofts have very little room because of the rooms in the loft.If you have space you might be able to insulate on the inside with PIR backed plasterboard. We had internal insulation in our old house but the plasterers did that not us. I think so long as the detailing is right where there are windows and stuff it would be better and tidier than insulating on the other side.1
-
Thank you for your post! When you say "pushed kingspan board up the slopes", did you do it from outside? If so, that probably requires scaffolding and experts, right?Green_hopeful said:We pushed kingspan board up the slopes and glued them to the back of the plaster board with gorilla glue. We used 50 mm board with a 50 m air gap. We used flexible batts of insulation on the side walls. They already had some batts between the wood which held in place with chicken wire stapled to the wood. We then added more batts over the top in a brick pattern to minimise the risk of gaps. We used cord to hold the batts to the already insulated bits.Cutting the PIR is relatively easy but accurately measuring the width of the gaps was hard. The rooms seem much warmer. Obviously you need some access to get it done. Most of our lofts have very little room because of the rooms in the loft.If you have space you might be able to insulate on the inside with PIR backed plasterboard. We had internal insulation in our old house but the plasterers did that not us. I think so long as the detailing is right where there are windows and stuff it would be better and tidier than insulating on the other side.
Sadly, insulating with plasterboards from inside isn't an option as it would mean compromising on ceiling height of every room (plus complications with the windows, curtains, etc.)
I imagine it would be difficult because the slopes are different size. I have avoided insulation sprays due to bad press but should I reconsider these for the slopes?0 -
I had similar in a recent house. The whole first floor had sloping ceilings as it was a Grade II listed coach house conversion. I took all the ceilings down, put battens up against the inside of the roof tiles/membrane to create an air gap then cut 75mm Celotex to fit between all the rafters then boarded up again. It was a big job but it made a huge difference to heat loss and noise from nearby road.
IMHO anything else is a bodge that will cost you ceiling height in tight spaces.Signature on holiday for two weeks1 -
Good catch - I hadn't considered in removing the ceiling and working from there. So that means taking off the existing plasterboards (by hammer and destroying them), draw PIRs, fit inside, and then add new plasterboards over before painting over them.Mutton_Geoff said:I had similar in a recent house. The whole first floor had sloping ceilings as it was a Grade II listed coach house conversion. I took all the ceilings down, put battens up against the inside of the roof tiles/membrane to create an air gap then cut 75mm Celotex to fit between all the rafters then boarded up again. It was a big job but it made a huge difference to heat loss and noise from nearby road.
IMHO anything else is a bodge that will cost you ceiling height in tight spaces.
1 -
My take. Broadly agree with Mutton_Geoff as a practical and incremental project. Only cost effective and life impact route.
But from bigger cost to smaller there are other options:
1 Raise the roof - historic cold roof renovated and put back over new modern one with thick insulation blocks between rafters - roof off job. Additional timber and possibly structural calculations.
Planning Permission. May suit a situation where an unusual and historic roof needs to be maintained due to conservation factors. But you want interior space below it. And insulation. And have deep pockets.
2 New roof - current height - roof off. Sort insulation from outside (compromised by available depths/interior impact). New membrane etc. Then redo interior seal and plasterwork. Like for like it's a repair. Big tech change or massive solar array = Planning. Some impact to interior space from additional thickness inevitable depending how far you take it and how expensive a material you can tolerate.
These first two are only remotely financially viable if the roof has to come off *anyway* as life expired and the building is worth saving vs reusing the site with a new build. And fit a load of solar when doing it as why not if aspects allow.
Or do it in situ from the inside.
3 High performance modern insulation block cut and fitted between timbers/beams and whatever is there - over a mini battened air gap behind panels and the inside sarking/membrane Then tape sealed on the inside. Then plasterboard over that. Skim. Decor. In a complex (interesting) or a large building this is a large amount of joinery labour and detailing to do it properly in terms of thermals and appearance.
If you don't do it properly to have the ventilated mini cold roof behind the insulated and now good air seal interior structure the return on investment is will be lacking for the cost and effort expended.
So finding good detail focused joinery skills to engage with "right" (to spec) rather than "fast" is very tricky.
Fixed price will be difficult. They can't see what they are up against until uncovered.
So day rate T&M is quite likely. And lots of days.
When you and your hired help - very carefully dismantle what is there - you may uncover - or indeed cause (if not careful enough) damage to the existing roof interior and membrane. Or rotten timbers - which then fairly quickly triggers 2. And signficantly increases cost and trauma of living there while doing it.
4 There is a school of thought for some old structures that breathables are a good option over PIR.
(c.f. Aberystwyth CAT etc) https://cat.org.uk/ run courses on it. What breathes and what is air sealed off varies with materials.
I have no love for sprays. It looks like it is perceived by buyers as trouble (due to past sins) or is actual trouble.
In coach houses, farm houses, barns open to apex etc. this is a common but tricky topic due to beam structures and oddities, or industrial conversions with exposed steel work. But the same principles apply as with converted to living space lofts. Compromises - what can you cover up, or not for usable space and aesthetics.
And how thick can insulation be with minimum air gap - before option 1 becomes the path.
Also consider that an old building regs (trickle vent and extractor fan but no MVHR) setup will at some point cross over into the new world where explicit and heat recovery ventilation becomes part of a "new" design. It is of course better to think that through and plan it in - if it is going to be part of the future design And ducting needs to be factored in.
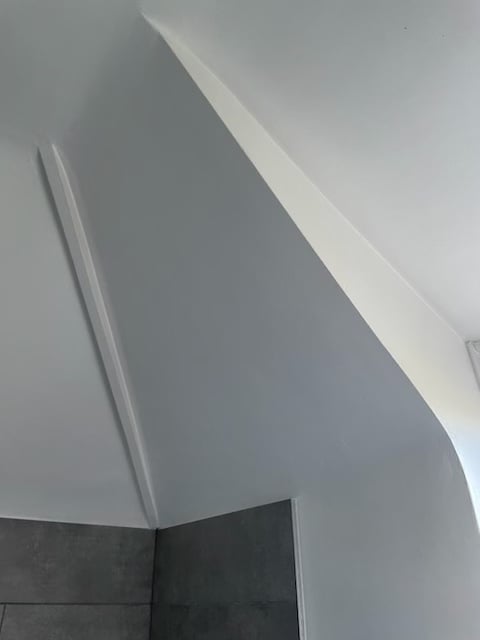
From the pictures you don't really have interior window reveals as is - but perhaps will afterwards. Where walls are thick and you already have them prior then interior insulation to ceiling and walls can end up with a bit of a "living in a castle" vibe. Very deep.
1 -
Thank you for a very detailed post - this is really informative and very much appreciated!gm0 said:My take. Broadly agree with Mutton_Geoff as a practical and incremental project. Only cost effective and life impact route.
But from bigger cost to smaller there are other options:
1 Raise the roof - historic cold roof renovated and put back over new modern one with thick insulation blocks between rafters - roof off job. Additional timber and possibly structural calculations.
Planning Permission. May suit a situation where an unusual and historic roof needs to be maintained due to conservation factors. But you want interior space below it. And insulation. And have deep pockets.
2 New roof - current height - roof off. Sort insulation from outside (compromised by available depths/interior impact). New membrane etc. Then redo interior seal and plasterwork. Like for like it's a repair. Big tech change or massive solar array = Planning. Some impact to interior space from additional thickness inevitable depending how far you take it and how expensive a material you can tolerate.
These first two are only remotely financially viable if the roof has to come off *anyway* as life expired and the building is worth saving vs reusing the site with a new build. And fit a load of solar when doing it as why not if aspects allow.
Or do it in situ from the inside.
3 High performance modern insulation block cut and fitted between timbers/beams and whatever is there - over a mini battened air gap behind panels and the inside sarking/membrane Then tape sealed on the inside. Then plasterboard over that. Skim. Decor. In a complex (interesting) or a large building this is a large amount of joinery labour and detailing to do it properly in terms of thermals and appearance.
If you don't do it properly to have the ventilated mini cold roof behind the insulated and now good air seal interior structure the return on investment is will be lacking for the cost and effort expended.
So finding good detail focused joinery skills to engage with "right" (to spec) rather than "fast" is very tricky.
Fixed price will be difficult. They can't see what they are up against until uncovered.
So day rate T&M is quite likely. And lots of days.
When you and your hired help - very carefully dismantle what is there - you may uncover - or indeed cause (if not careful enough) damage to the existing roof interior and membrane. Or rotten timbers - which then fairly quickly triggers 2. And signficantly increases cost and trauma of living there while doing it.
4 There is a school of thought for some old structures that breathables are a good option over PIR.
(c.f. Aberystwyth CAT etc) https://cat.org.uk/ run courses on it. What breathes and what is air sealed off varies with materials.
I have no love for sprays. It looks like it is perceived by buyers as trouble (due to past sins) or is actual trouble.
In coach houses, farm houses, barns open to apex etc. this is a common but tricky topic due to beam structures and oddities, or industrial conversions with exposed steel work. But the same principles apply as with converted to living space lofts. Compromises - what can you cover up, or not for usable space and aesthetics.
And how thick can insulation be with minimum air gap - before option 1 becomes the path.
Also consider that an old building regs (trickle vent and extractor fan but no MVHR) setup will at some point cross over into the new world where explicit and heat recovery ventilation becomes part of a "new" design. It is of course better to think that through and plan it in - if it is going to be part of the future design And ducting needs to be factored in.
From the pictures you don't really have interior window reveals as is - but perhaps will afterwards. Where walls are thick and you already have them prior then interior insulation to ceiling and walls can end up with a bit of a "living in a castle" vibe. Very deep.
Our wishlist already contains EWA and solar panels but sadly we have limited budget (hence why we DIYed many projects including insulation and boarding in the loft!).
Perhaps a silly question but can you clarify on "interior window reveals"? Is this the same as window sills (we do have them)?
0 -
Yes, but don't use a hammer on the old plasterboard, just cut with a saw (pad saw) and pull as much down with your hands as you can. If it's lathe & plaster, it's messy, but the finished result was well worth it. I also used soundboard (blue) which is more dense than plasterboard to reduce noise levels from outside as the rooms were almost all bedrooms (and 2 bathrooms).moneysaver1978 said:
Good catch - I hadn't considered in removing the ceiling and working from there. So that means taking off the existing plasterboards (by hammer and destroying them), draw PIRs, fit inside, and then add new plasterboards over before painting over them.Mutton_Geoff said:I had similar in a recent house. The whole first floor had sloping ceilings as it was a Grade II listed coach house conversion. I took all the ceilings down, put battens up against the inside of the roof tiles/membrane to create an air gap then cut 75mm Celotex to fit between all the rafters then boarded up again. It was a big job but it made a huge difference to heat loss and noise from nearby road.
IMHO anything else is a bodge that will cost you ceiling height in tight spaces.Signature on holiday for two weeks1 -
Yes I meant floor/walls/mini ceiling to inside of the window until it meets the face of the wall at 90ish (or indeed whatever angle)
1 -
We have rooms in the roof so a second floor. We can access the loft above the second floor but also have doors in the walls of the rooms in the roof to get into the little bit of loft above the first floor that isn’t a room. All the lofts re pretty low. I had to crawl through to get access. Some of the access traps are only the size of an A3 sheet of paper because they are cut between the joists. We also have a chimney through the top loft. Quite tricky to get through.moneysaver1978 said:
Thank you for your post! When you say "pushed kingspan board up the slopes", did you do it from outside? If so, that probably requires scaffolding and experts, right?Green_hopeful said:We pushed kingspan board up the slopes and glued them to the back of the plaster board with gorilla glue. We used 50 mm board with a 50 m air gap. We used flexible batts of insulation on the side walls. They already had some batts between the wood which held in place with chicken wire stapled to the wood. We then added more batts over the top in a brick pattern to minimise the risk of gaps. We used cord to hold the batts to the already insulated bits.Cutting the PIR is relatively easy but accurately measuring the width of the gaps was hard. The rooms seem much warmer. Obviously you need some access to get it done. Most of our lofts have very little room because of the rooms in the loft.If you have space you might be able to insulate on the inside with PIR backed plasterboard. We had internal insulation in our old house but the plasterers did that not us. I think so long as the detailing is right where there are windows and stuff it would be better and tidier than insulating on the other side.
Sadly, insulating with plasterboards from inside isn't an option as it would mean compromising on ceiling height of every room (plus complications with the windows, curtains, etc.)
I imagine it would be difficult because the slopes are different size. I have avoided insulation sprays due to bad press but should I reconsider these for the slopes?1 -
It is an easy job to cut through the joists and build a box to open up the hole.Some of the access traps are only the size of an A3 sheet of paper because they are cut between the joists. https://www.youtube.com/watch?v=XDoI21EduUs
Signature on holiday for two weeks1


Confirm your email address to Create Threads and Reply

Categories
- All Categories
- 353.9K Banking & Borrowing
- 254.3K Reduce Debt & Boost Income
- 455.2K Spending & Discounts
- 246.9K Work, Benefits & Business
- 603.5K Mortgages, Homes & Bills
- 178.3K Life & Family
- 261K Travel & Transport
- 1.5M Hobbies & Leisure
- 16K Discuss & Feedback
- 37.7K Read-Only Boards