We’d like to remind Forumites to please avoid political debate on the Forum.
This is to keep it a safe and useful space for MoneySaving discussions. Threads that are – or become – political in nature may be removed in line with the Forum’s rules. Thank you for your understanding.
📨 Have you signed up to the Forum's new Email Digest yet? Get a selection of trending threads sent straight to your inbox daily, weekly or monthly!
filling hole from old extractor fan
wallofbeans
Posts: 1,493 Forumite


Hi all,
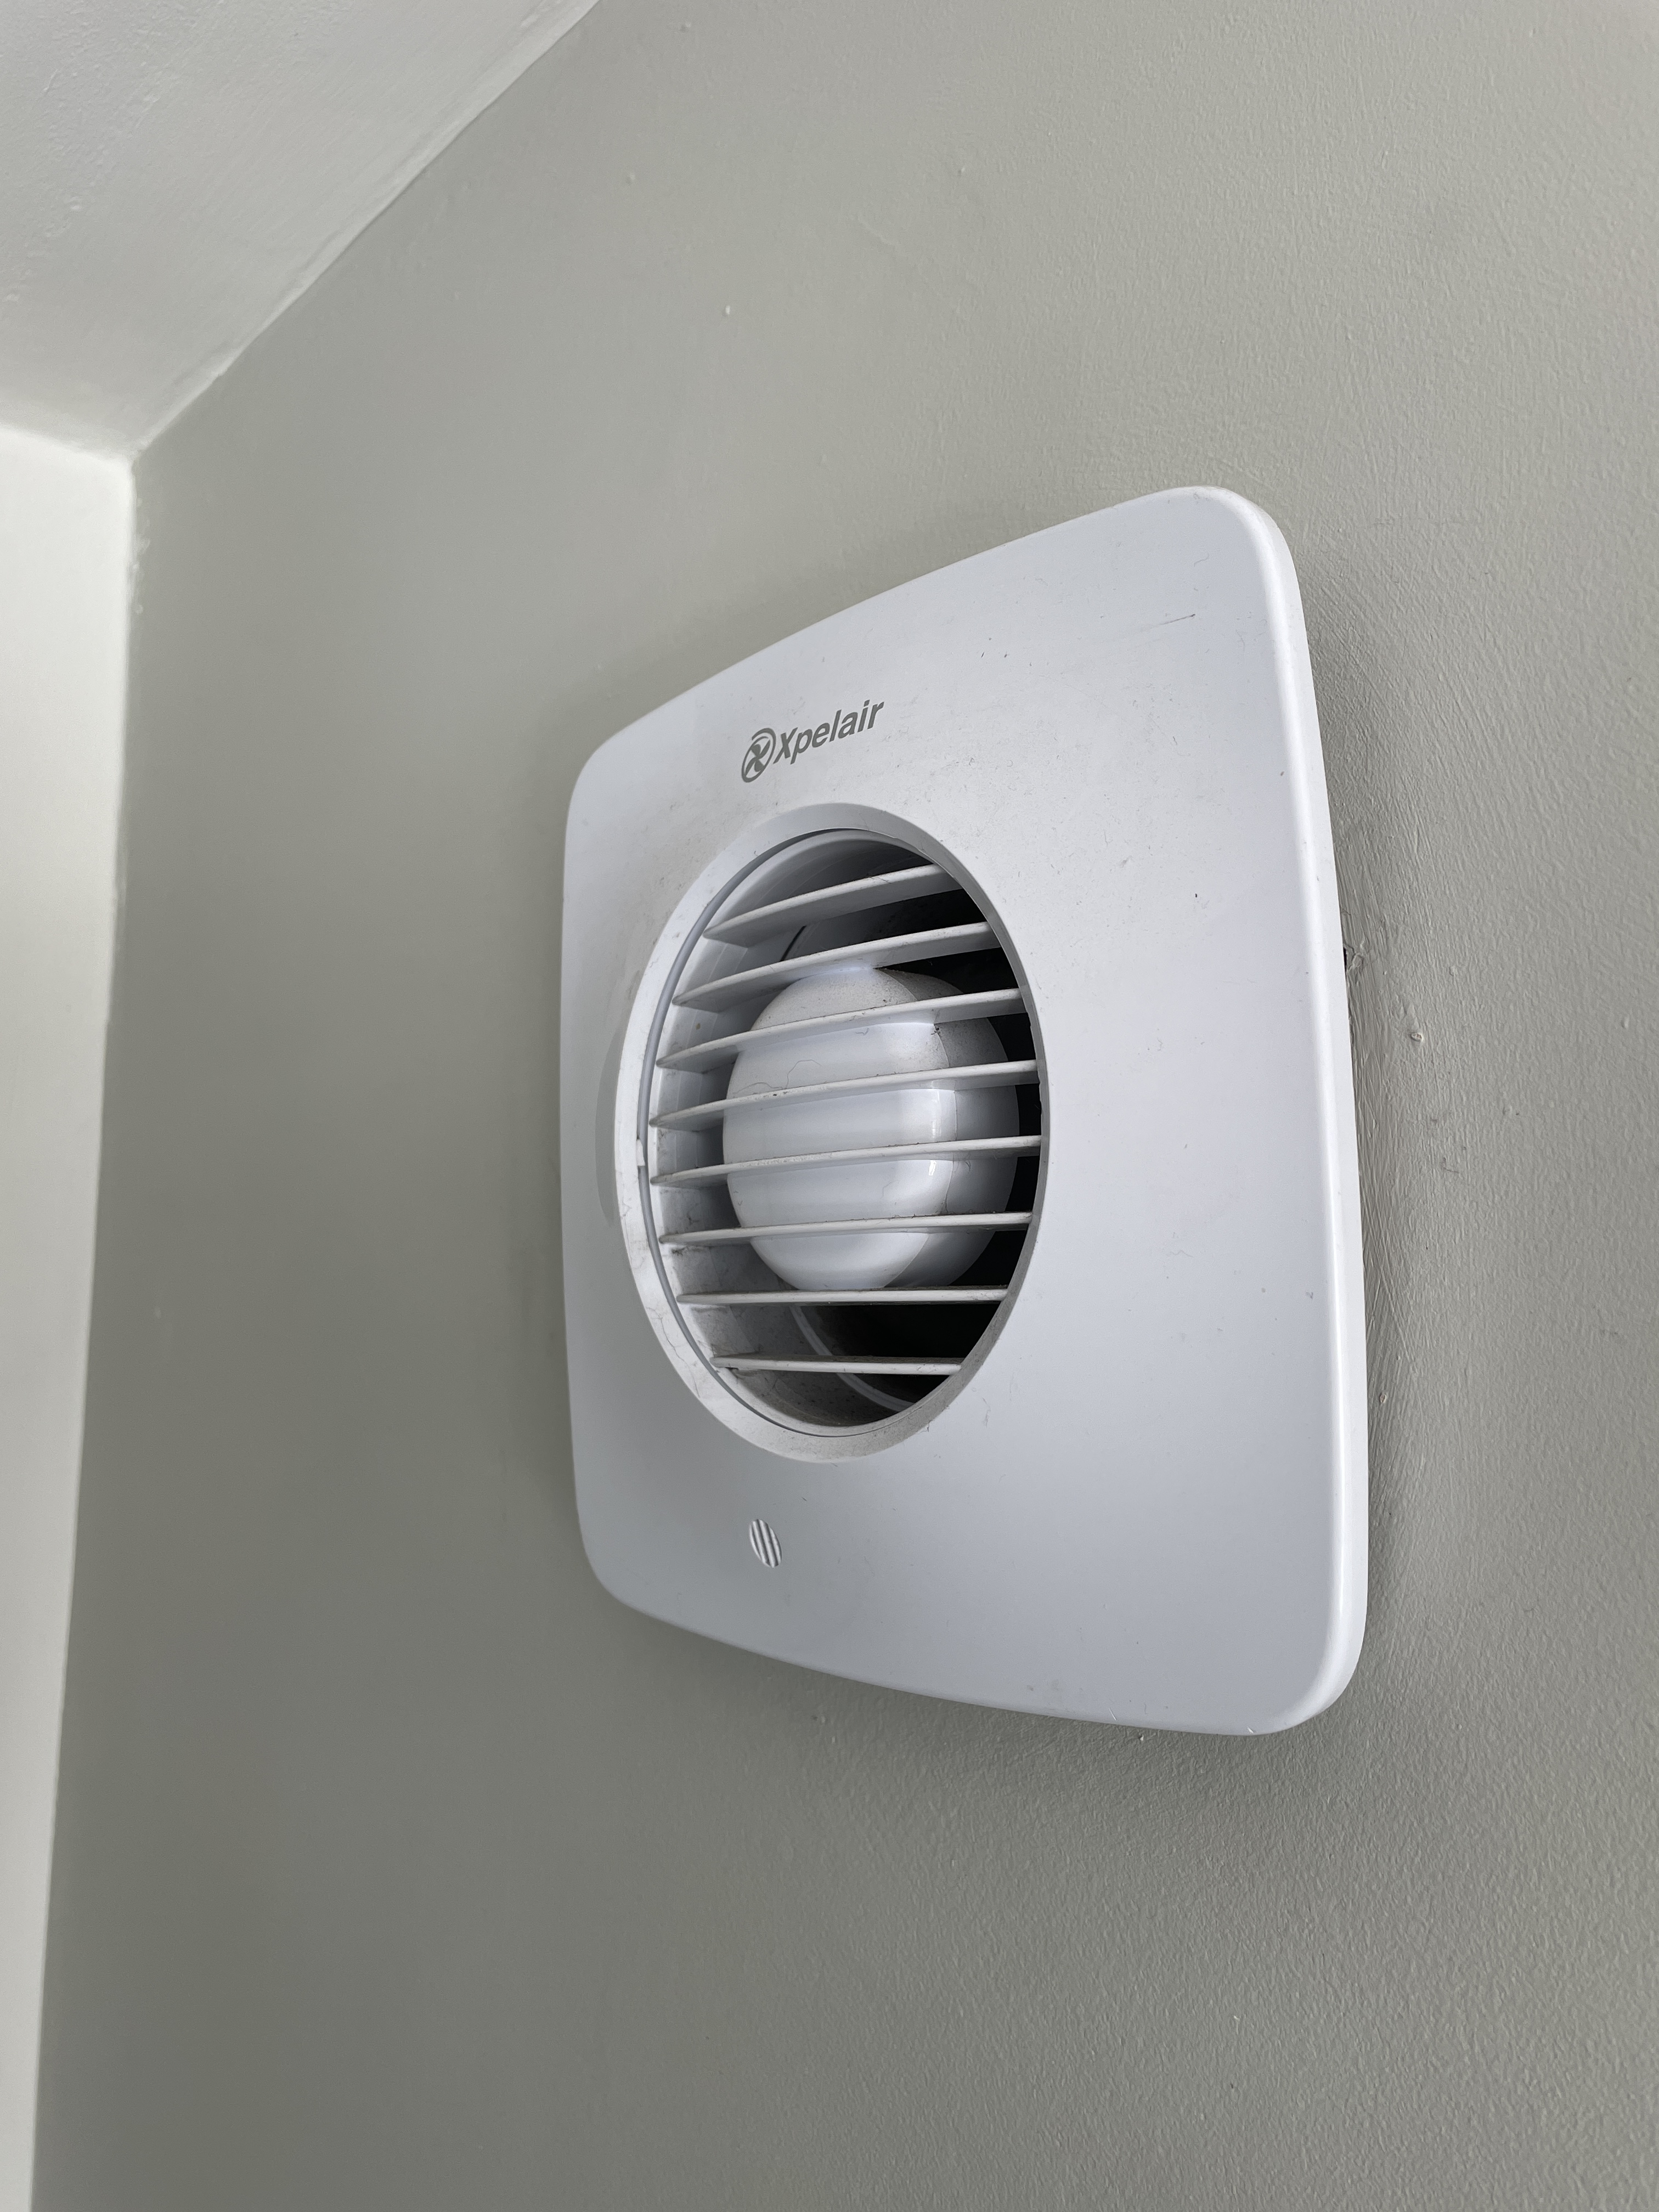
So I have an old extractor fan in my kitchen (currently behind the fridge freezer) which has never worked and is a job I've been meaning to get around to dealing with since I moved in.
Couple of questions:
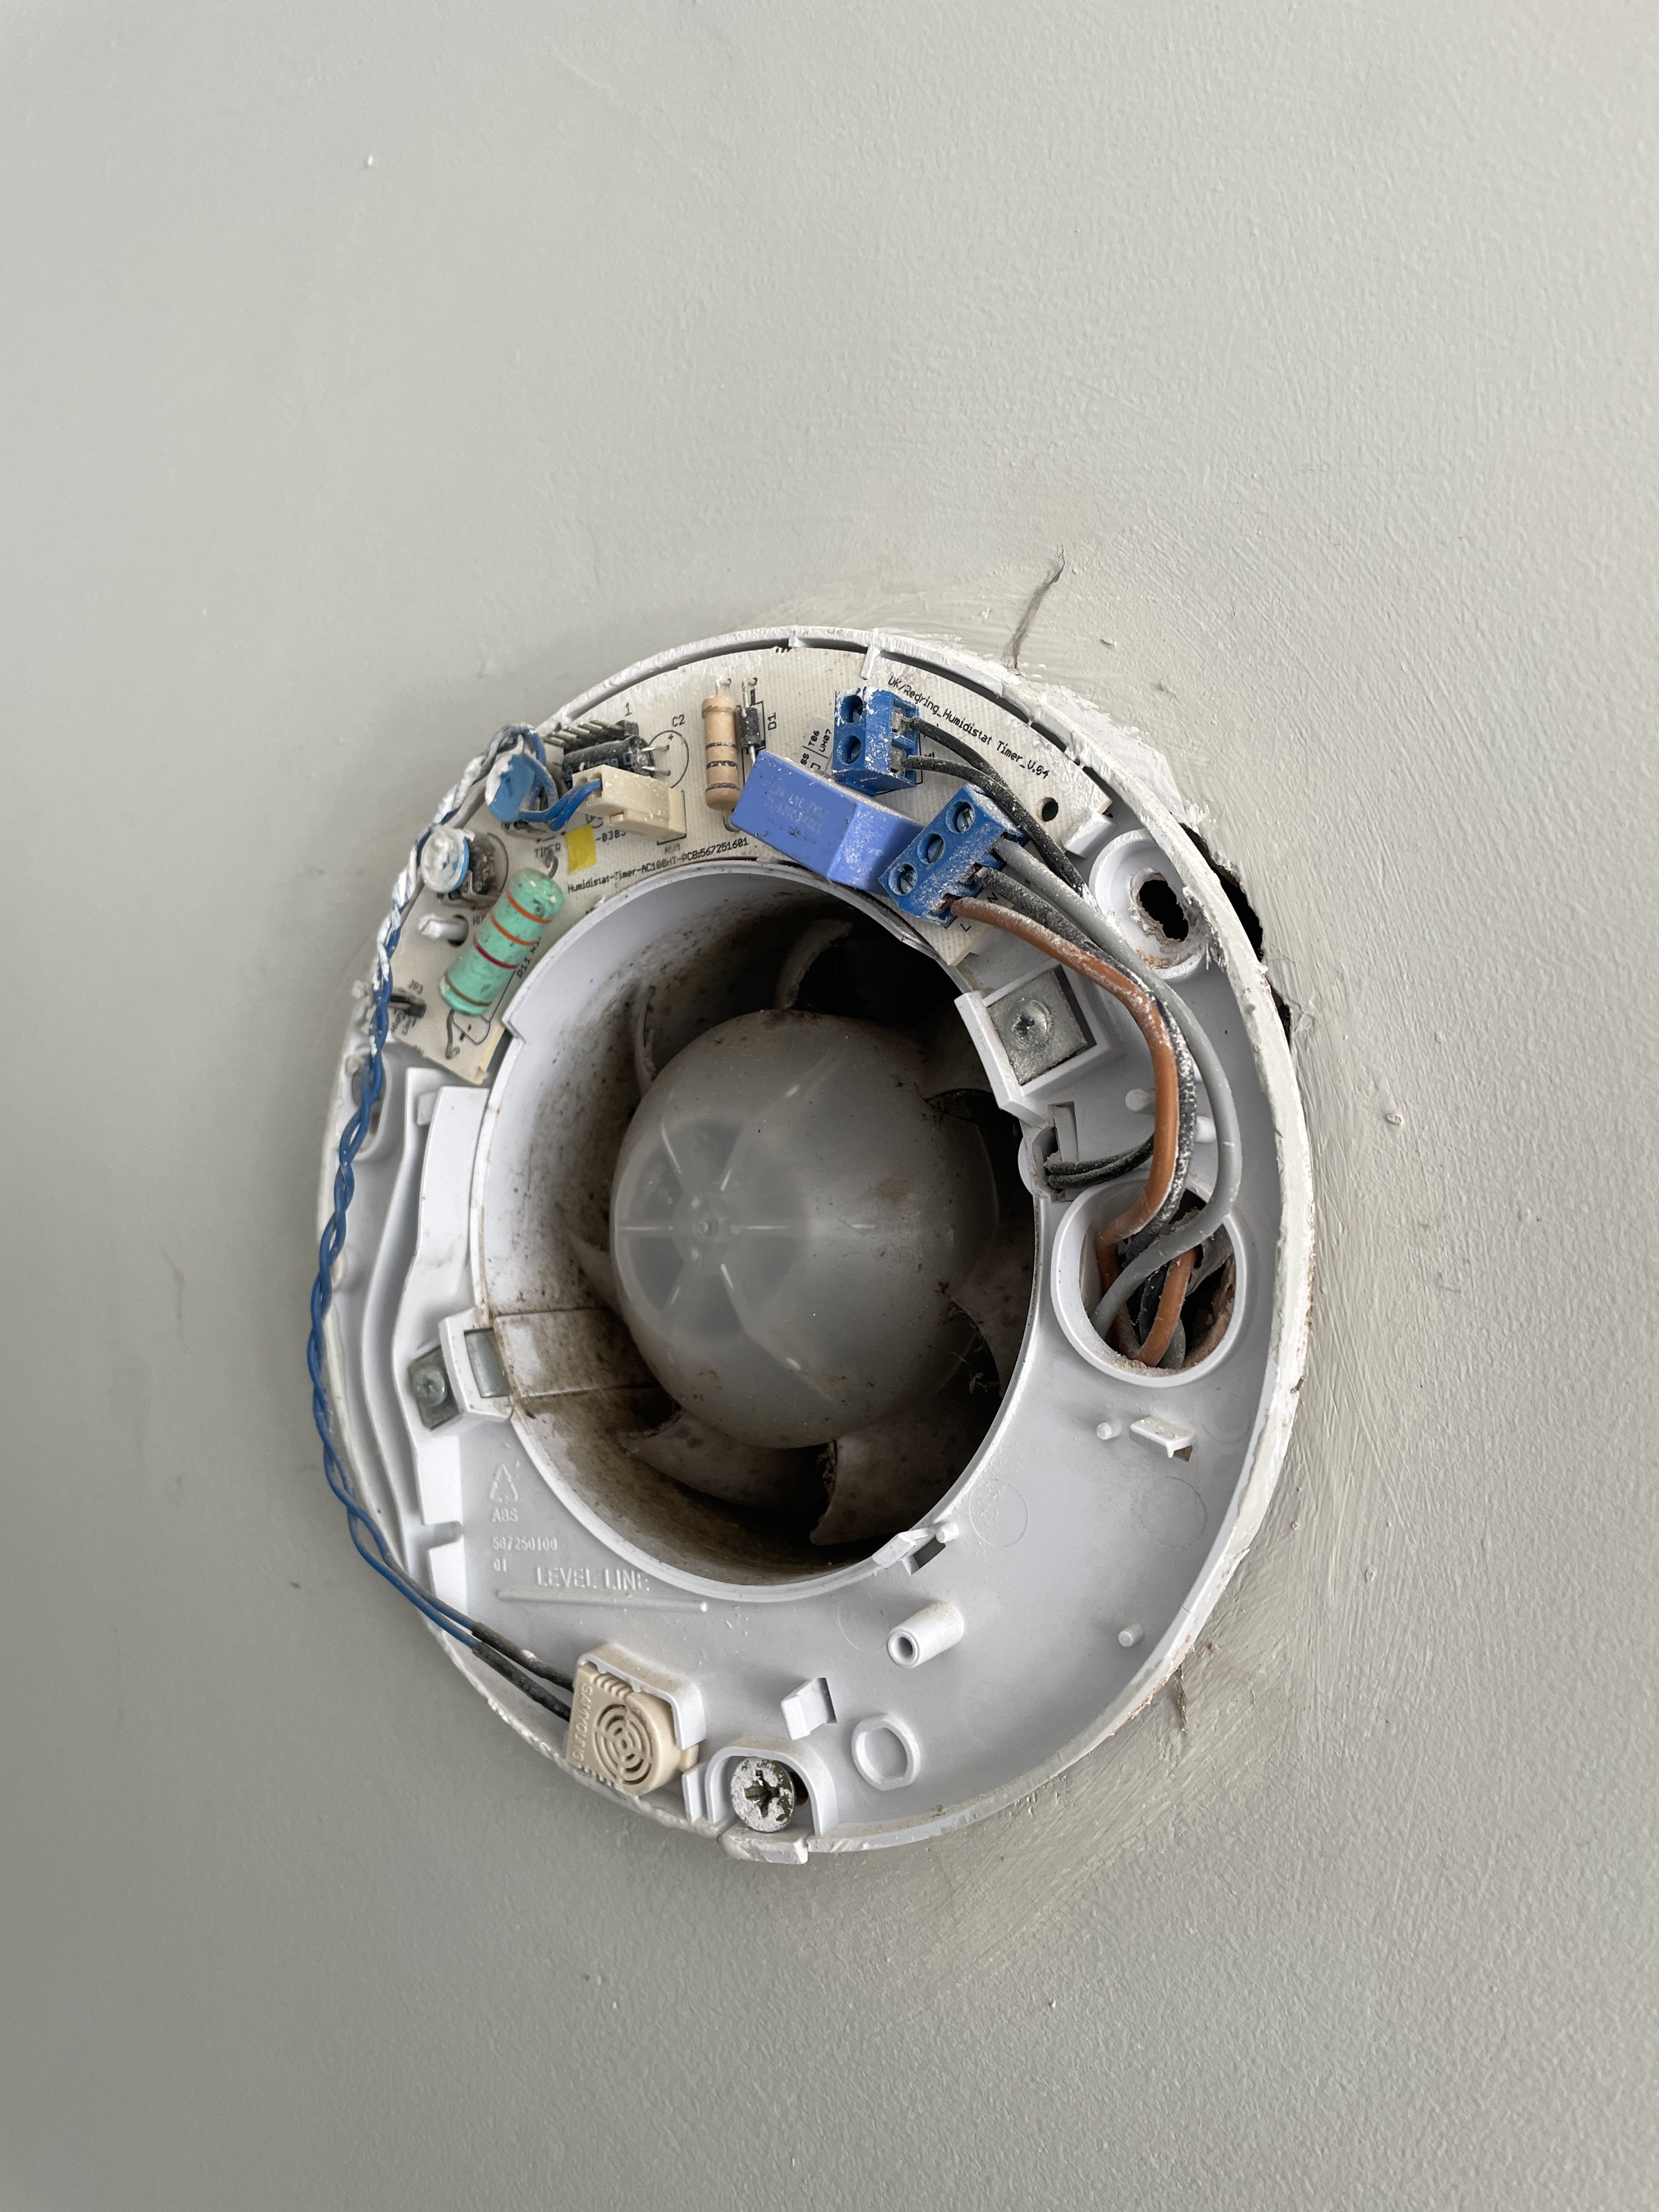
How can I tell if the cables going to it are live? It doesn't work at all, but I don't know if it's just broken or there is no power to it, or both.
How then do I go about filling in the hole? Is this the job for an expert or can I DIY this? I'm worried about it not being done properly and getting damp coming through.
I've added a couple of photos for context.
Any advice welcome!


0
Comments
-
Assume the cables are live unless tested with a contact voltage tester.1
-
Most of them are designed to be interchangeable. I would simply replace it (£50ish quid from Screwfix) as far less hassle than trying to make right the brickwork on one side, any missing insulation in the middle and plaster on the inside.
1 -
CSI_Yorkshire said:Assume the cables are live unless tested with a contact voltage tester.And use a multimeter, not one of those screwdrivers with a neon light in the end (they are called "death sticks" for a reason).What finish do you have on the exterior of the wall ?For brick, find some matching ones. Cut out the bricks that have the hole in them, and mortar the new ones in place. If the wall is rendered, I'd get a lump of breeze block, cut a round slug from it, and mortar it in to the hole. Then render over it and try to match the finish..Inside, again, take a slug of breeze block, and finis with a skim of plaster.
Any language construct that forces such insanity in this case should be abandoned without regrets. –
Erik Aronesty, 2014
Treasure the moments that you have. Savour them for as long as you can for they will never come back again.1 -
That was going to be my next question - how do I reliably test the cables!FreeBear said:CSI_Yorkshire said:Assume the cables are live unless tested with a contact voltage tester.And use a multimeter, not one of those screwdrivers with a neon light in the end (they are called "death sticks" for a reason).What finish do you have on the exterior of the wall ?For brick, find some matching ones. Cut out the bricks that have the hole in them, and mortar the new ones in place. If the wall is rendered, I'd get a lump of breeze block, cut a round slug from it, and mortar it in to the hole. Then render over it and try to match the finish..Inside, again, take a slug of breeze block, and finis with a skim of plaster.
The finish outside is rendered, and I am about to have it repainted - partly why I'm looking to sort this out now.
And just using breeze block and render will stop any damp issues? Am I over worrying about it?0 -
I want to get rid of it, at least on the inside, to clean up the look of the wall.Jonboy_1984 said:Most of them are designed to be interchangeable. I would simply replace it (£50ish quid from Screwfix) as far less hassle than trying to make right the brickwork on one side, any missing insulation in the middle and plaster on the inside.0 -
wallofbeans said:
I want to get rid of it, at least on the inside, to clean up the look of the wall.Jonboy_1984 said:Most of them are designed to be interchangeable. I would simply replace it (£50ish quid from Screwfix) as far less hassle than trying to make right the brickwork on one side, any missing insulation in the middle and plaster on the inside.
If it is cavity wall then it is a case of building up the hole in the inner skin of brickwork/blockwork with broken up pieces of brick/block set in mortar. Leaving it to set for a couple or three days and then plastering over it with sand cement plaster layer (mortar) and then a gypsum plaster layer. It is a job for an experienced DIYer rather than a beginner I should have thought. The plastering is made easier by the fact that you can use the wall around the whole as a guide when you plaster it, so an even finish would be quite simple to achieve for the average DIYer.
1 -
I think of myself as a bit more than a beginner, but I don't think I'm experienced enough to tackle this. I can do the finishing plastering but wouldn't be super confident doing the rest I don't think..Mistral001 said:wallofbeans said:
I want to get rid of it, at least on the inside, to clean up the look of the wall.Jonboy_1984 said:Most of them are designed to be interchangeable. I would simply replace it (£50ish quid from Screwfix) as far less hassle than trying to make right the brickwork on one side, any missing insulation in the middle and plaster on the inside.
If it is cavity wall then it is a case of building up the hole in the inner skin of brickwork/blockwork with broken up pieces of brick/block set in mortar. Leaving it to set for a couple or three days and then plastering over it with sand cement plaster layer (mortar) and then a gypsum plaster layer. It is a job for an experienced DIYer rather than a beginner I should have thought. The plastering is made easier by the fact that you can use the wall around the whole as a guide when you plaster it, so an even finish would be quite simple to achieve for the average DIYer.0 -
If the cable is live -- I'll also need to get an electrician to deal with that before filling the hole. I wonder if my regular electrician will come and check it for free and only charge me if it is live...0
-
It would be quicker to replace the extractor fan with one that does work. And you will have a less damp and/or smelly kitchen.
If it sticks, force it.
If it breaks, well it wasn't working right anyway.0 -
Hi WoB.That extractor has three power wires going to it, which most likely means a 'switched' supply - ie you flick a switch to turn it on and off - and also a permanent 'live' to operate either a timed fan overrun period after it's been turned off, or to operate a humidistat, which means it will come on by itself when the humidity levels are high enough (I suspect it's the latter as there's a funny wee white thing at the bottom with two blue wires going to it - it looks like a sensor?)Anyhoo, what this means is that there should be a 'special' switch somewhere to isolate it. It often looks like a very wide light switch - ie the 'rocker' part is stupid-big.Have a look around and see if you can find it. There 'has' to be some sort of isolator or control switch somewhere.How visible is the outside wall where this comes through? Would you be happy with just a round plastic blanking plate that can be painted over if necessary? If you really want to render it, you'll need to match the current finish - and that's unlikely to be easy. To my eye, a purposeful blanking cover can look better than a bad render patch.Struggling to find one, tho'...What does the outside vent opening look like? Does it have 'flaps' that close when it's not running? If so, is it ugly, or can you live with it? If you can, then you can keep it there, and spray-foam behind it to the thickness of the outer brick skin. Depending on whether there's CWI infill, you may wish to then leave a gap, before filling the inner skin with foam too, ending with a round section of plasterboard (find an offcut on Fb Marketplace) glued almost flush, and with a skim of filler to finish.0
Confirm your email address to Create Threads and Reply

Categories
- All Categories
- 353.2K Banking & Borrowing
- 254K Reduce Debt & Boost Income
- 454.9K Spending & Discounts
- 246.3K Work, Benefits & Business
- 602.4K Mortgages, Homes & Bills
- 177.9K Life & Family
- 260.2K Travel & Transport
- 1.5M Hobbies & Leisure
- 16K Discuss & Feedback
- 37.7K Read-Only Boards


