We’d like to remind Forumites to please avoid political debate on the Forum.
This is to keep it a safe and useful space for MoneySaving discussions. Threads that are – or become – political in nature may be removed in line with the Forum’s rules. Thank you for your understanding.
The MSE Forum Team would like to wish you all a Merry Christmas. However, we know this time of year can be difficult for some. If you're struggling during the festive period, here's a list of organisations that might be able to help
📨 Have you signed up to the Forum's new Email Digest yet? Get a selection of trending threads sent straight to your inbox daily, weekly or monthly!
Shower tray installation help
Comments
-
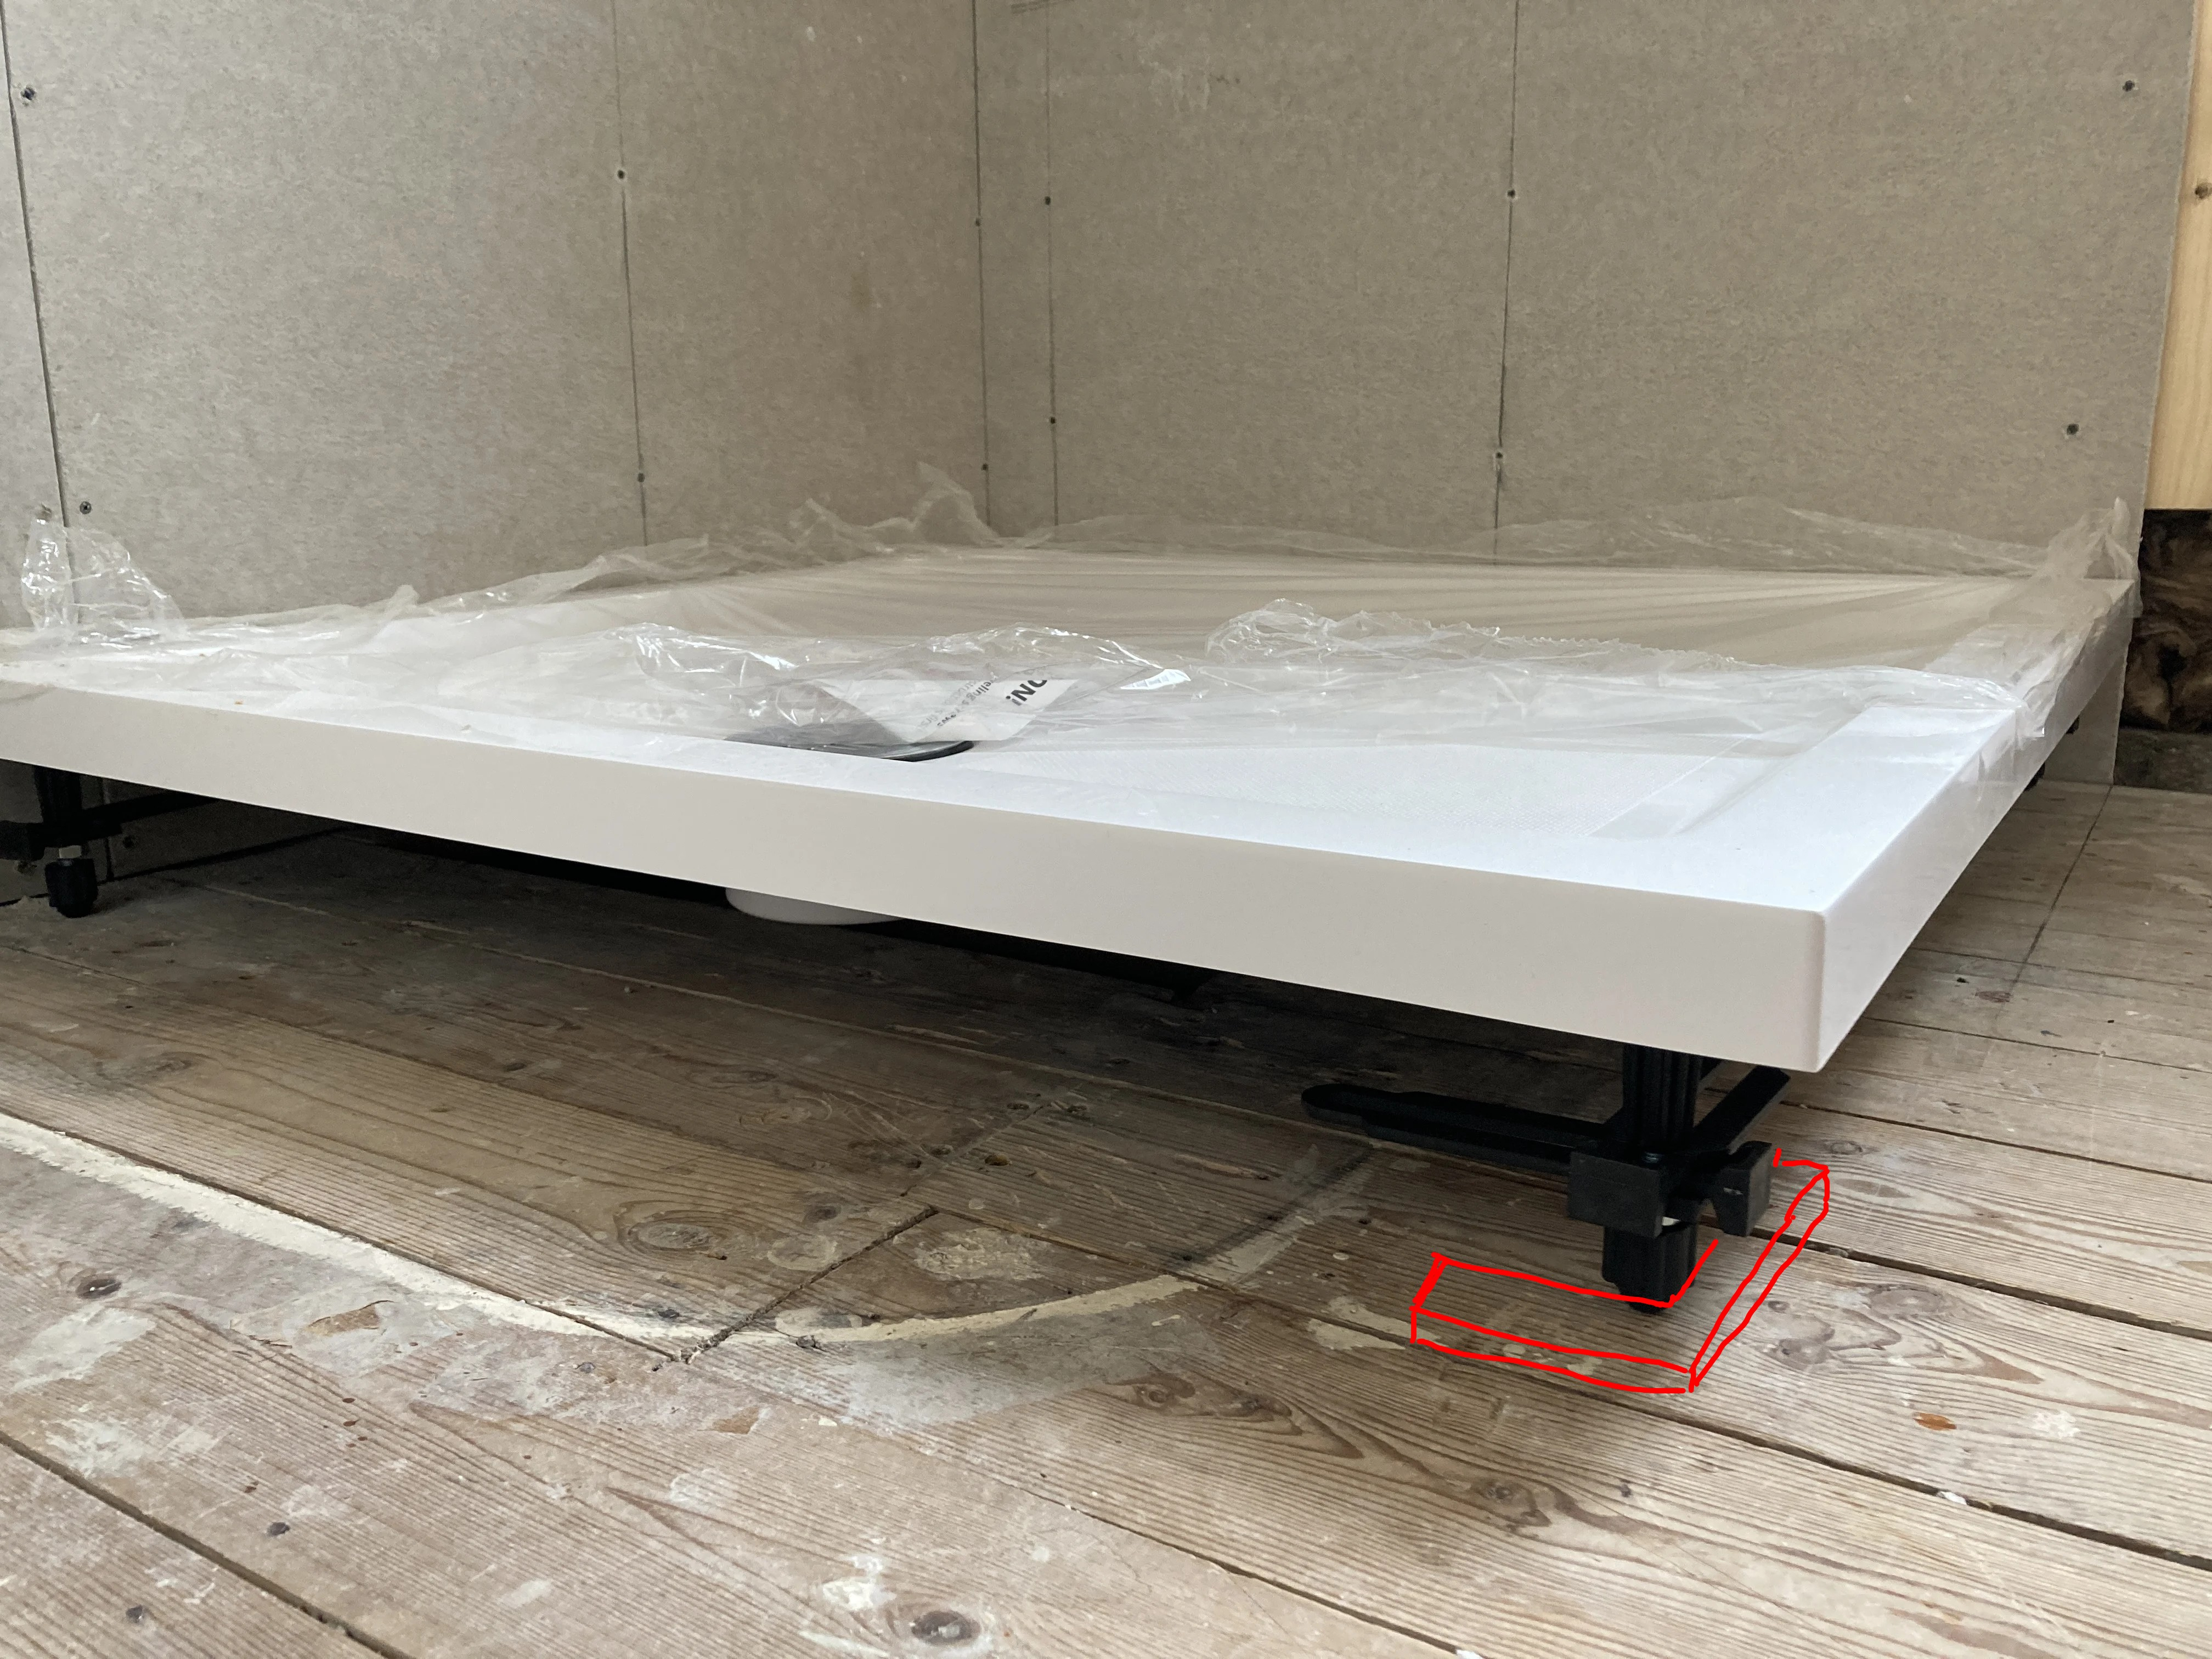
Once it’s tiled in it shouldn’t move, plus put some plywood under the feet to spread the weight rather than it sitting on the floorboard or a couple of pieces of 3x1 timber.
Plus I would recommended fitting some Classi-seal around the tray before you tile.A thankyou is payment enough .1 -
Yes, put the ply up against the legs so it is touching them all, this should stop it. If you want a bit more security you can add some extra ply ( maybe a couple of layers, so 12mm thick so it comes up around the square section part of the legs ) in L shaped pieces around the legs. Just screw them down to the new ply floor and the tray shouldnt be able to move at all. Something like below, and once tiled and sealed in as well it shouldnt go anywhere.benson1980 said:Hi again,
I've finally got around to setting up the shower tray now that I have installed my backer board and done my pipework behind, and had another query.
The legs are all screwed in and I still need to do some fine adjustment to get it level/install the waste- but has anyone got any suggestions regarding preventing lateral movement of the tray? It is very heavy but it will quite happily slide across the floor on it's legs, which don't seem to have any fixings to prevent movement.
I am installing 6mm marine ply around the tray for the flooring, so could butt that up to the three outer legs. My other thought was that I could silicone/glue the tray edge to the backer board, or do both?
1 -
Thanks both- I was thinking classi seal but was veering towards tanking all of the hardiebacker with a tanking kit and overlapping the tray slightly with the tape at the bottom. Not sure if one approach is better than the other…0
-
You should be putting silicone between the tray and backer board regardless. Silicone around the edge, then tile, then another bit of silicone between the tiles and shower tray.benson1980 said:I am installing 6mm marine ply around the tray for the flooring, so could butt that up to the three outer legs. My other thought was that I could silicone/glue the tray edge to the backer board, or do both?
I agree with plumb1_2 as well, you'd be better off putting something like ply under the tray to help spread the weight.
If you're worried about movement then take mi-key's advice and screw in a couple of bits of wood around the feet to hold them in place.1 -
I am a kind of belt and braces type, ( fit and forget). with an upstand tray shouldn’t really need it. But adding it will give you another 45/50mm protection. Plus it always depends on if your walls are square, and most aren’t. So if you have to pull the tray away from one wall it will give a bit of flexibility when fitting.stuart45 said:
What's your opinion on Classi-seal v a tray with an upstand?plumb1_2 said:
Plus I would recommended fitting some Classi-seal around the tray before you tile.
Some walls are well out of square, so you might need to cut a channel In the plasterboard, or chase the plaster out to get an acceptable fit. No one method suits all.A thankyou is payment enough .1 -
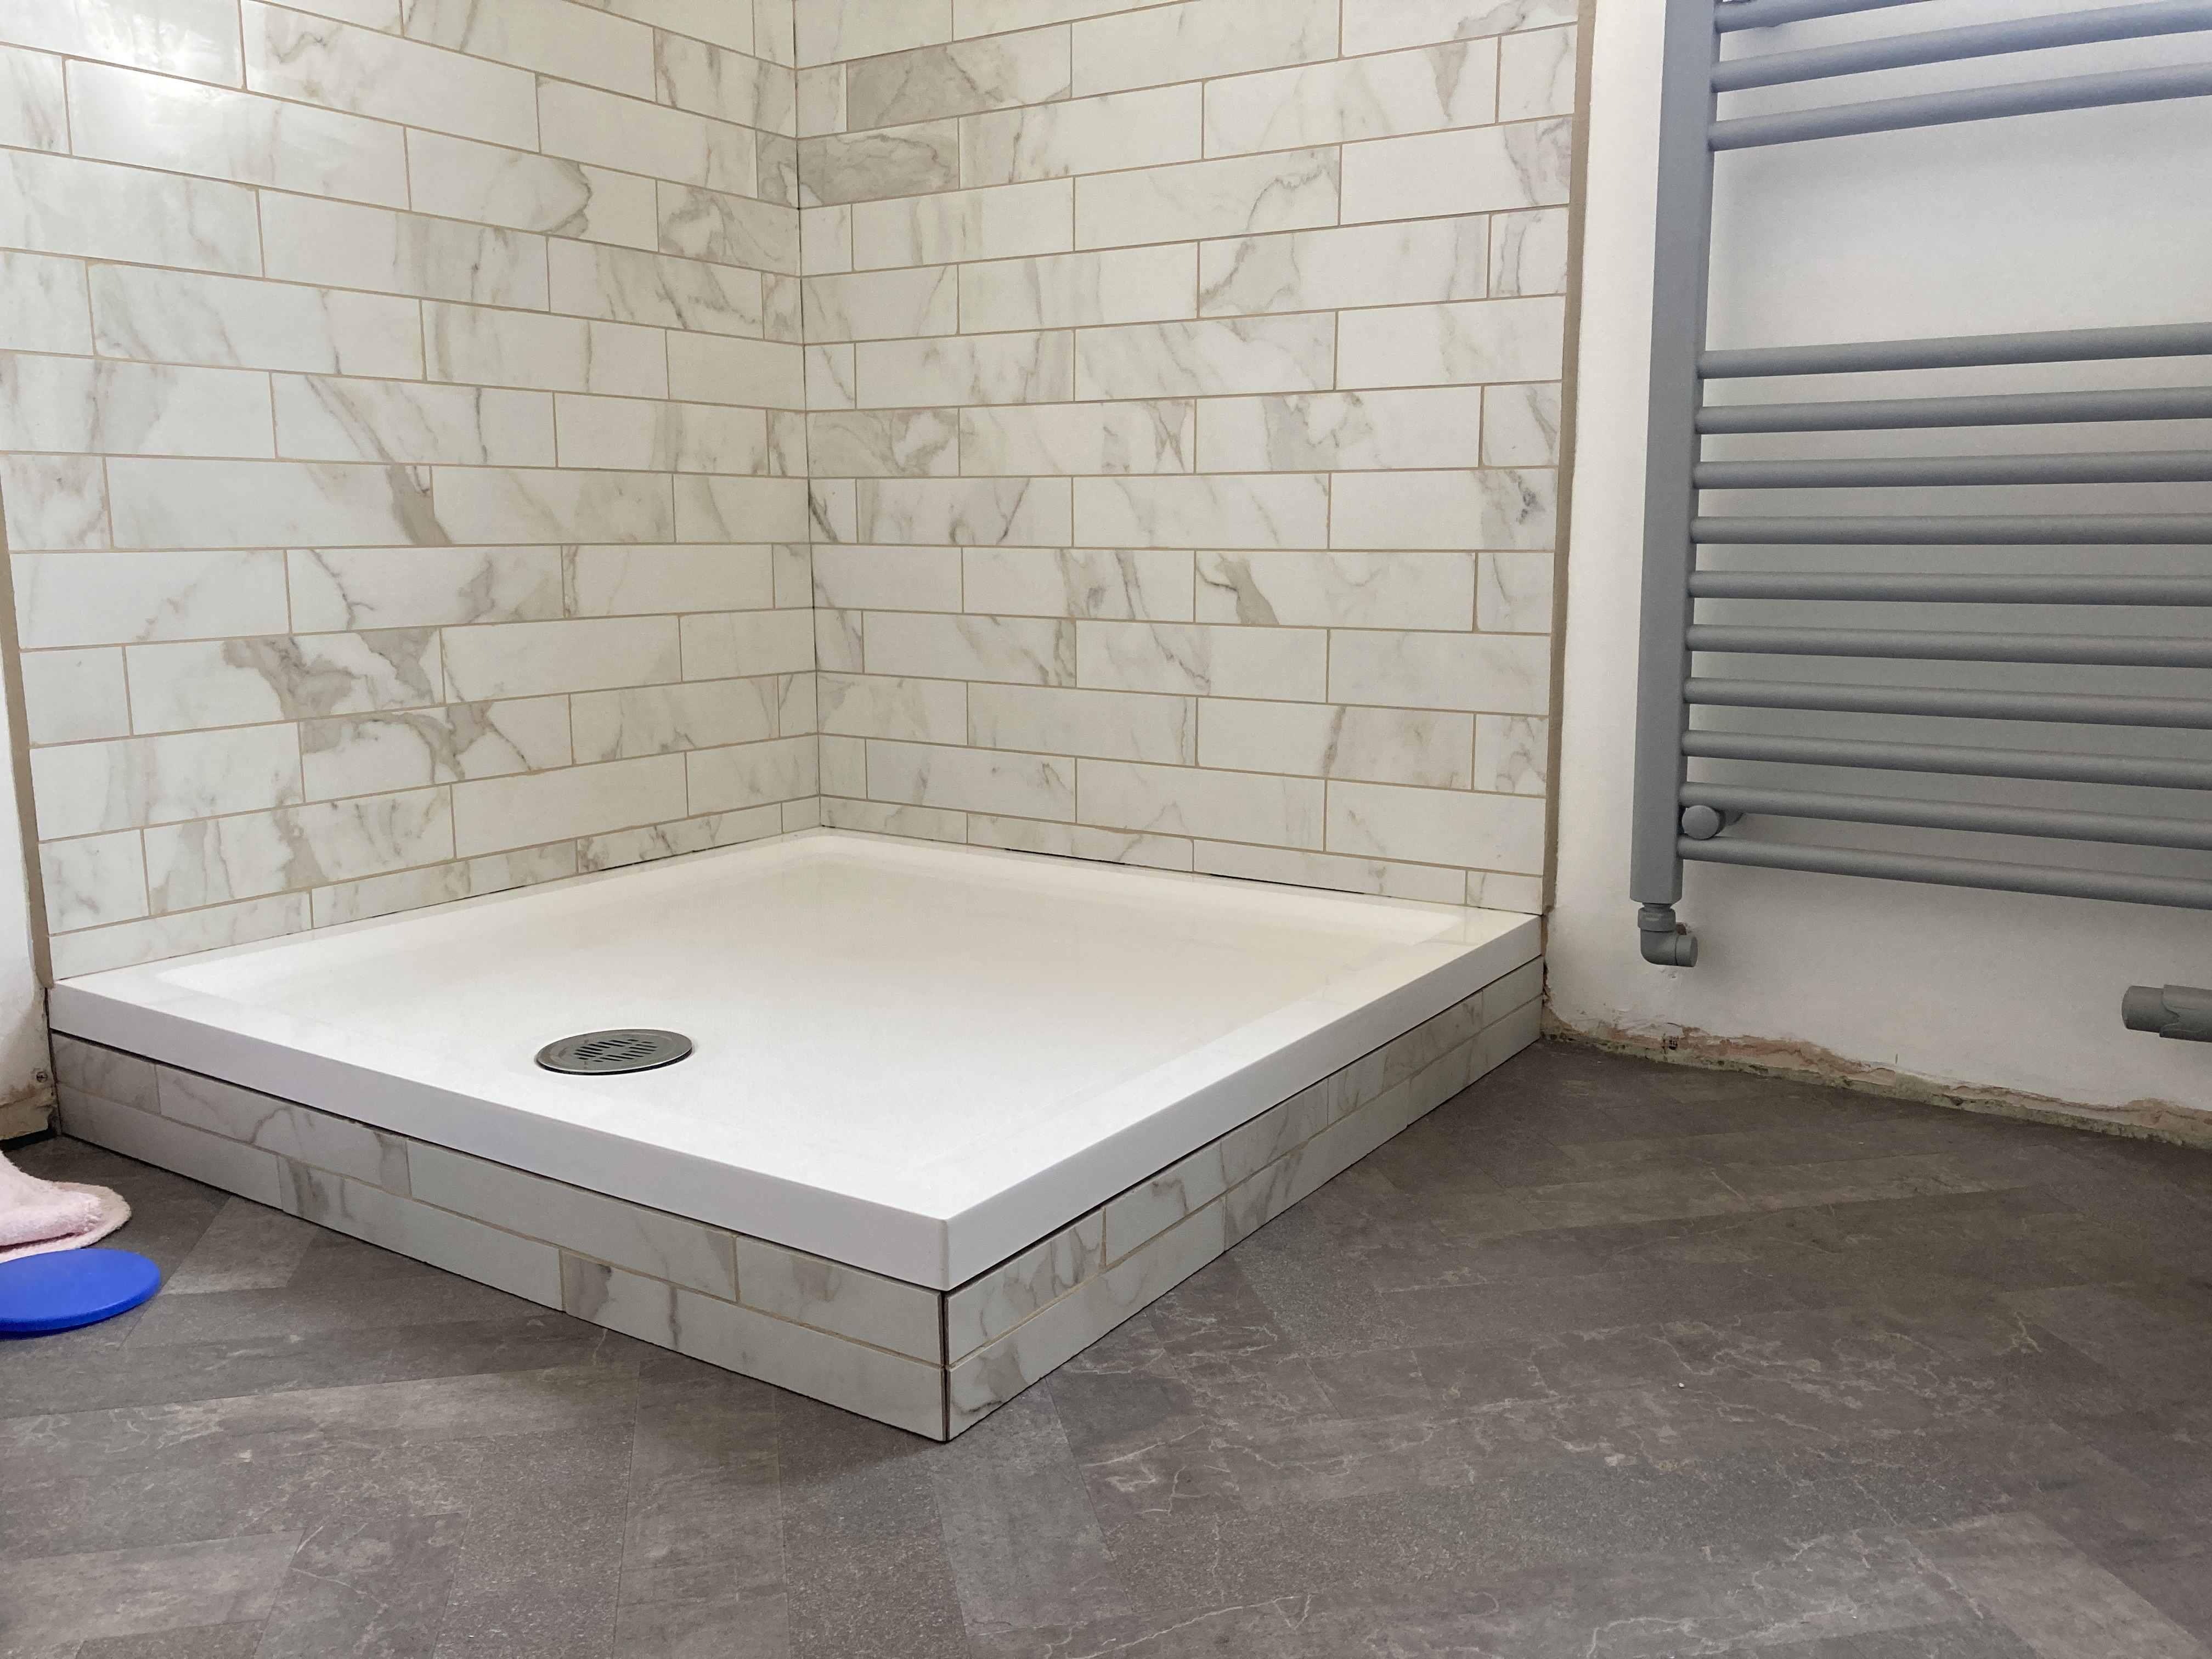
Appreciate all the help on this. Here's what I've ended up with. As suggested, shower tray siliconed to walls. All feels really solid now I've done this, plus the tiles.
I've tanked the whole area behind the tiles and overlapped the membrane slightly at the bottom of tray. Created some matching plinths from hardiebacker, to conceal the space underneath. Mitred edges where they meet. Once we start using the shower and I'm happy there's no leaks I'll probably silicone all the gaps, colour matched to the grout, which is epoxy so again rock solid now it's all set.
And...almost finished. Just got to fit the shower enclosure, shower valve and head, and skirting.
1
Confirm your email address to Create Threads and Reply

Categories
- All Categories
- 352.9K Banking & Borrowing
- 253.9K Reduce Debt & Boost Income
- 454.7K Spending & Discounts
- 246K Work, Benefits & Business
- 602.1K Mortgages, Homes & Bills
- 177.8K Life & Family
- 259.9K Travel & Transport
- 1.5M Hobbies & Leisure
- 16K Discuss & Feedback
- 37.7K Read-Only Boards


