We’d like to remind Forumites to please avoid political debate on the Forum.
This is to keep it a safe and useful space for MoneySaving discussions. Threads that are – or become – political in nature may be removed in line with the Forum’s rules. Thank you for your understanding.
📨 Have you signed up to the Forum's new Email Digest yet? Get a selection of trending threads sent straight to your inbox daily, weekly or monthly!
The Forum now has a brand new text editor, adding a bunch of handy features to use when creating posts. Read more in our how-to guide
Boxing in RSJ musings.

ChasingtheWelshdream
Posts: 957 Forumite


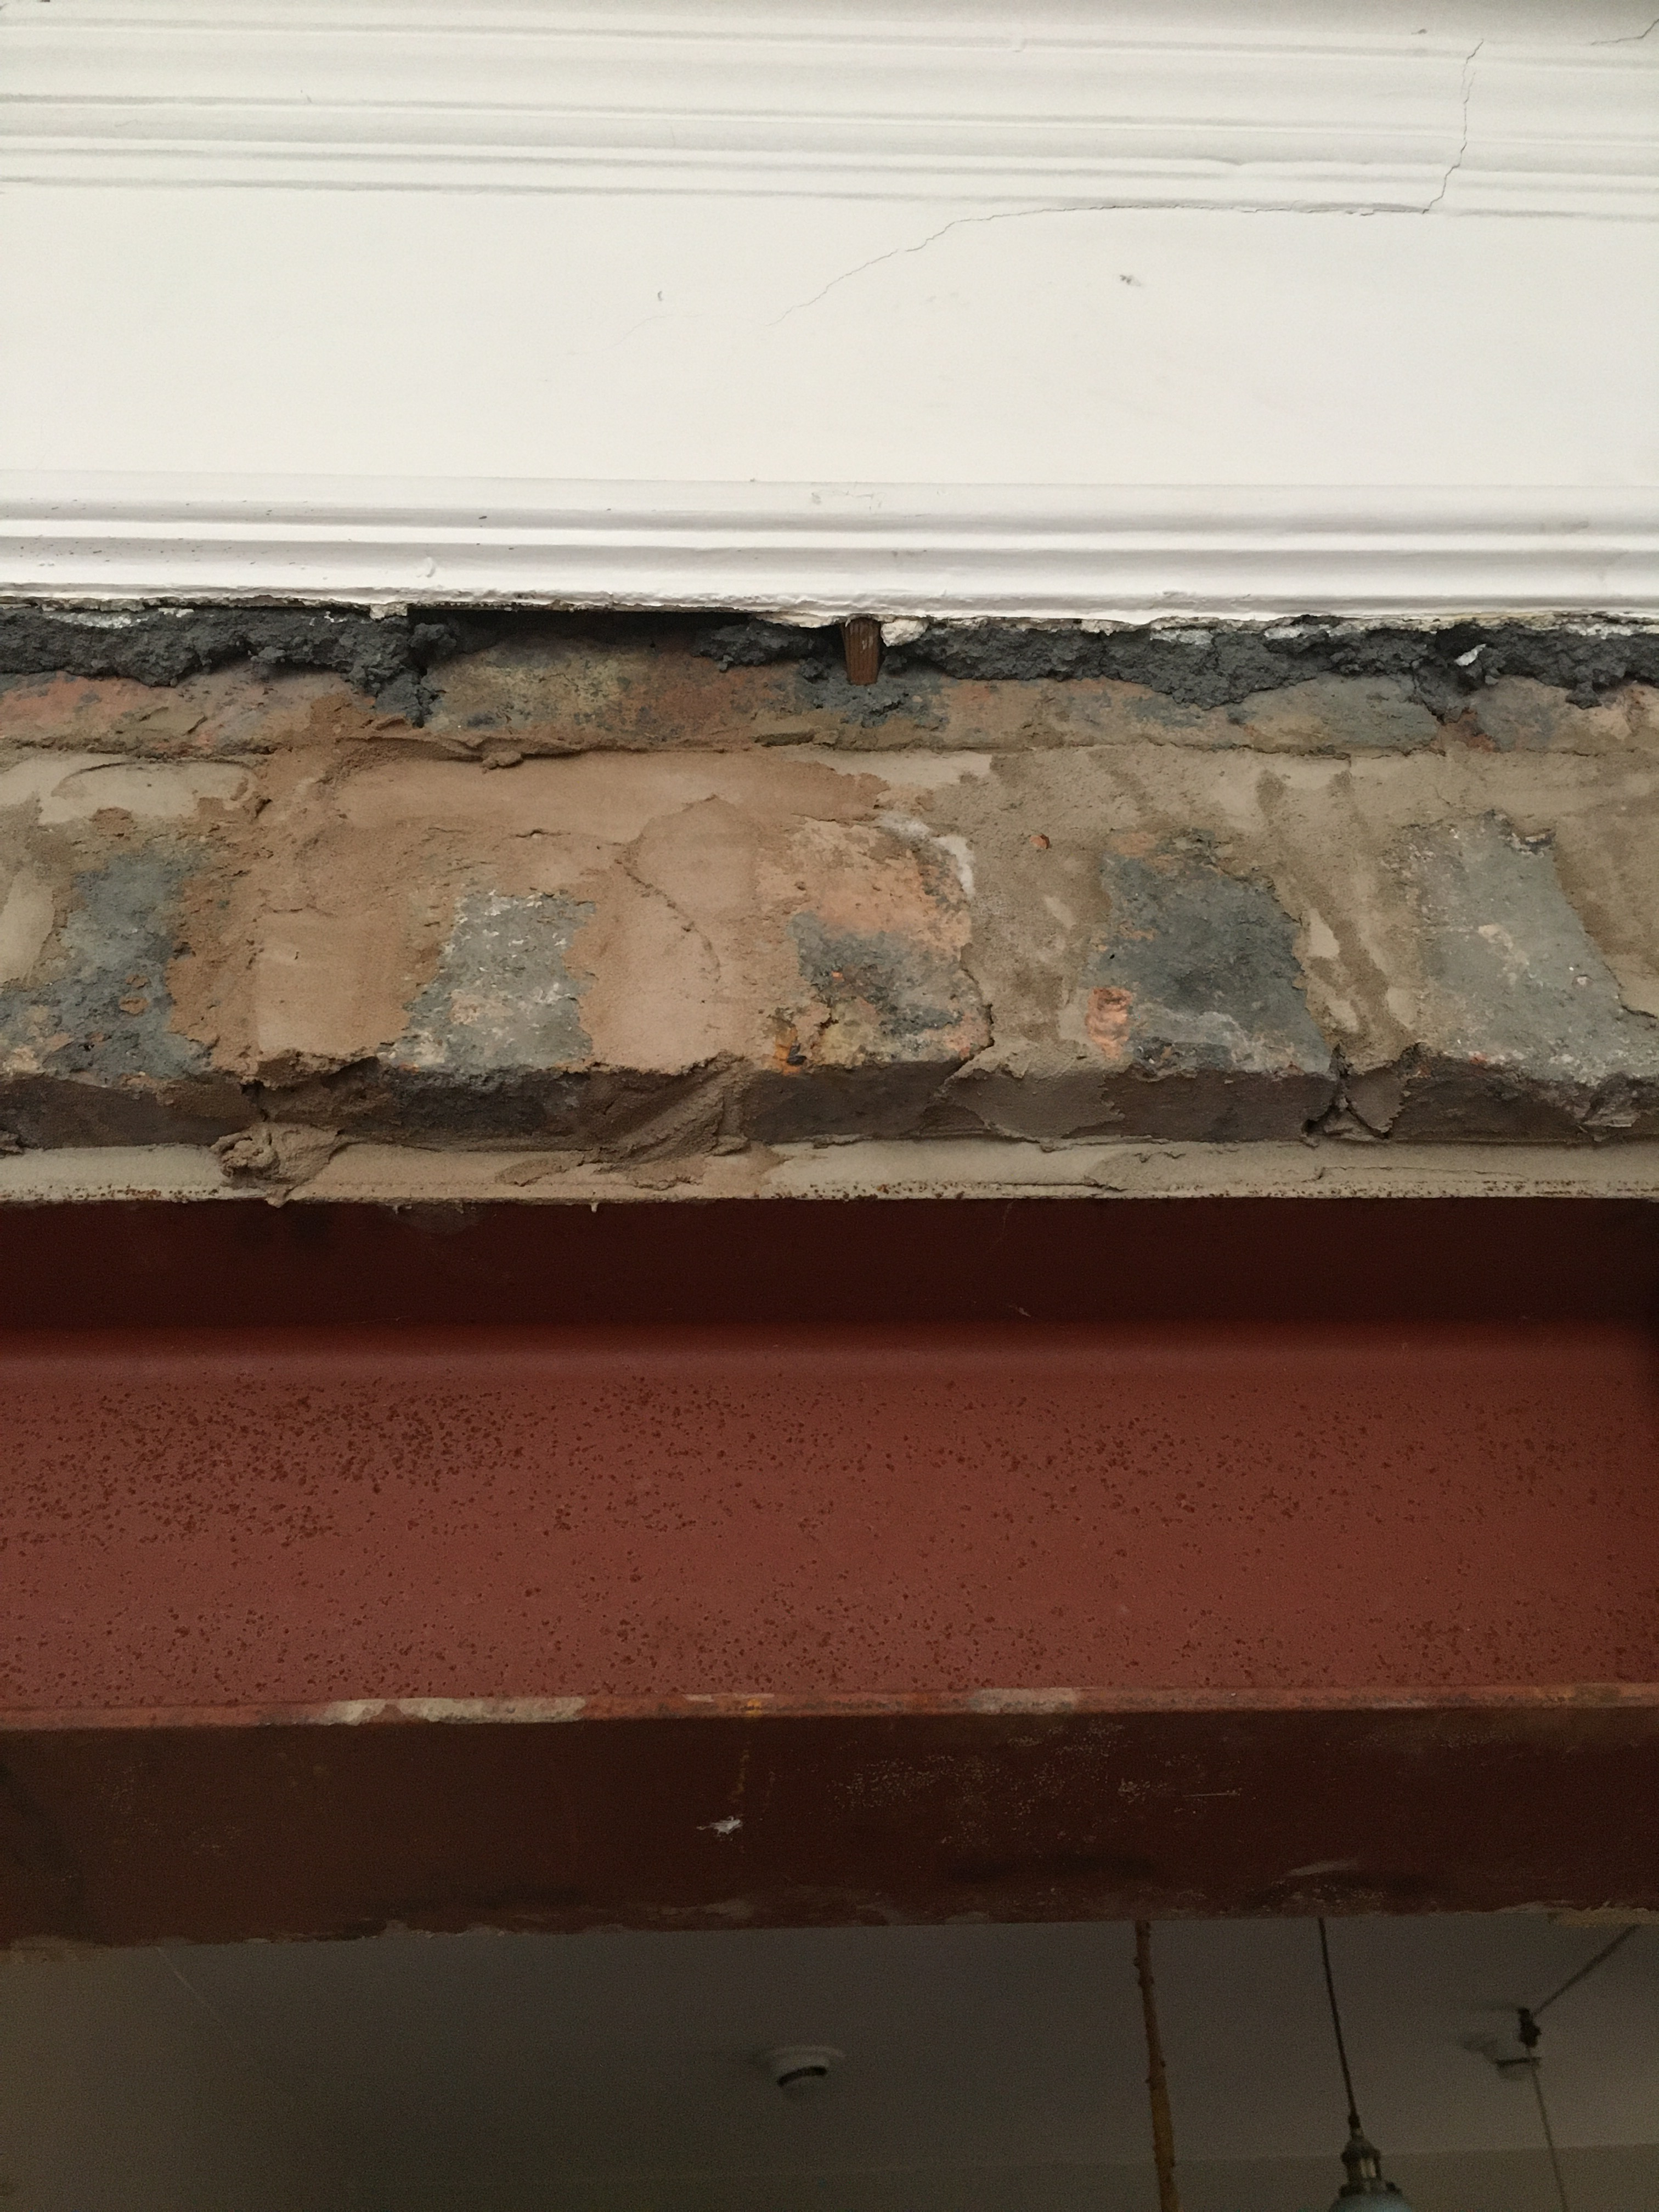
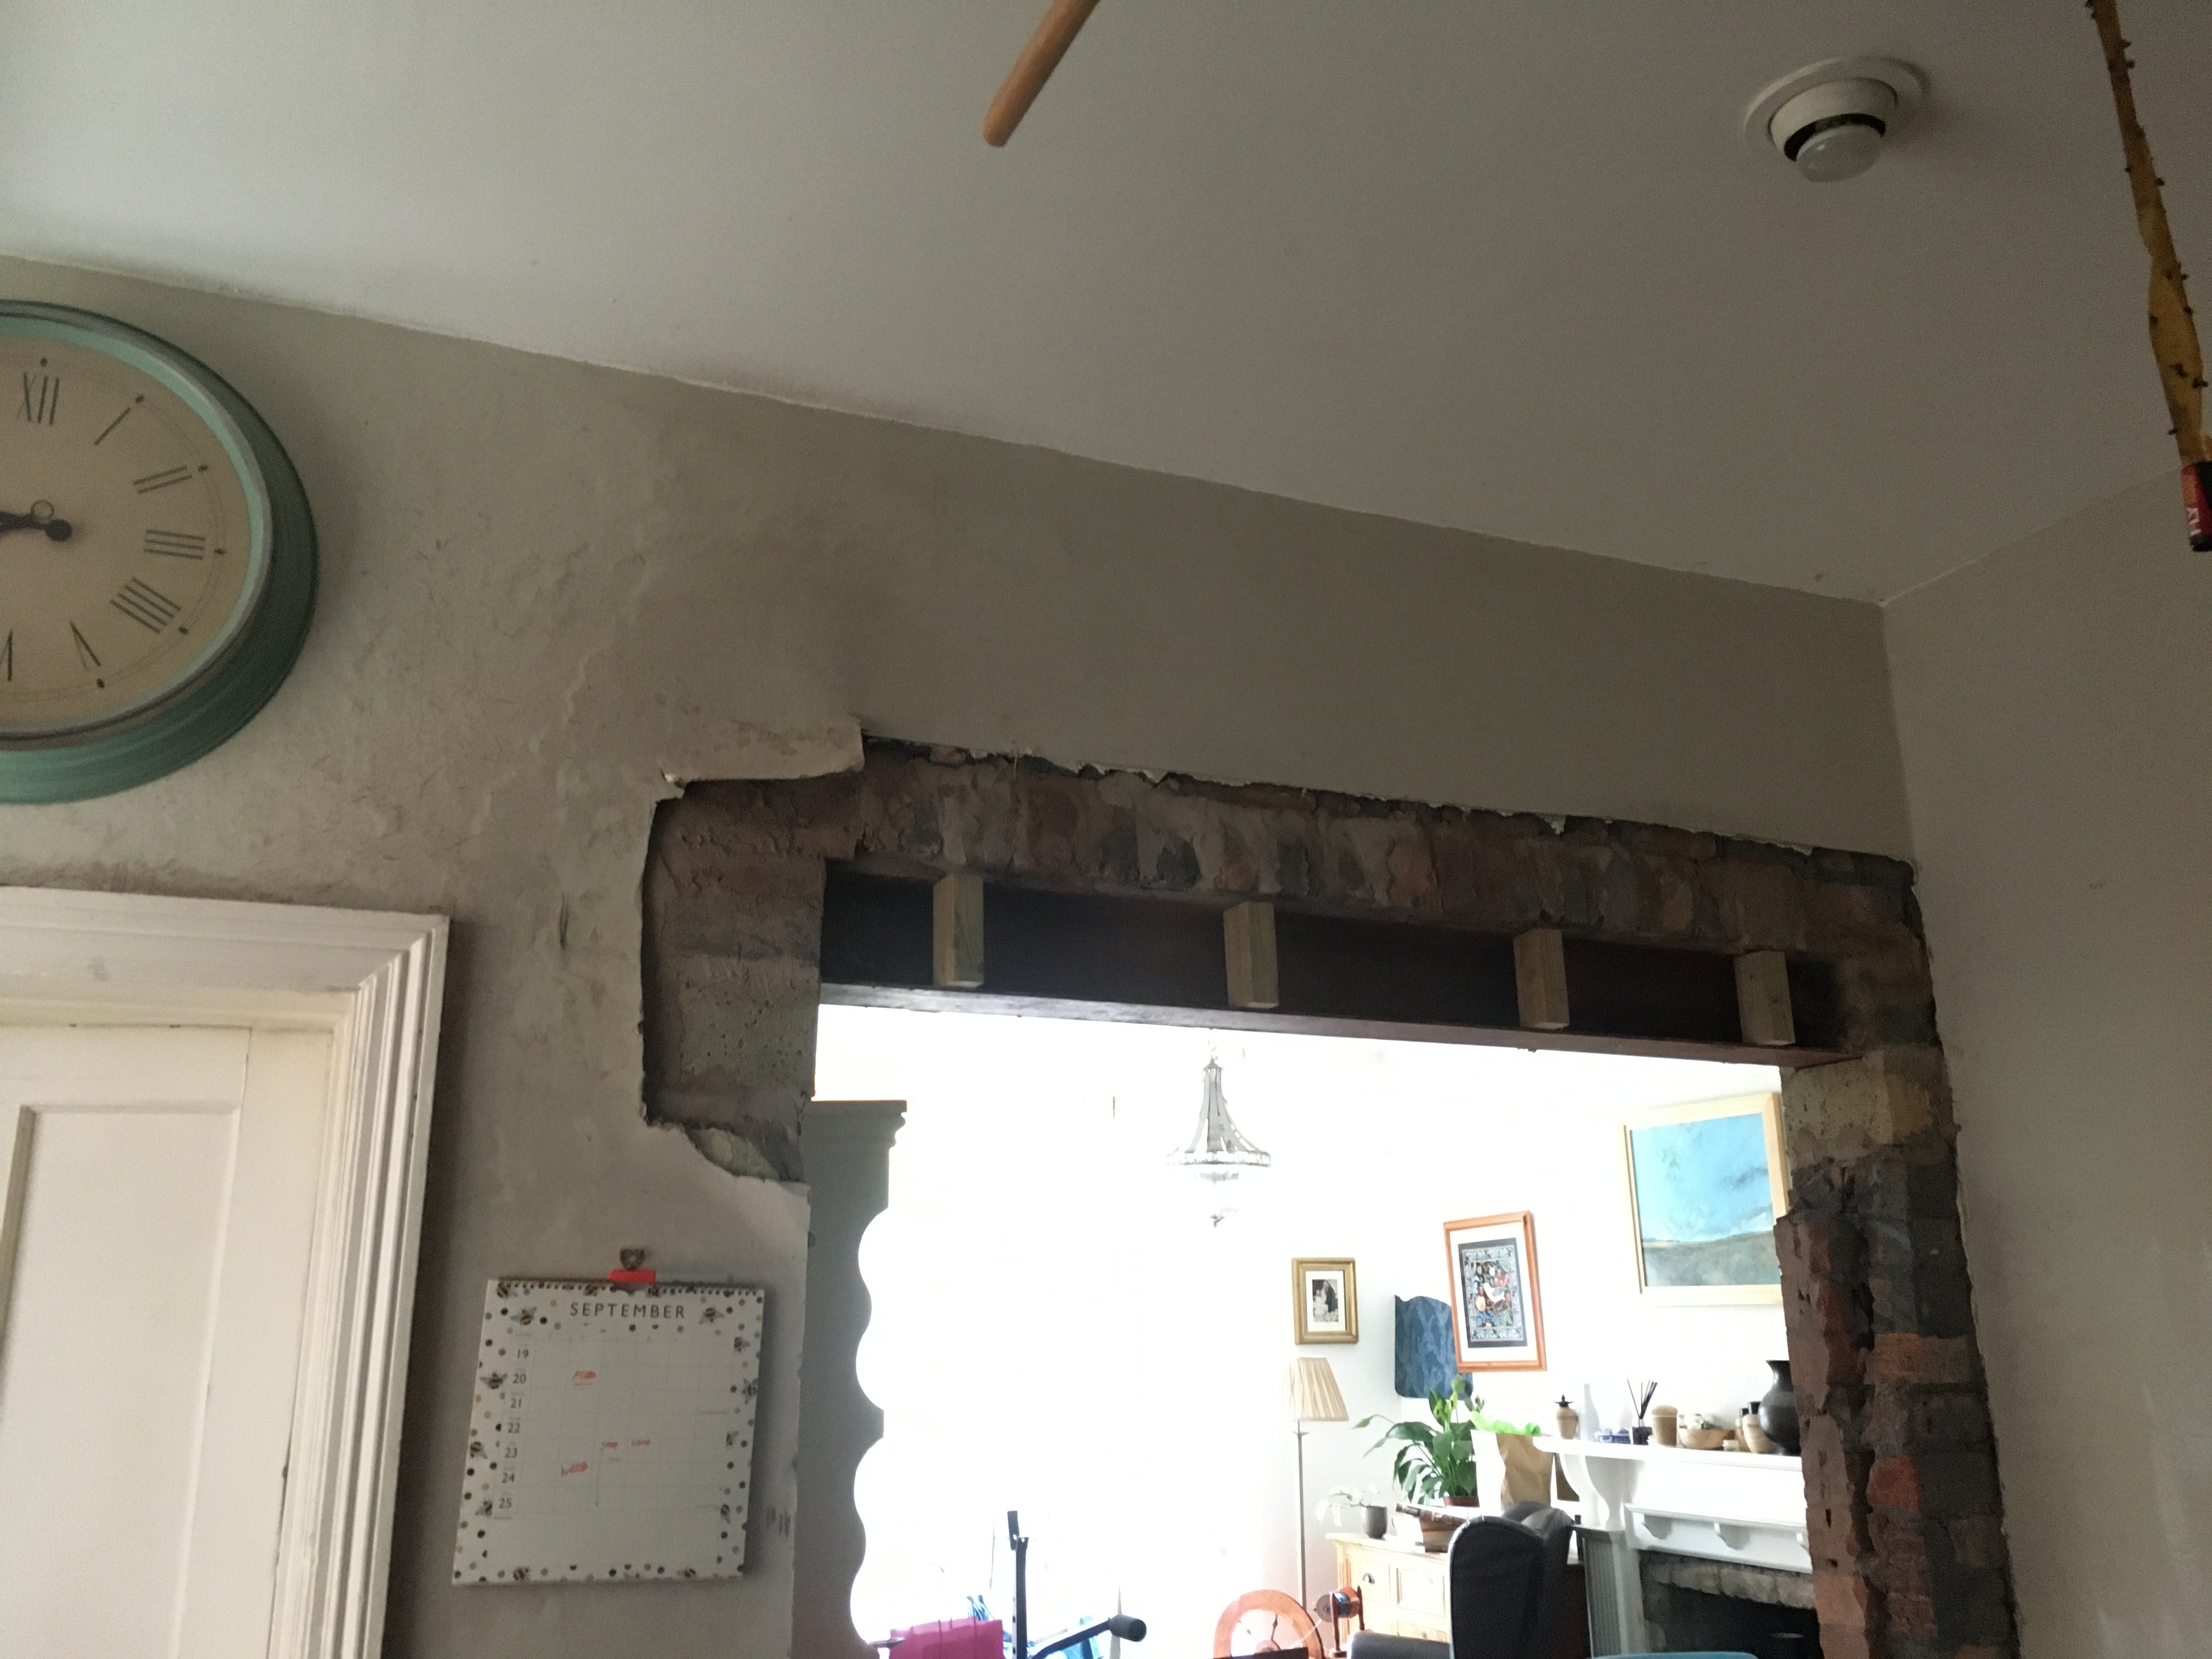
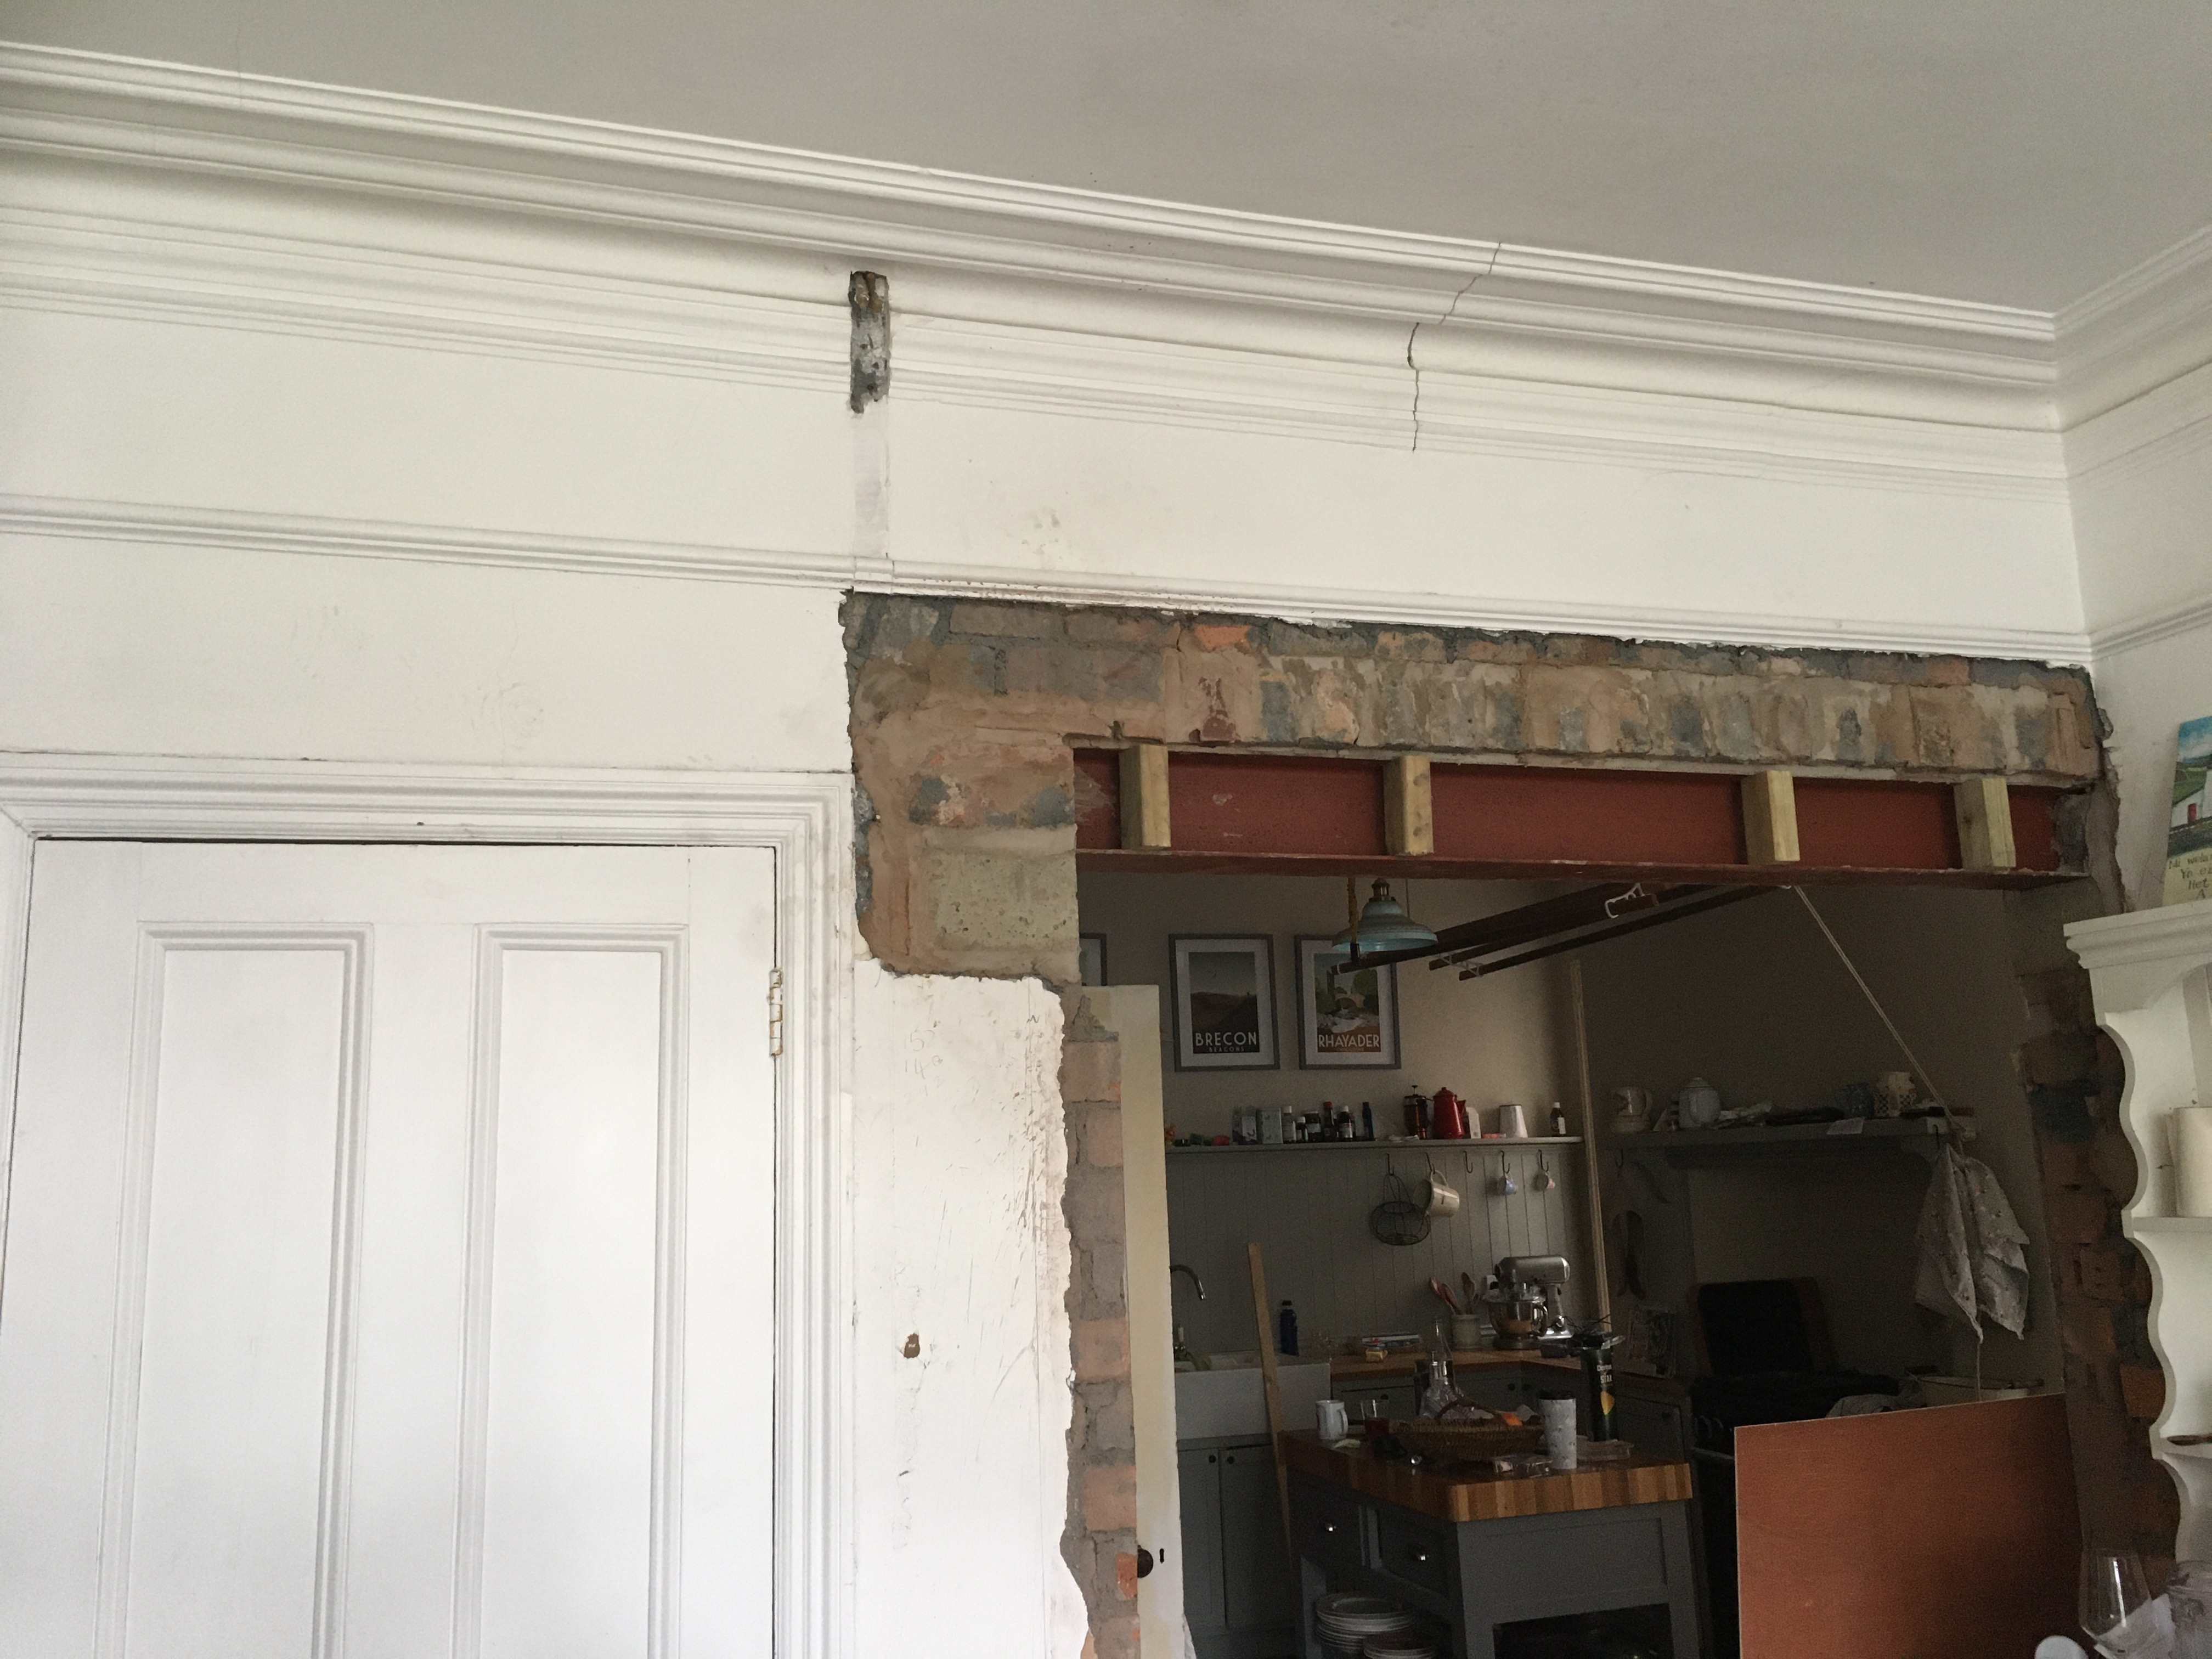
Today’s musing is how to tackle my next job - boxing in an RSJ for our building inspector. Double layer plasterboard and how to do that is all understood.
However, I’m wondering how best to ensure the final finish is flush with the rest of the wall. Is it best to take the rest of the wall back to brick and re-do it all with plasterboard? Or is that extreme?
The complication I can see is not disturbing the original cornicing on one side more than necessary. It has been hacked about a fair bit over the years but I’m trying to save it.
Ignore the noggins as they are wrong, but hope the pictures help.
The doorway below the clock is staying. The other doorway is now redundant and will be blocked up with studwork/plasterboard so there isn’t actually much wall left. But what is, needs to all tie in nicely once finished.
0
Comments
-
I don't understand what the problem is. If two layers of plasterboard are too thick, AFAIK one layer of fireproof plasterboard can do the job.ChasingtheWelshdream said:
However, I’m wondering how best to ensure the final finish is flush with the rest of the wall. Is it best to take the rest of the wall back to brick and re-do it all with plasterboard?
1 -
Sorry, I didn’t explain very well.
Two layers won’t be too thick and won’t be proud of the wall, there is plenty of depth to play with.
But the existing surrounding plaster is varying depths - between 6-15 mm. I am unsure how to marry up the perfect flatness of the plasterboard to the surrounding plaster without it looking ‘odd’. Hence I wondered about taking all the plaster off and starting again.
It is currently covered in lining paper, and I suspect a lot will come off when I strip the paper.
Maybe I am overthinking it? I don’t want to create unnecessary work if I am.0 -
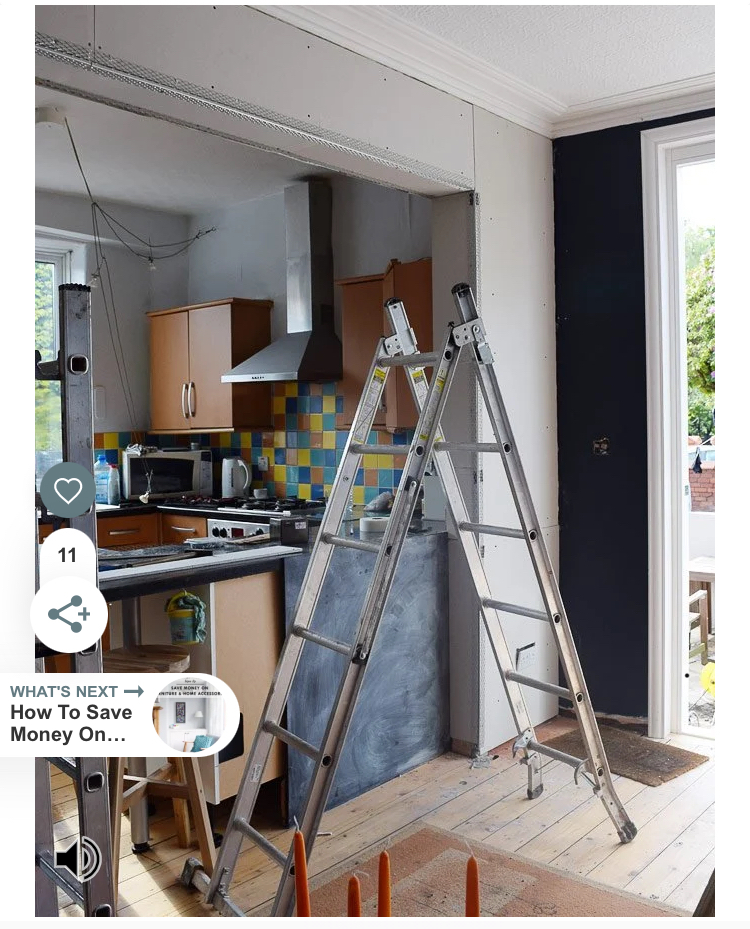
Like they did here:
0 -
I still don't understand. If the original plaster wasn't flat and you want it to be perfect now, then yes, you can rip it off and replaster. The simplest and the cheapest way of doing this is to dot&dab plasterboard first.
1 -
Thank you.
Yes, I am looking for the simplest way to get a uniform finish on the whole wall and assume it is to go back to brick brick and add plasterboard on it all.
But I wondered if that is extreme and there is a better way?
0 -
 Did that crack happen before, during, or after installation of the beam? If before, did the SE know about it?1
 -
AFAK, such cracks are common and expected when installing RSJs and builders don't do their best to avoid them.
0 -
Builders will always warn people in advance about settlement cracks, although they can usually be kept to a minimum, or avoided if the correct methods are used.
In that picture there wasn't enough space to get in 2 courses of brickwork, so they used a brick on edge with a big bed joint on top. If wet mortar was used there would be more shrinkage, which would increase any settlement.1 -
Neither, it isn’t a crack.Section62 said:Did that crack happen before, during, or after installation of the beam? If before, did the SE know about it?It was made with a multi tool to help make an accurate template to get some replacement cornice made for elsewhere in the room.3 -
Thanks, and that answers the follow up question of why the 'crack' doesn't run into the ceiling or wall.ChasingtheWelshdream said:
Neither, it isn’t a crack.Section62 said:Did that crack happen before, during, or after installation of the beam? If before, did the SE know about it?It was made with a multi tool to help make an accurate template to get some replacement cornice made for elsewhere in the room.")
0


Confirm your email address to Create Threads and Reply

Categories
- All Categories
- 354.3K Banking & Borrowing
- 254.4K Reduce Debt & Boost Income
- 455.4K Spending & Discounts
- 247.3K Work, Benefits & Business
- 604K Mortgages, Homes & Bills
- 178.4K Life & Family
- 261.5K Travel & Transport
- 1.5M Hobbies & Leisure
- 16K Discuss & Feedback
- 37.7K Read-Only Boards