We’d like to remind Forumites to please avoid political debate on the Forum.
This is to keep it a safe and useful space for MoneySaving discussions. Threads that are – or become – political in nature may be removed in line with the Forum’s rules. Thank you for your understanding.
📨 Have you signed up to the Forum's new Email Digest yet? Get a selection of trending threads sent straight to your inbox daily, weekly or monthly!
Floorboards and Woodflooring
PierremontQuaker03
Posts: 333 Forumite


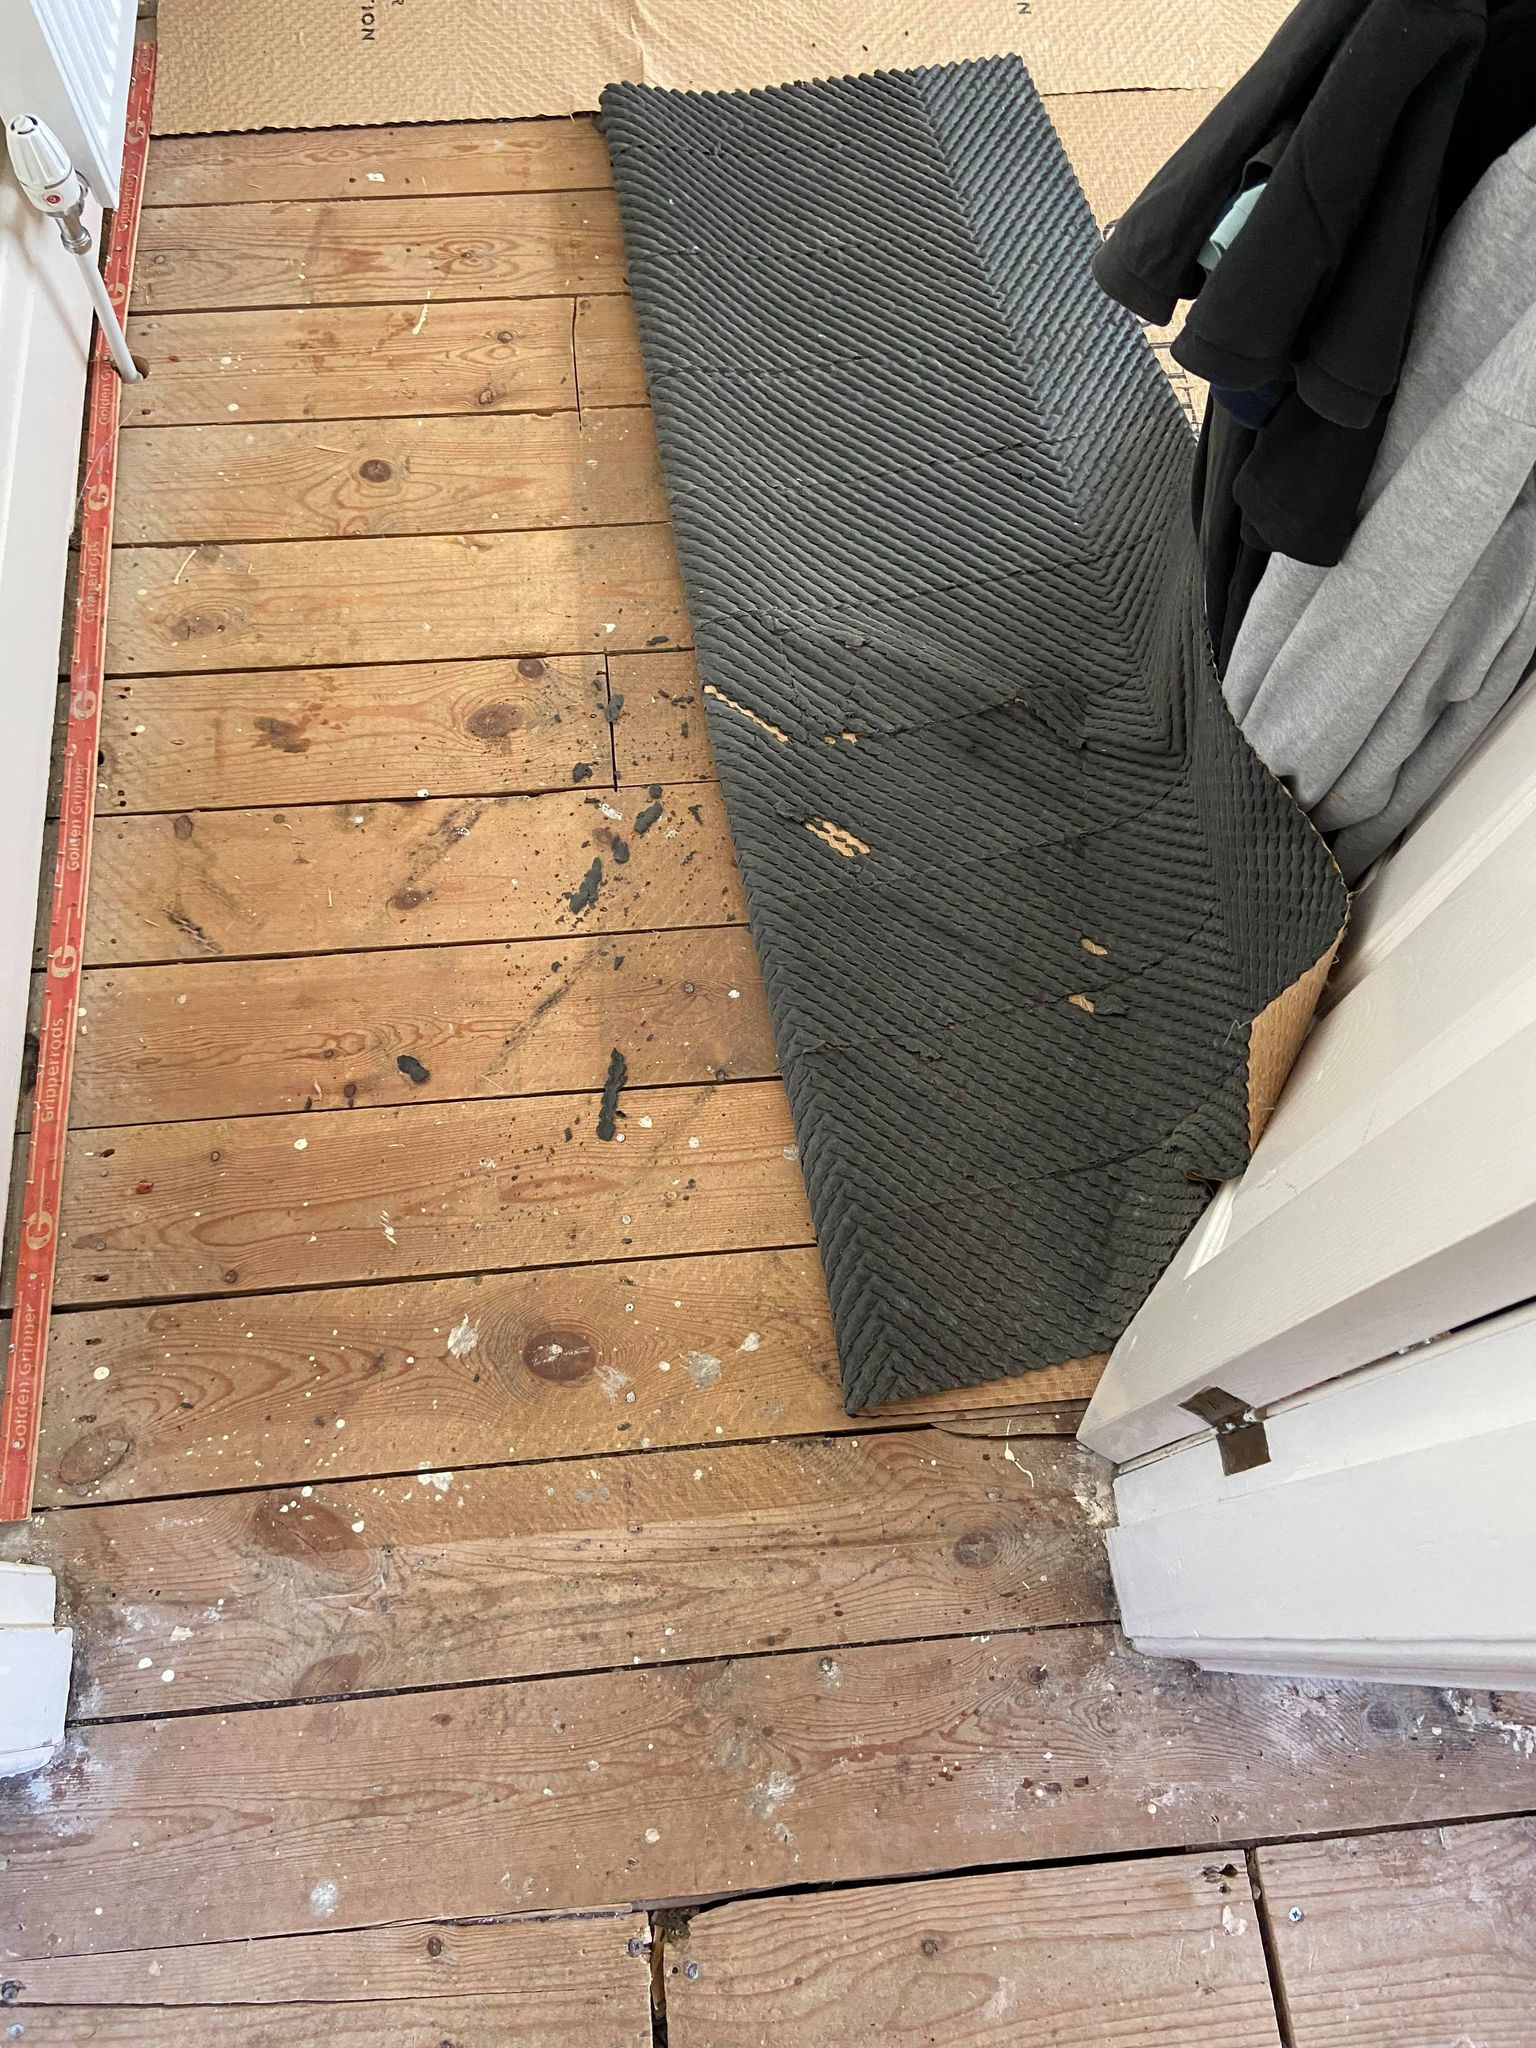
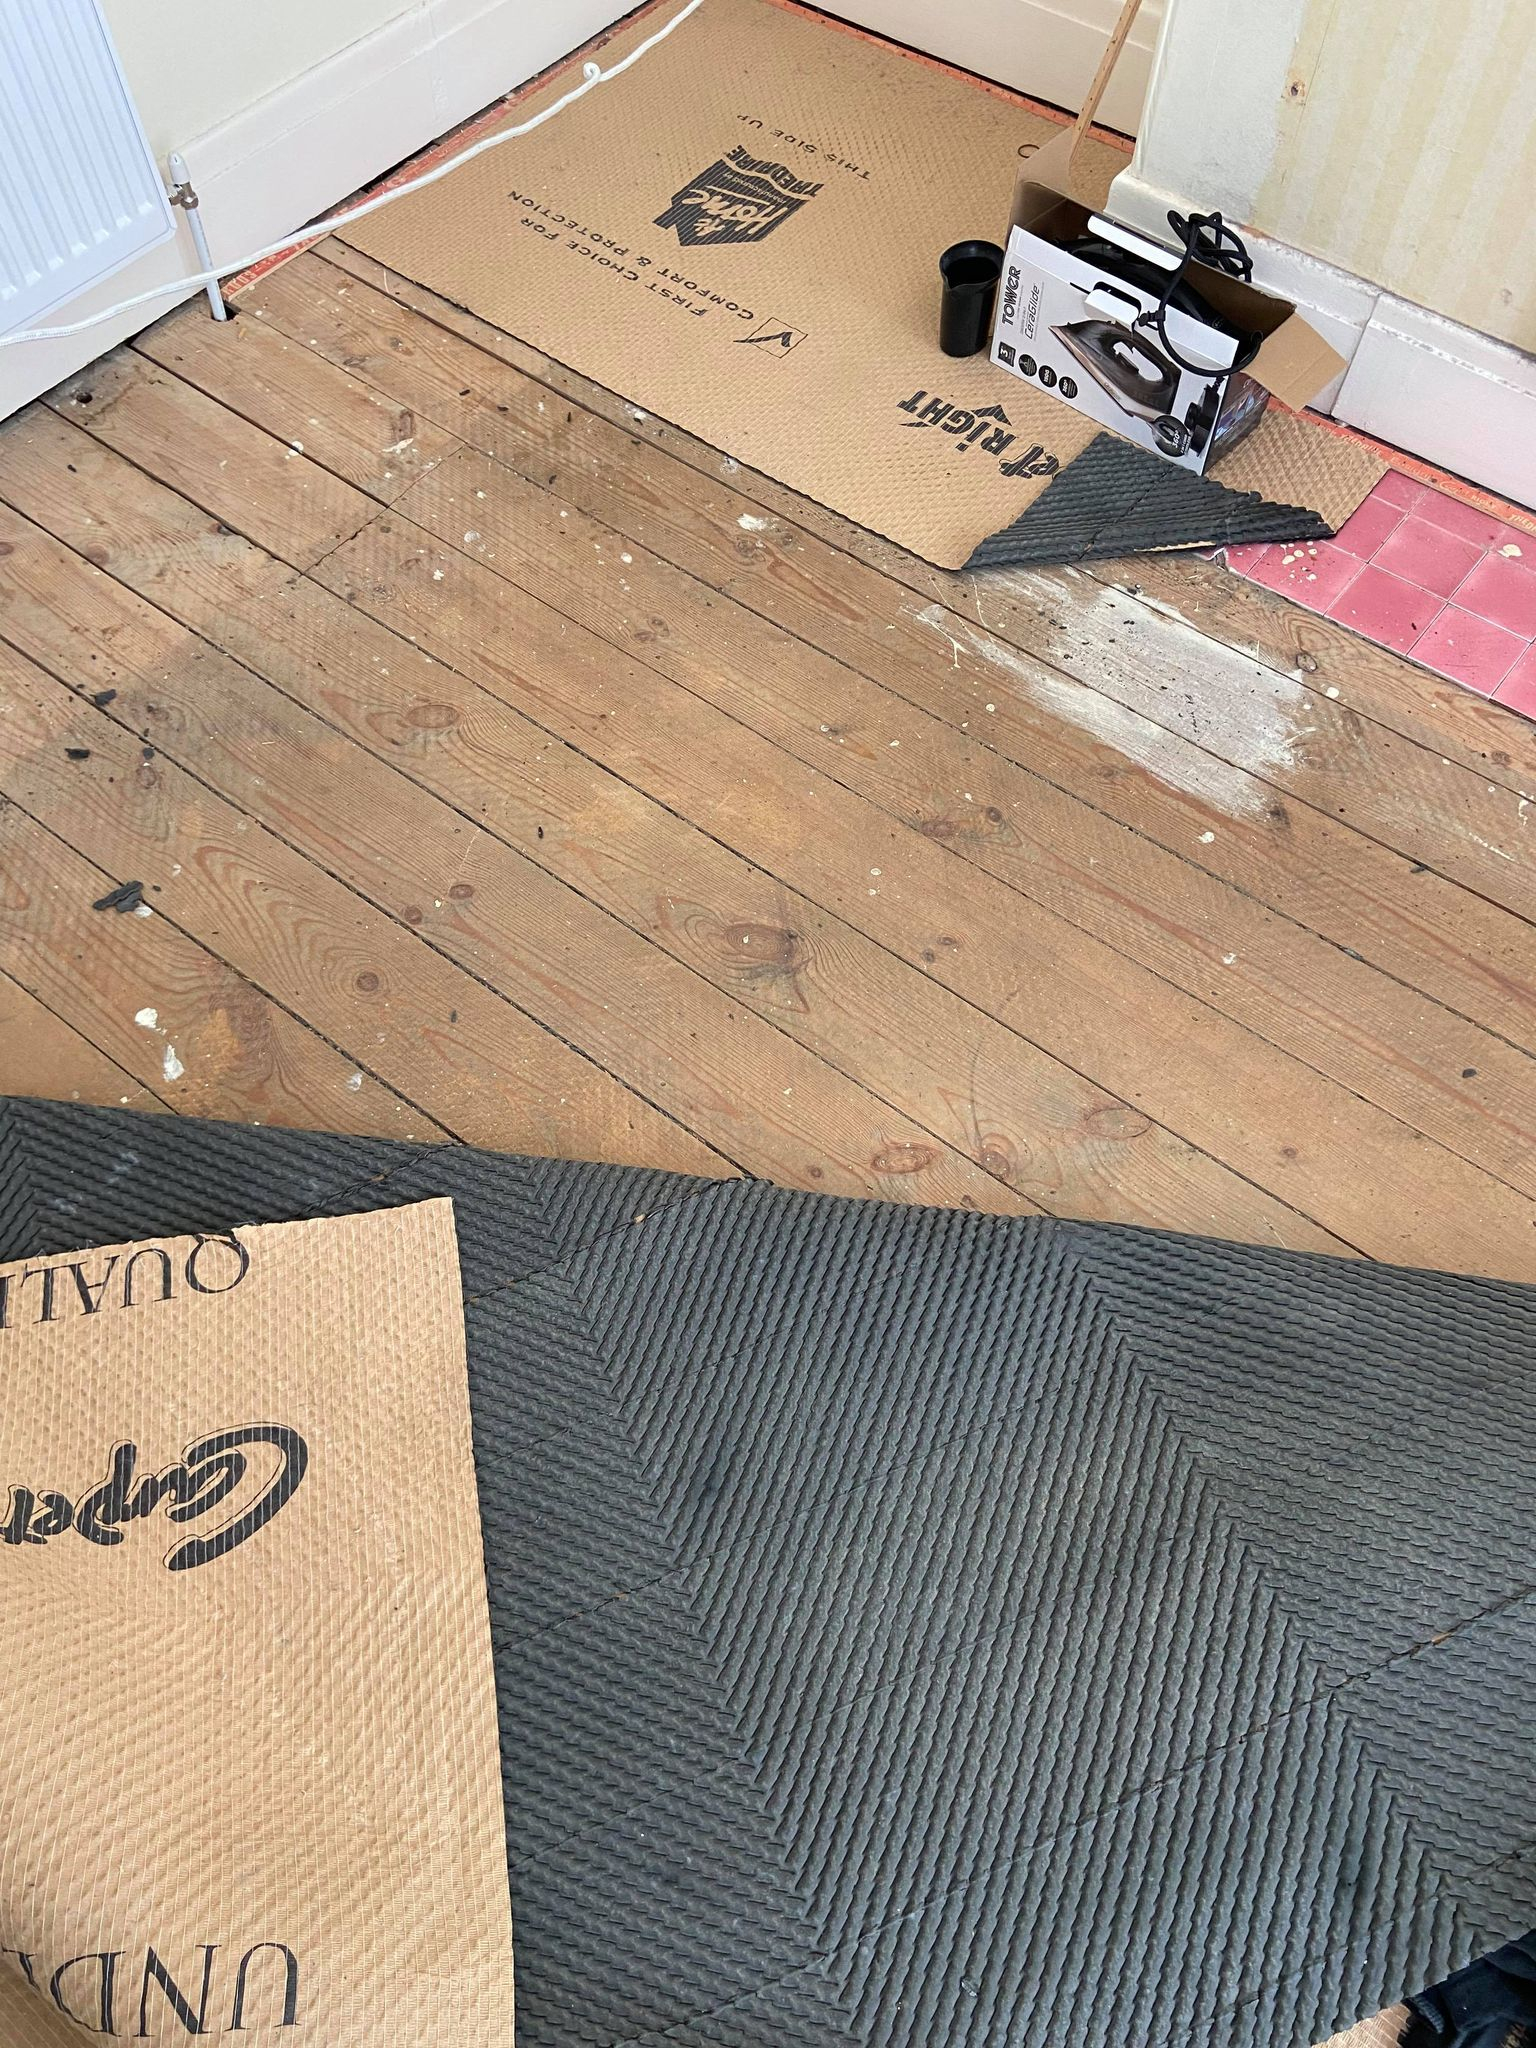
Hi All, I own a 1920s semi and have just pulled the carpet up and the wood floorboards look quite nice in the bedroom. I am thinking they can be sanded and stained as something a bit different, all the other bedrooms are carpeted. I am going for a full decoration of the bedroom, new and relocated electrical sockets, fitted wardrobes etc etc.
Firstly do you think these floorboards would come up nice (see below pics) and any advice on what to do with them? Also should I get the flooring sorted first, before anything else or leave it until last? I was thinking getting the electrical points done first (as obviously floorboards may need to come up) then get the flooring done, before any of the decorating? I have had the radiator moved and a new one fitted as the first job done. Or do you think sanding and staining the floorboards is a bad idea. Let me know any thoughts thanks.


Firstly do you think these floorboards would come up nice (see below pics) and any advice on what to do with them? Also should I get the flooring sorted first, before anything else or leave it until last? I was thinking getting the electrical points done first (as obviously floorboards may need to come up) then get the flooring done, before any of the decorating? I have had the radiator moved and a new one fitted as the first job done. Or do you think sanding and staining the floorboards is a bad idea. Let me know any thoughts thanks.


0
Comments
-
I think they nice when done well. Cover them up whilst painting afterwards though! I'd suggest a rug too as will be noisy in the room below?0
-
I loved muy 1920's floorboards.The only thing I had was draugh on really cold and windy days filtering through the gaps between them. Also from under the skirting.They make something now that is virtually invisible to fill them but I can't remember what. Someone will know because I think I read it on here.Whatever you finish them with make sure it's non slip. I had the original varnish and when I polished it up it was like a skating rink till it had been worn down a bit.
I can rise and shine - just not at the same time!
viral kindness .....kindness is contageous pass it on
The only normal people you know are the ones you don’t know very well
0 -
We uncovered our Victorian floorboards and they were literally dark grey with (presumably over a hundred years worth of) grub, as well as splatters of paint etc. They now look amazing. We went for a Matt lacquer.
If you can paint before doing the floorboards it'd save some stress. But as someone else said, just use sheets to protect the floorboards if you can't.
Btw this is something theoretically you could DIY. But we paid to get people in, especially as the stairs were involved, and we thought it was money well spent - it was quite a lot of work with big drum Sanders0 -
We hired a sander and then used a coloured sealant between the boards and then varnished, it worked for us at the time and every few years we have done a light sand and varnish and a little resealing. The antique pine varnish we used went from an orange colour to a brown when we varnished with the same pot a few years later. Still looked ok though.I am planning to put LVT on top soon, our floorboards 12 years later aren’t in the best condition now, they are marked, the sealant didn’t really work and stiletto heals marked the floor (thanks to an estate agent).Our neighbour had it done professionally and it looked a cut above our attempts, original floorboards can be stunning, sadly our enthusiastic diy approach was not great.0
-
It's many years since I did this throughout a couple of Victorian houses, but when done, they did look absolutely terrific. But this was the 1970's at the height of Conran style in pre-trendy Brixton; neighbours thought we were weird as they preferred shagpile and Chintz.
We only had basic DIY skills but it was easy. We hired a big belt sander which covers a whole room in a couple of hours, plus an edging sander for the corners and fiddly bits. We found that we got through a lot of sanding sheets (which you have to buy- but don't skimp - our renter took unused ones back) until we learned that you have to knock all the nail-heads down just below the surface with a hammer and punch of some kind; or the sheet distintegrates with a bang! We also had an even older house than yours, with several damaged boards, and so had to buy original replacemnts from salvage shops, lift the old bits and re-lay 'em; in fact, as it was on the ground-floor with a suspended floor and air bricks for ventilation below, we lifted, relaid, and shuffled the boards closer together to minimise draughts from the cold sub-floor void (presumably not an issue for you).
We also used a very hard two-pack mix type sealant- it smelt toxic at 1st so is probably banned now, but it was bomb-proof; do check reviews on whatever surface coating you use and choose a durable or industrial one.
And a final warning if you have old fashioned "lath and plaster " ceilings as opposed to plasterboard and skim. We were doing a complete makeover after a flood from the loft tank had run for days when we were away one New-Year; brought down the upstairs ceilings and damaged paintwork throughout. We worked so fast on the downstairs through lounge floor that we thought we'd knock off the bedroom floor too to get our money's worth on the day hire. And as we ran the noisy, vibrating sander over that room on the Ist floor, we heard an omnious rumble from below... and found that the lath and plaster ceiling had collapsed on our beautiful new sanded timbers! Thankfully we'd not sealed or painted them!
So if doing an upstairs room, just check for loose or cracking plaster below.
Alternatively consider just cleaning and painting your boards- very Cottage-core Shabby Chic! Or get in someone who's insured?1 -
I spent the day yesterday sanding my dining/living room floors with a hired drum sander. This is a big room, approx 30 x 14 ft and I managed the lot in a day (a long day)!
I have done the same in other rooms in the house and it all looks fantastic. I would say my boards looked in similar condition to yours before I started.
I would highly recommend Ronseal Diamond Hard clear floor varnish. I've had this on my bedroom floors for almost 2 years now and it's still solid with no discolouring.
As far as the gaps are concerned, if you want to be really posh and don't mind a bit of extra expenditure and more work, you can buy pine slivers which you knock down into the gaps, then chisel down and sand to the same level as your floorboards. Otherwise you can use something like Draughtex which you just push down in between. I don't have any draughts so haven't bothered.2
Confirm your email address to Create Threads and Reply

Categories
- All Categories
- 352.4K Banking & Borrowing
- 253.7K Reduce Debt & Boost Income
- 454.4K Spending & Discounts
- 245.5K Work, Benefits & Business
- 601.3K Mortgages, Homes & Bills
- 177.6K Life & Family
- 259.4K Travel & Transport
- 1.5M Hobbies & Leisure
- 16K Discuss & Feedback
- 37.7K Read-Only Boards


