We’d like to remind Forumites to please avoid political debate on the Forum.
This is to keep it a safe and useful space for MoneySaving discussions. Threads that are – or become – political in nature may be removed in line with the Forum’s rules. Thank you for your understanding.
📨 Have you signed up to the Forum's new Email Digest yet? Get a selection of trending threads sent straight to your inbox daily, weekly or monthly!
Dismantling (removing back cover) Packard Bell OneTwo L5800
Jeepers_Creepers
Posts: 4,339 Forumite


This is a 'how to' as I've just done this job and couldn't find the info on t'interweb, even tho' others had the same issue. Hopefully folk will now find this thread should they search online.

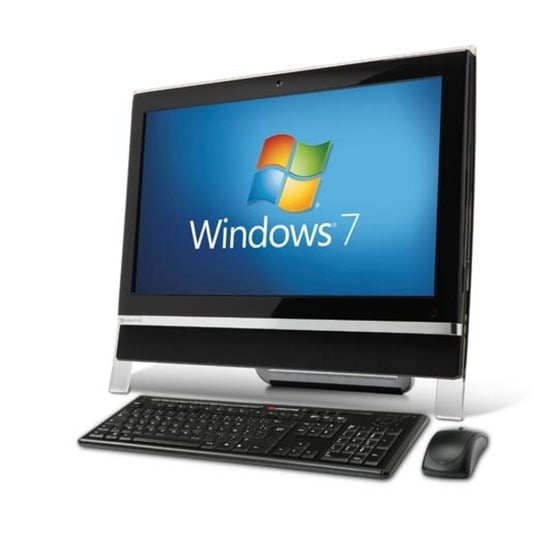
It's this type of all-in-one PC, an oldie but very capable of everyday tasks. I took mine up to 8GB RAM and swapped to a Solid State HD, and it now boots up (with Win10) in around 7 seconds.
Ok, how to get inside...

It's this type of all-in-one PC, an oldie but very capable of everyday tasks. I took mine up to 8GB RAM and swapped to a Solid State HD, and it now boots up (with Win10) in around 7 seconds.
Ok, how to get inside...
1
Comments
-
Lay it flat on its front on summat soft and remove anything peripheral, such as the USB keyboard dongle.
1) Remove the plastic cover over the stand - this is prised off:
0 -
2) Undo the 4 screws holding the stand in place and remove.

0 -
3) Now you remove the central cover - this again is clipped in place and you release it by lifting it from the bottom end (where the stand was) and by gently squeezing in the sides too if needed where there are small clips. It should lift up as shown, and you'll find the largest 'hooking' clips at the top - it'll lift off easily from this.

0 -
This shows the underside of that panel, so you'll have an idea of the type of clips on it. It's all very robust!

0 -
If all you wish to do is upgrade/change the RAM, that's located under that rectangular mesh cover which simply pulls off.
4) To remove the whole back cover, prise out the rubbery screw covers found over the 4 corner screws and the two either side of the stand position (the latter two covers are longer). Remove the 11 screws - these are small crosshead, so presumably Pozidrive 1 (PZ1). You'll need quite a slim screwdriver blade to get to the deeper central ones.
Now the cover will come off with a bit of prying - if you insert a slim blade under the cover, prise the cover outwards from the PC's body to release the small clips. This shouldn't be hard - the clips are small and release easily.
Lift the cover upwards from the RH side first as the LH side has the buttons for the DVD drive and stuff, not that I think it makes much difference. It should lift off easily.
0 -
And this is what you'll find.
5) The metal shield is held in place with 9 small screws which are easy to locate. Make sure you keep them safe, and don't drop them on to the MOBO or lose them inside the PC!
NB - the arrowed screw holds an earthing wire, so be sure to replace that connector. There is also a white connector adjacent to this which needs unplugging before the metal cover can be removed - gently squeeze inwards that white 'lever' on the plug's LH side, and pull upwards.
0 -
And here you have access to everything :-) Enjoy.

1 -
very well done , but there's summat missing,
 how d'ya put it back lad
  ?
?
4.8kWp 12x400W Longhi 9.6 kWh battery Giv-hy 5.0 Inverter, WSW facing Essex . Aint no sunshine ☀️ Octopus gas fixed dec 24 @ 5.74 tracker again+ Octopus Intelligent Flux leccy2 -
Er...umm....0
-
Read this thread from bottom to top and right to left?
 2
2
Confirm your email address to Create Threads and Reply

Categories
- All Categories
- 351.7K Banking & Borrowing
- 253.4K Reduce Debt & Boost Income
- 454K Spending & Discounts
- 244.7K Work, Benefits & Business
- 600.1K Mortgages, Homes & Bills
- 177.3K Life & Family
- 258.4K Travel & Transport
- 1.5M Hobbies & Leisure
- 16.2K Discuss & Feedback
- 37.6K Read-Only Boards


