We’d like to remind Forumites to please avoid political debate on the Forum.
This is to keep it a safe and useful space for MoneySaving discussions. Threads that are – or become – political in nature may be removed in line with the Forum’s rules. Thank you for your understanding.
📨 Have you signed up to the Forum's new Email Digest yet? Get a selection of trending threads sent straight to your inbox daily, weekly or monthly!
The Forum now has a brand new text editor, adding a bunch of handy features to use when creating posts. Read more in our how-to guide
Draughty new timber, double glazed, sash windows

adaze
Posts: 623 Forumite


So, slightly confusing one, but I cannot find an answer on Google to this. Hopefully someone has timber double glazed sashes and can take a look, or someone makes them?
Basically, we have had new windows installed, they look great, and operate as they should etc. No problems there.
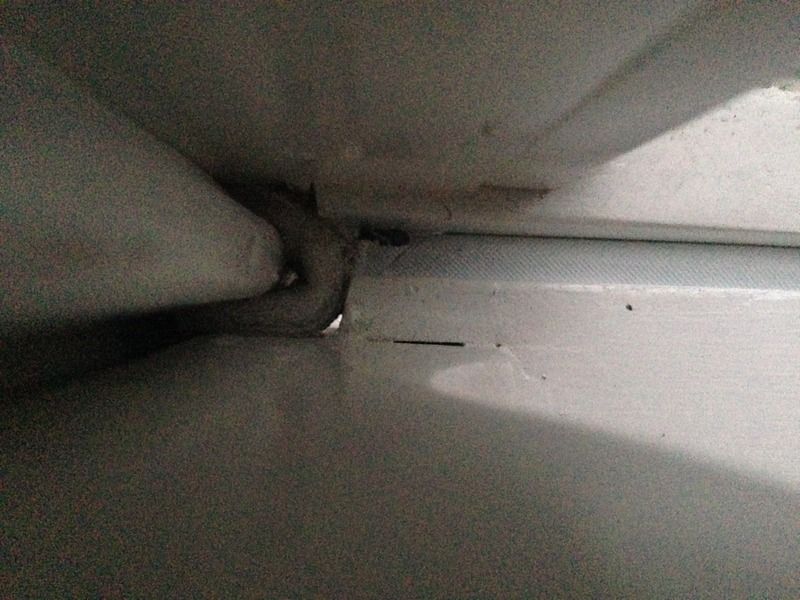
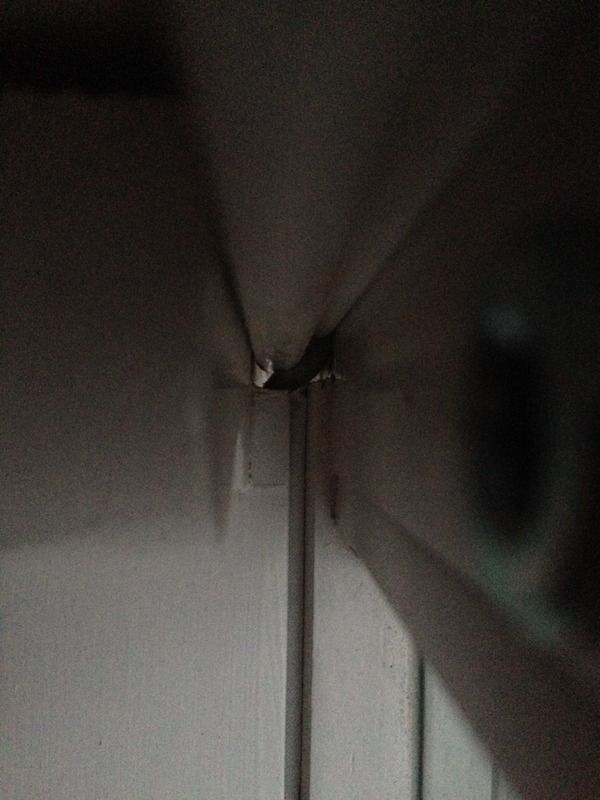
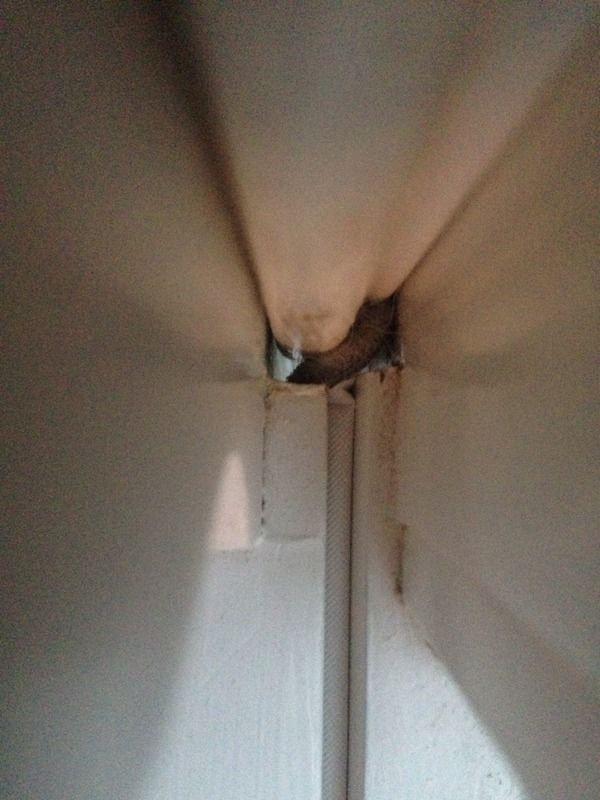
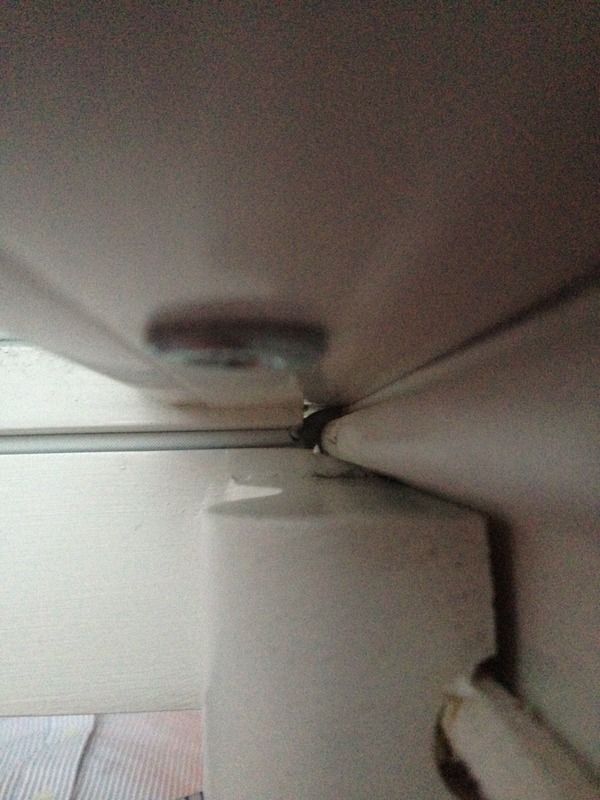
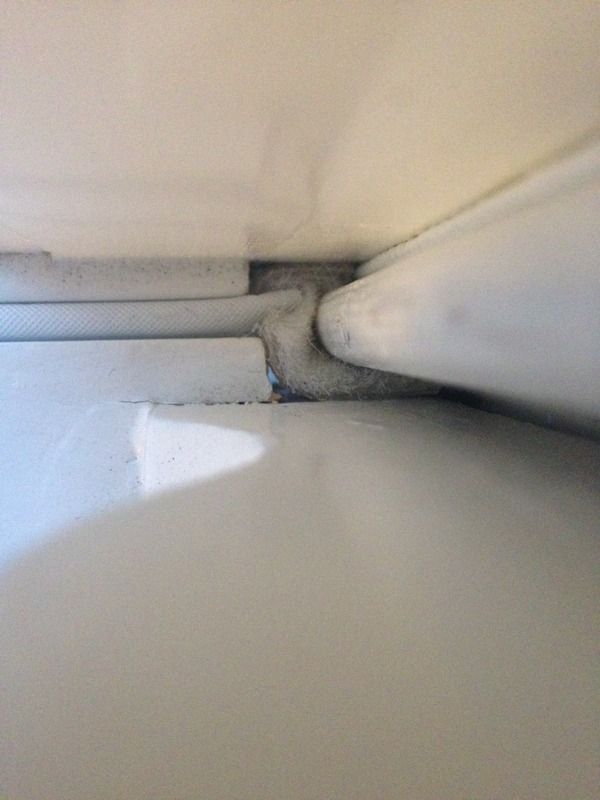
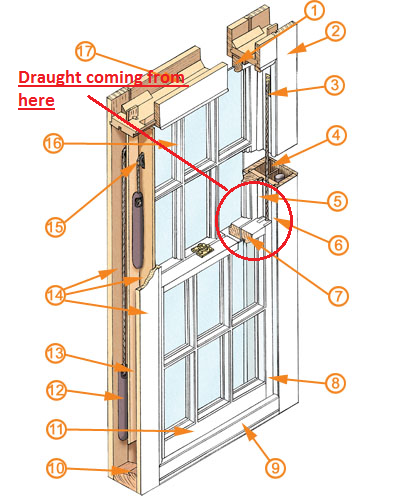
Then cue the colder weather and I noticed that there were draughts coming though in the corners, where the sashes meet in the middle. Technically this is where the parting bead meets the meeting rail!
If you look at the pictures, you will see that the around the parting rail there is a gap, this is where the draught is coming through. Now the windows were sold with "full draught proofing", so I naturally assumed there would be no draughts.....
The question is is this normal, should the windows fit as in the pictures, and should there be a draught? Or have the windows been badly fitted?
The company that fitted them are coming back, but I don't know what I should expect them to do. If they have done a bad job I would like it repaired, but I need to know if this is standard?
Does anyone have any similar experience, or know how closely I should expect the windows to fit?
FYI - the draught proofing is fine everywhere else
Pictures!
http://imgur.com/a/7lHCL
Basically, we have had new windows installed, they look great, and operate as they should etc. No problems there.
Then cue the colder weather and I noticed that there were draughts coming though in the corners, where the sashes meet in the middle. Technically this is where the parting bead meets the meeting rail!
If you look at the pictures, you will see that the around the parting rail there is a gap, this is where the draught is coming through. Now the windows were sold with "full draught proofing", so I naturally assumed there would be no draughts.....
The question is is this normal, should the windows fit as in the pictures, and should there be a draught? Or have the windows been badly fitted?
The company that fitted them are coming back, but I don't know what I should expect them to do. If they have done a bad job I would like it repaired, but I need to know if this is standard?
Does anyone have any similar experience, or know how closely I should expect the windows to fit?
FYI - the draught proofing is fine everywhere else
Pictures!
http://imgur.com/a/7lHCL
0
Comments
-
0
-
If you asked for full draught proofing, there shouldn't be a draught.0
-
From the photo's I would say the meeting rail draught excluder which is fitted to the bottom sash meeting rail doesn't actually touch/meet the bottom (meeting) rail of the top sash. It looks as though they use "bubble" seal(or similar) made by Mighton which is fine for the other areas they have used it but for meeting rails I always use a "brush pile" draughte excluder which is more flexible.
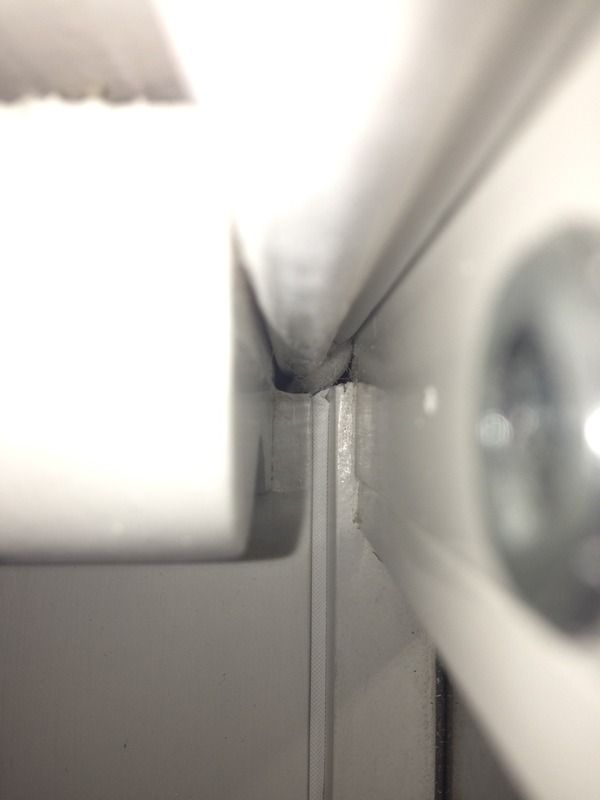
The other (bigger) issue is where the ends of the meeting rails meet the parting beads someone has cut them back too far so there looks like a wide gap . You have to have a small gap otherwise when you try and slide the sashes up/down the sashes would hit the meeting rails. No reason to have such a wide gap. Sash windows (even new ones) are almost impossible to make draught "proof".If all of the windows are the same then I would suggest the only thing they can do is make wider parting beads which would reduce the gap between the beads and the ends of the meeting rails.
Looks like they have fitted sash restrictors/vent locks into the stiles of the top sashes very close to the horns of the bottom sashes. They shoudl be fitted around 100mm above the horns when the sahes are shut so that you can open the sashes to air/vent a room without any intruder being able to lift the sashes enough to gain entrance. They look about 25mm above the the horns which is very odd.0 -
That is a hatchet job on the draught proofing.
I think you need to get them back in for another try!0 -
Thanks all.
Leveller2911, there is evidence that they have cut back the meeting rail that I can see. Why they would do this I don't know, I assumed they were made to measure in the factory so there should be no need to cut anything? That said they measured them incorrectly (their admission, the windows were to deep to fit the existing box) so they had to rebate them, maybe this had something to do with them.
I struggled to find any diagrams on Google that confirm what you said. In that the meeting rail should be as tight as possible to the parting rail, but because of the seal there would always be a small gap. I accept that, just couldn't find anything!
So, in your opinion, they haven't been installed correctly as the gap is too large between the parting rail and meeting rail? This is what I thought, just looking for someone to say yes and what is acceptable so I don't get given the run around!
Thanks, much appreciated!😀0 -
Thanks all.
Leveller2911, there is evidence that they have cut back the meeting rail that I can see. Why they would do this I don't know,
When you make a sliding sash the meeting rail is all shaped/moulded from a single piece of timber so the front of the meeting rail that meets the opposing meeting rail needs to be cut back so it doesn't hit the parting bead so its quite correct to cut it back but they have cut it back too far. There only needs to be a gap of 2-3mm from the parting bead to the meeting rail so the sash slides up and down without rubbing.That said they measured them incorrectly (their admission, the windows were to deep to fit the existing box) so they had to rebate them, maybe this had something to do with them.
Load of rubbish. If the boxes were new and the sashes were new then its just a c0ck up by the Joiner who fitted the sashes in the box and its no different if the sashes were new but fitted in an existing boxframe its still a fitting mistake. The gap between the parting bead and meeting rail can be reduced by making wider parting beads.I struggled to find any diagrams on Google that confirm what you said. In that the meeting rail should be as tight as possible to the parting rail,
I never said it needs to be "tight as possible", there needs to be just enough space between the parting bead and the meeting rail so they don't rub against each other when the sashes slide up and down.2-3mm is fine but you seem to have more and also the draught excluder fitted to the meeting rail itself doesn't touch the other meeting rail so its not stopping the draughts.
but because of the seal there would always be a small gap. I accept that, just couldn't find anything!So, in your opinion, they haven't been installed correctly as the gap is too large between the parting rail and meeting rail?
Gap between the parting bead and the end of the meeting rail is too big so yes installation problem. Make slightly wider parting beads and it will help. Its not a difficult job to do. Just take off the inside Staff bead (inside beads) pull out the bottom sash to gain access to the part beads ,take the old ones out and fit new (slightly wider) ones and put sash back in place and re-fit the staff bead.") 0
0 -
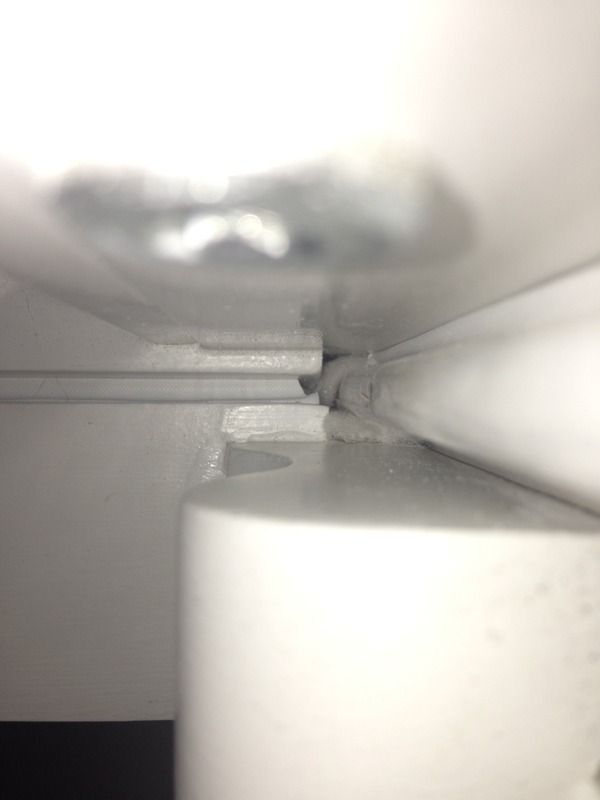
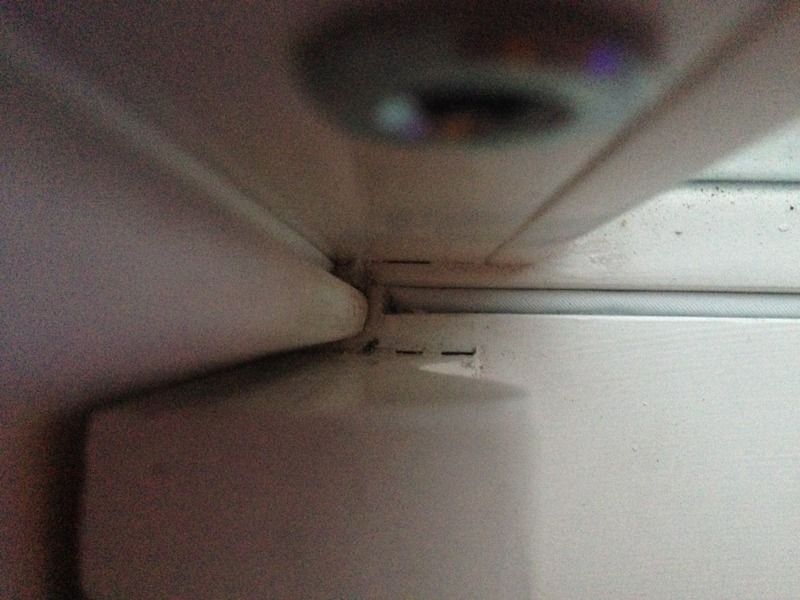
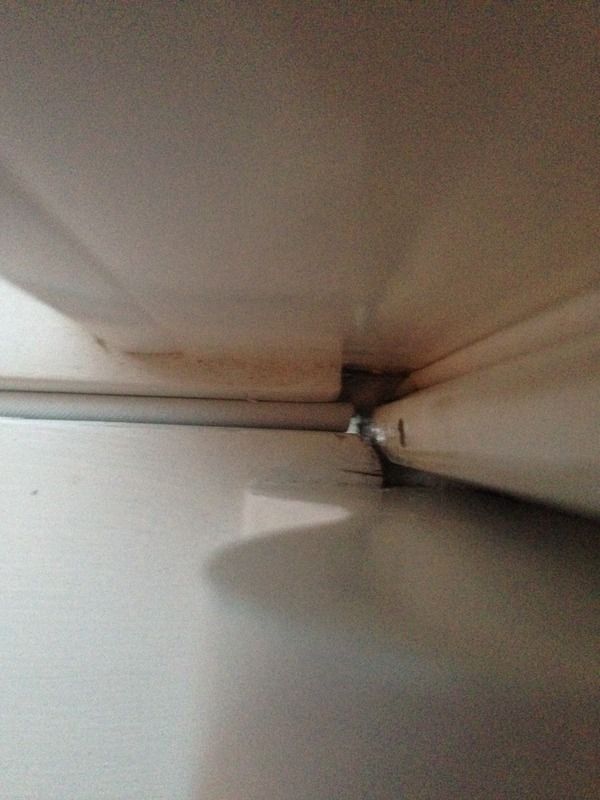
OK, so bit of an update.
The company have been back in and have fitted new seals, that looks like stick on velcro (?!). It does seem to fill the gaps pretty well. Still gaps in places, but drafts reduced. See pics below. Satisfactory? I'm not 100% convinced, feels a bit of a bodge to me, but is it an acceptable fix?


 0
0 -
Looks like a bodge to me, but wait to see what leveller2911 says.0
-
It's impossible to fully fraught proof a sash window and as I said previously they cut the meeting rails back too far from the part bead. 3mm is enough so the sashes don't hit the part bead.
The way they have got over the problem is not the best solution and I'd be surprised if the extra bits they pinned/glued on will stay in place long term. A better solution would be to make wider parting beads so the gaps would be smaller but then they would need painting..0


This discussion has been closed.
Confirm your email address to Create Threads and Reply

Categories
- All Categories
- 354.3K Banking & Borrowing
- 254.4K Reduce Debt & Boost Income
- 455.4K Spending & Discounts
- 247.3K Work, Benefits & Business
- 604K Mortgages, Homes & Bills
- 178.4K Life & Family
- 261.5K Travel & Transport
- 1.5M Hobbies & Leisure
- 16K Discuss & Feedback
- 37.7K Read-Only Boards